Dear fellow photographers. As you have noticed I was not very active on the blog for quite some time now. Unfortunately it was not only the case with the blog but with my film photography in general. This had many reasons including shifting priorities, too much stress and work and the need for a creative break.
But I am not here today to be negative, in fact quite the contrary. There are many things to share and many things which made me super excited. There is new software which I love, new cameras to review, awesome youtube channels I have discovered and more. Essentially I have got motivated again and I hope this new energy will revive the blog as well. There were some not so positive events to talk about as well, but eventually I think they all collectively pushed me to shoot more and hopefully vitalize this blog.
So let’s get started and see what made me enthusiastic about film photography again.
Negative Lab Pro
The software I needed to get control over my scans. https://www.negativelabpro.com/ For a long time I was set on the journey to find a consistent high quality home scanning and processing pipeline. I was testing and tinkering with a lot of software and I ended up using Vuescan with an Epson V700. This is a great combo which I would recommend to anyone, but I was never truly satisfied with the result. The TIFF files I was getting were not very flexible compared to RAW files from digital cameras. Many things like curve settings were baked in the files at the time of scanning. It was very difficult to color match multiple images as bigger changes required re-scans which takes a lot of time. I am aware that my skills are probably the main issue here, but I always lusted for a scan once edit freely type of solution.
Negative Lab pro gives me what I needed. It is a Lightroom plugin which converts the negative images itself by generating a Ligtroom settings which can be reverted or adjusted non destructively. Essentially taking away the responsibility of the inversion of the negative image from the scanner software and bringing it into Lightroom. Not only that but it works fantastically simulating popular lab scanner profiles and giving me colors that I absolutely love. Now I can match series of images together more easily and I can even benefit from new versions of the software later as I can reconvert any negative at any time.
Leica M2, Color Skopar 35mm, Fujifilm 200, Negative Lab Pro
Leica M2, C Sonnar 50mm, Ektar 100 , Negative Lab Pro
Leica M2, Color Skopar 35mm, Fujifilm 200, Negative Lab Pro
Leica M2, Color Skopar 35mm, Fujifilm 200, Negative Lab Pro
The only catch is that the software is not exactly cheap with a 99$ one time charge. But if I factor in how much money I burn on film, chemicals and how much time I invest into my photos it is actually quite fair. I would also mention that Negative Lab Pro is a creation of a single person. He is actively maintaining the software and working together with the community to develop it further. There is a dedicated Forum and a Facebook page where support can be found for any related issues in no time. As a software developer myself I deeply sympathize with the project which was yet another reason to support it. I find it very motivating that a single person can have such a massive and positive impact and bring new life into (certainly into my) film photography.
E, Leica M2, Color Skopar 35mm, Ektar 100, NLP
G, Leica M2, C Sonnar 50mm, Fujifilm Pro 400 H, NLP
The king is dead, long live the king!
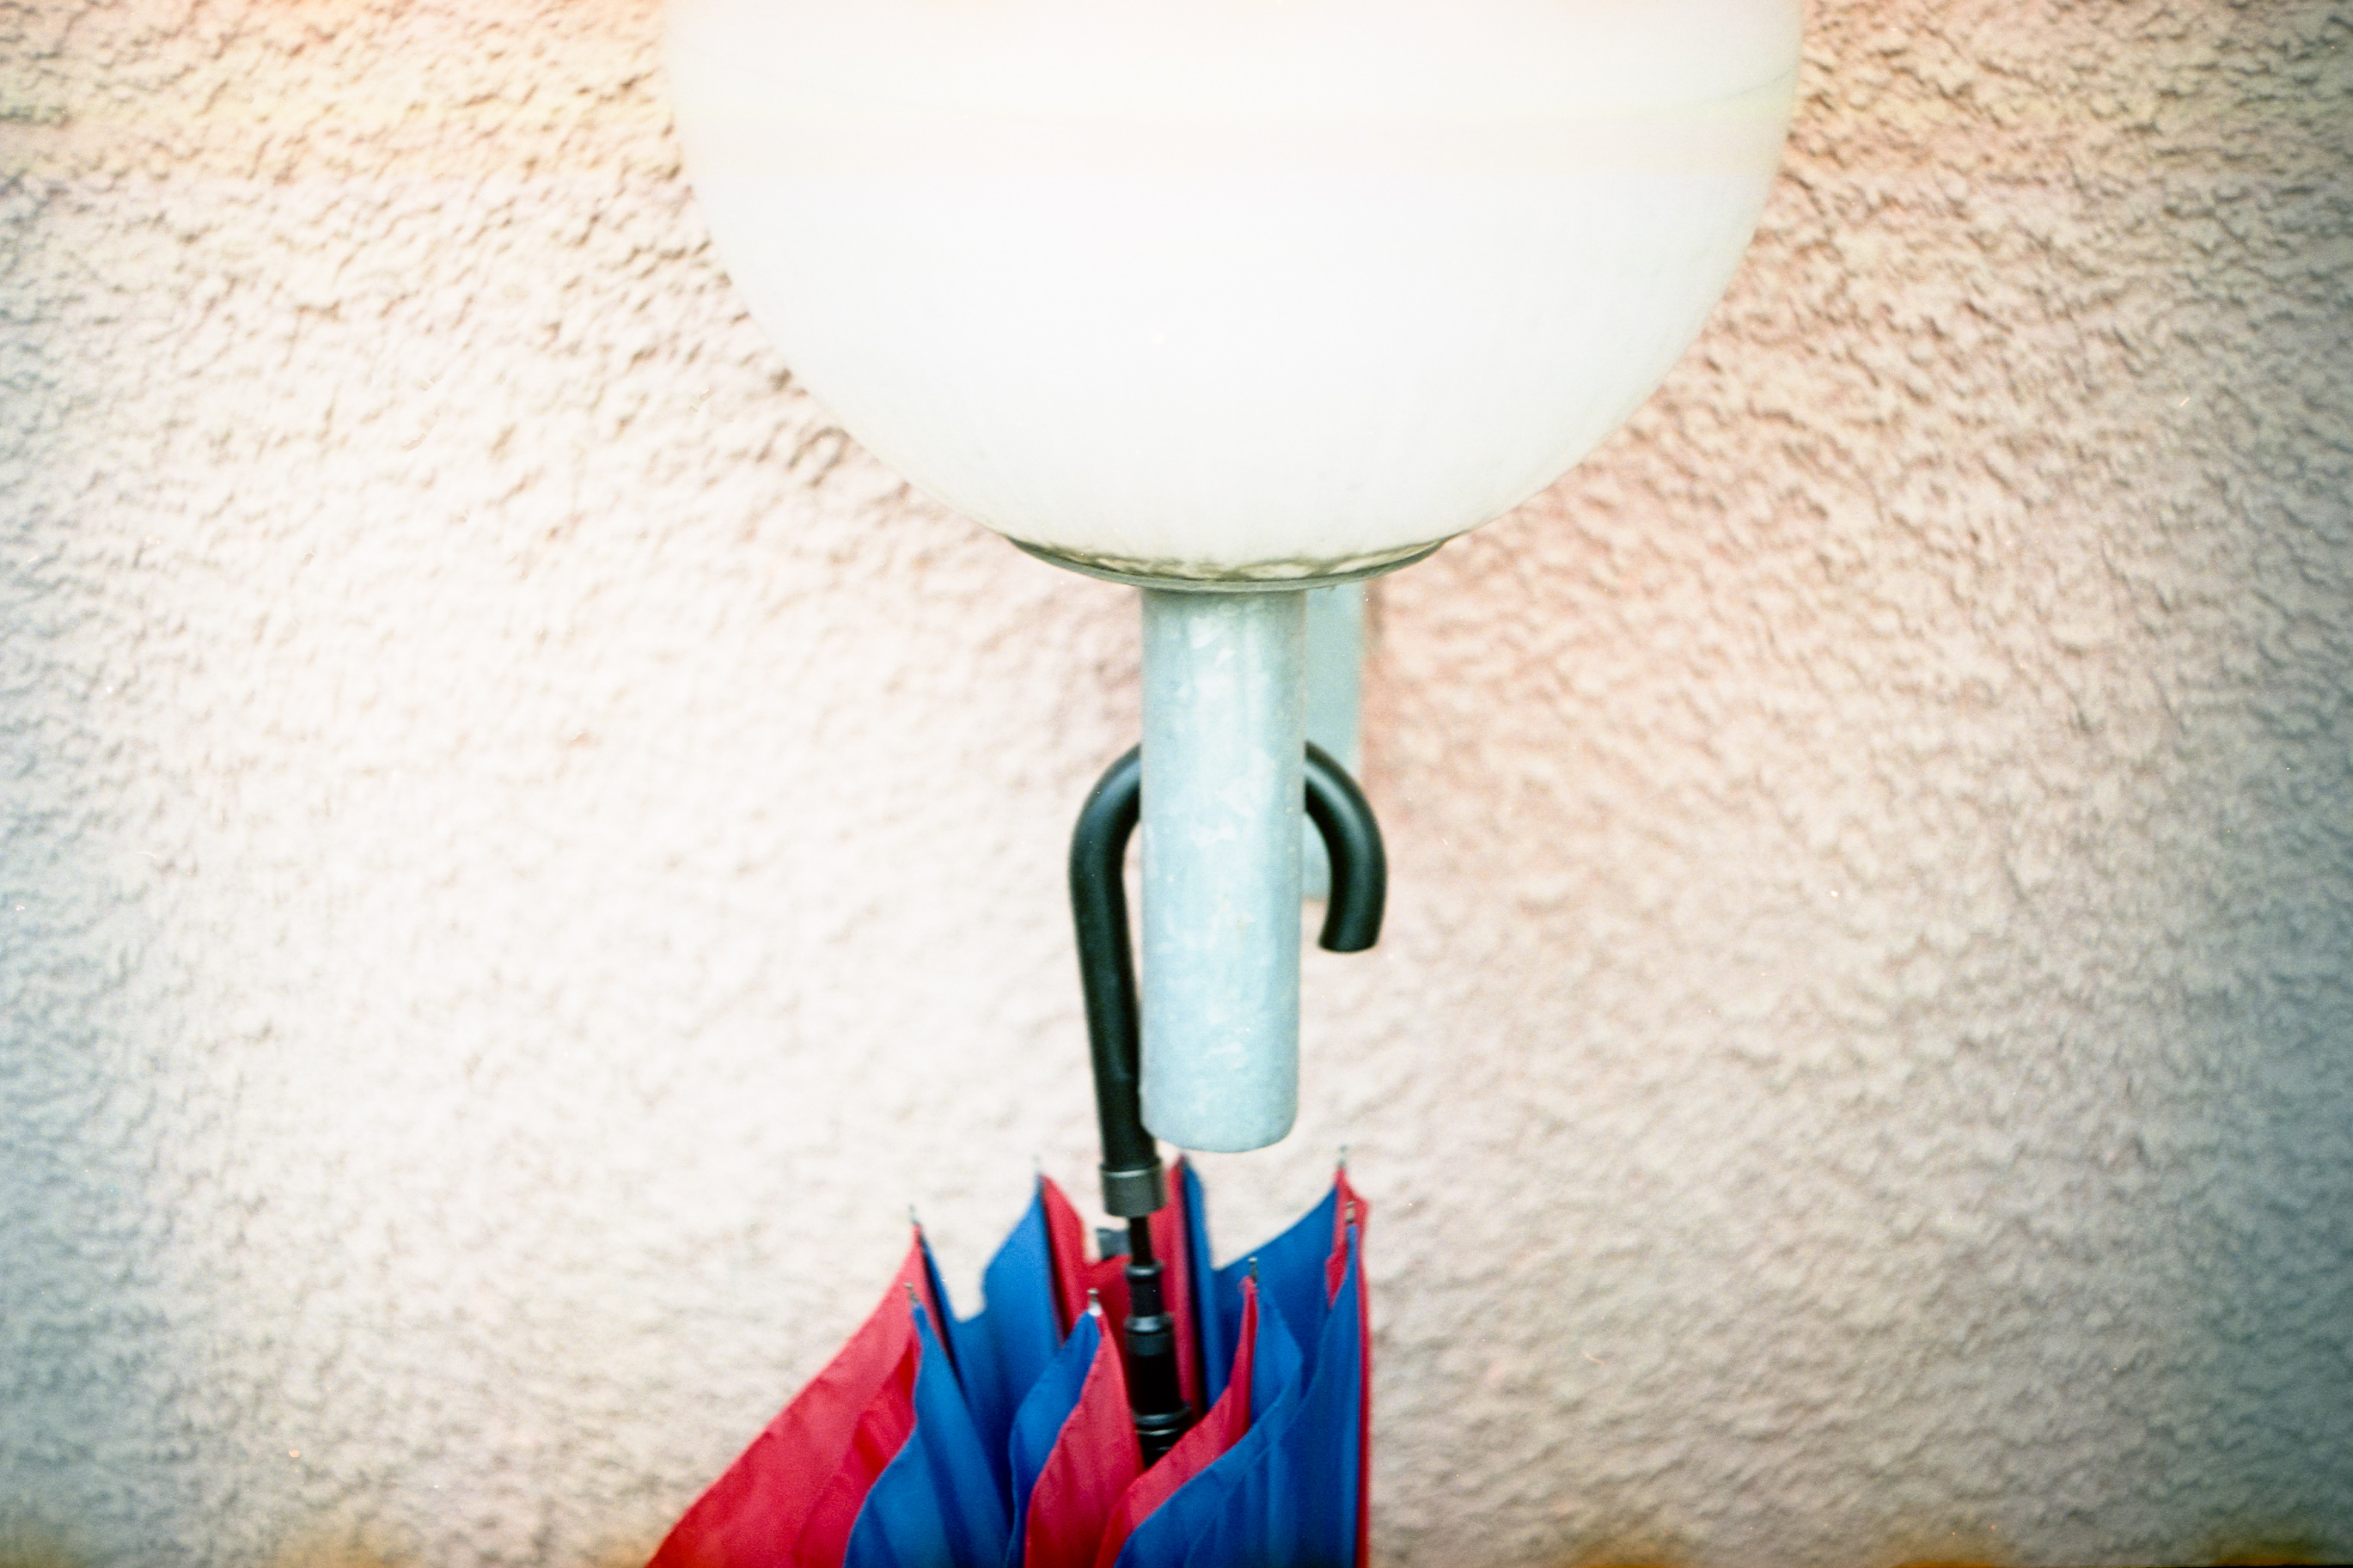
Unfortunately my old trusted Pentacon Six TL has stuck on a single shutter speed. I asked some local camera shops if a repair would be possible. But I got very little hope after my survey. At one place they told me that they don’t service such low quality cameras because it is impossible to adjust their shutter speeds anyways. At the end, I attempted to open the camera myself to see if, by any chance the issue is something so obvious that I could spot it. Needless to say that I managed to do more harm than good and currently the P6 sits in a box partially disassembled. Since then I have got a repair manual and I hope that one day I can get it back together and use it again. To put more salt to the wound, most of my Pentacon Six lenses got stuck aperture syndrome including the 50mm, 120mm and 180mm lenses. So, I would need a full CLA on pretty much everything I own in the system except the 80mm standard lens.
E with Pentacon Six TL and Sonnar 180mm
After many said months of not shooting any medium format film, I decided that I look for a replacement camera. Something totally different, something reliable and simple. It also had to be relatively manageable in size because I like to carry my cameras everywhere and shoot hand held. I was eyeballing the 645 system cameras for quite some time but then I ran into a wonderful Fuji GW 690 III which had recently a fully CLA. Needless to say that I could not resist. Best of all the seller is a really nice guy with a freezer full with film and with a really cool portfolio . You can check out his work here.
Fuji GW 690 III
I love rangefinders for many reasons, mainly because I can manage precise focus with them. The camera is a beast, it shoots 6×9 frames yet it fits into my messenger bag. It feels lighter to carry than the P6 kit. The built in lens makes it even more rugged plus I will not be tempted to get additional lenses to satisfy my GAS. Last but not least the lack of the mirror means I can still confidently use it handheld for the kind of pictures I usually take.
Needless to say that I am very excited because of this new addition to my collection. I have already shot 3,5 rolls with it although only 1 is developed and scanned so far.
From the first roll. GW 690 III, Foma 100, Rodinal
I am really curious if it will be such a good fit as I think now. But in any case, it motivates me to shoot and develop more and brings new impulses into the game.
Lab torments
I have been always developing my black and white work because it gives me full control over the process, allows quick results because I don’t have to wait for the lab and last but not least it is a lot of fun. On the other hand I have never done color film development myself. I was conditioned to believe that it is extremely difficult and best to leave it to professionals.
But recent events have made me to take a deeper look on the C41 process and as it turns out it might not be that difficult after all.
But what pushed me over the fence on this matter? I brought 4 rolls of color film to my preferred camera shop in Graz. They told me that development will take about 2 weeks because of COVID . I had no problem with this as it usually takes 1-2 weeks anyways. I have received 3 out of the 4 rolls relatively quickly (in 10 days), cut up and flattened nicely, ready to be scanned. But the 4th roll was not there. In fact it was not there after a month despite my repeated calls. It seemed that no one knew where it was and I started to be worried that it really got lost. To make it worse, that roll was the most important in the bunch. A friend of mine asked me to take some photos of his family before his kids leave the house for the first university year.
In the end, the lab found the film and the story ends without big harm. The camera shop says that there is only 1 lab available and I was not the only one who went through the same torment. The timestamp on the index print was 3 weeks old when I got the film.
From the 4th roll. Cosina CSM, Pancolar 80mm, Expired Agfa Vista 200, NLP
I know that the low demand and the current situation does not support film labs. I have no problem to wait even several weeks if I know that my film is in good hands, tracked and I will get it in the end. But my trust is shattered.
I will develop my color film myself. You will surely see some posts about my journey with color process. I am also very open for suggestions. I need to figure out how to do this economically. Batch sizes, shelf life and similar topics are all on my research list.
YouTube
I am quite addicted to YouTube which I need to get into check somehow. But at least I discover from time to time a channel which inspires my film photography. I am not sharing my full list of photography channel subscriptions at once, but here are some of my top pics without any particular ranking or ordering among them.
grainydays
The guy who runs the channel is completely crazy in the best possible way. If it is strange for the first time keep watching he has a special humor, a big punch of self irony and great photos. I like especially his night shoots.
Kyle McDougall
Kyle has fantastic camera reviews and I really enjoy his medium format architectural work. He is not only showing his work but also his way of working including, scanning, archiving and behind of scenes of his videos.
T. Hopper
Great moody videos with beautiful pictures and a lot of info about film stocks. She also makes great essays about photographers, film and art in general.
Jamie Windsor
Very informative educational videos mostly about digital photography and editing. But also very well thought through and intelligent video essays about art and photography.
This is all I had in mind for now. I hope you find this new type of post interesting and perhaps my enthusiasm makes some of you go out to shoot some film too. If so, please wear a mask and I wish you all good light.
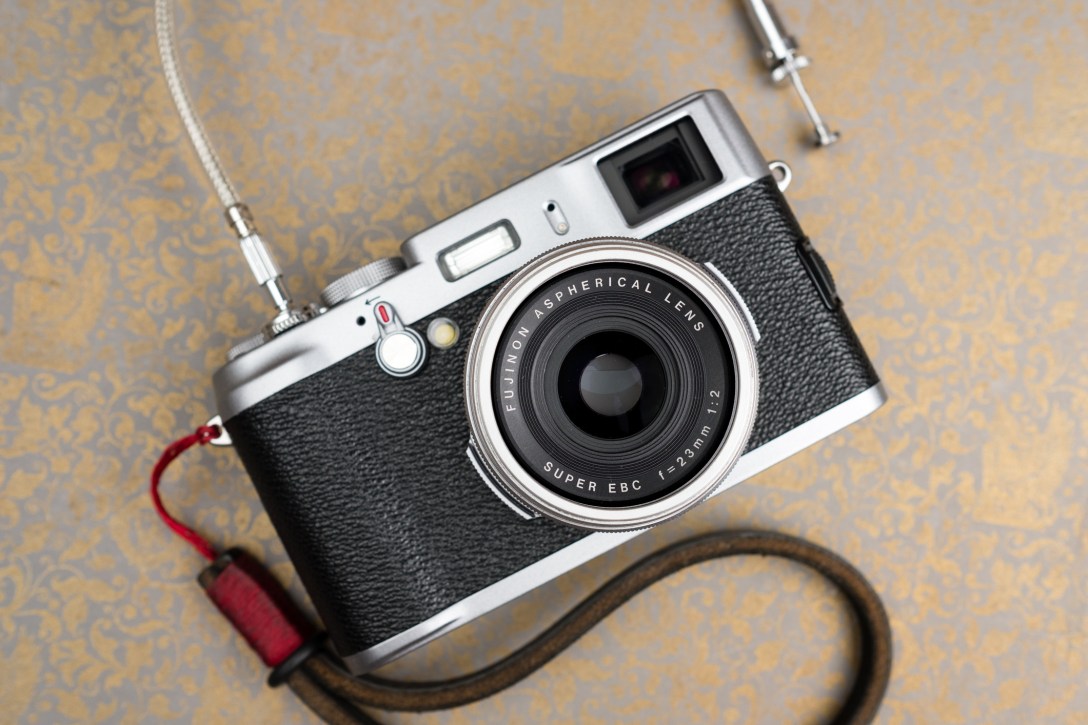
What qualifies a digital camera classic? Certainly the age, popularity and the reputation of a camera are all important factors. These all contribute to the level a camera embedded into our collective photography consciousness. I cannot tell if the original Fuji X100 (revealed in 2010) can already be considered as a classic camera by the general public, but it is definitely on my list.
This little gem has grabbed my attention right at the time it was announced. Such a striking retro design spiced up with a big sensor and a rangefinder like a viewfinder which actually made sense in an autofocus camera. I fell in love with it immediately and spent quite some time on the elegant Fujifilm website dedicated to this camera. The hybrid viewfinder was something quite special. To be honest, I was a bit concerned about the longevity of the little screen which jumps in an out of sight. But it was very innovative at the time and unique to this day. The lens looked interesting too. A compact 35mm equivalent lens designed for the sensor specifically. The whole package was really appealing to me.
But, I am a late adapter. I like to wait until a product matures. Indeed the X100 had several issues which were mainly addressed by firmware updates. Needless to say that newer incarnation of the X100 has reportedly improved on the early weak spots of the camera such as focus speed or easy to bump dials.
At the end of the day, I have picked up a Leica M2 instead. After all, many of the so appealing design clues on the X100 likely originate from the Leica M.
As the years passed by, I have almost lost sight of the small camera. Of course, I was reading the news about the releases of the revised versions of it. But was no longer particularly intrigued by it.
Until recently when a colleague of mine spotted my Leica on my desk. He casually mentioned that his camera looks almost the same the one front of me. Classic cameras are great conversation starters. So, we have started to talk and soon I learned many cool things about Dominic. I knew that he grew up in the US but I had no idea that it was the neighborhood where Ansel Adams lived at the time. I knew that he is a photographer, but I did not know that he is shooting with an X100.
The best part is that he is not only owning the first generation X100, but he was also kind enough to borrow me so I could take pictures with and of it for the blog.
My impressions
The camera is gorgeous. It felt in the hand just like I have imagined. It is small, compact and well built. Obviously, it is not the same feel as my M2, but I have never expected it to be. Brass has been replaced with magnesium alloy which makes the little Fuji lighter. But the less weight suits the X100. It is a camera which could come with me anywhere without noticing it much. I think this is probably the point of it. A camera which looks great even special takes brilliant images and small and lite enough to carry everywhere.
Menus and button layout
I have used other digital Fuji cameras before ranging from a 10-year-old point and shoot to the XT-2. It is interesting to see how Fuji carries over design characteristics over camera generations. For example, the delete photo animation is very similar to all the cameras I have used although more and more elegant and refined with each iteration. The X100 felt like a Fuji camera immediately even so it took some time to learn it’s special quirks. The menu system is slow and (unsurprisingly) looks dated compared to newer models. But once I set up everything to my taste, I could forget about the menus. I have programmed the Fn button for ISO and the Raw button to control the built-in ND filter.
The button placement needed some practice time too. The AF point selection button felt out of place at first and I have still not completely figured out all the functions of the rotating ring around the D-pad.
My biggest and possibly my only real complaint is that the exposure compensation dial is way too easy to move accidentally. I had many occasions of wrong settings after getting the camera out of my bag.
The viewfinder
My favorite part, on the other hand, is the hybrid viewfinder. I love to use it in optical mode. The projected information overlay is ingenious. We may take customizable information overlay granted today but we usually find it in full electronic finders.
The instant preview in the viewfinder is also something I enjoy. The little display screen slips into place right after the photo has been taken to show the captured image without the need to ever remove the eye from the viewfinder. Since the image in the electronic preview mode different from the view seen through the optics, I am always full of curiosity before I press the shutter. I excited to know how the camera would interpret the exact same view I am seeing.
To be said, this experience is not for everyone. My wife does not like the fact that the lens is visible in the viewfinder. She always has been more fascinated by the image on the ground glass of a medium format SLR. A rangefinder-style optical finder does not show the depth of field. Everything is up to the imagination of the photographer, except this case the camera shows the result an instant after the actuation of the shutter.
Over the years there were several changes to the X100 cameras. The sensor and the processor have been updated many times. Autofocus and operation speed have been greatly improved throughout generations. Even the viewfinder have seen some changes. As far as I know, the only remaining constant is the lens. If it ain’t broke don’t fix it. This lens is definitely noteworthy and I think it is a big part of the X100 experience.
I enjoy using the aperture ring very much. Has a good feel to it and also good to look at. The leaf shutter built into the lens is very quiet and lets me sync flash with any shutter speed.
Of course, the drawback of the leaf shutter is that the maximum shutter speed depends on the aperture. The more the lens is open, the lower the maximum shutter speed gets. Luckily there is a built-in ND filter in this tiny lens. This way it is possible to shoot wide open on a sunny day with mechanical shutter without any extra accessory.
Because the lens is the same on any version of the X100 family the adapter lenses are compatible with all of them.
Did I mention how small this lens is? It is very comparable with my Voigtlander Color Skopar 35mm f/2.5 pancake lens in size. I have always been a fan of pancakes despite the optical tradeoffs they need make for the sake of small size. In fact, the Fujinon 23mm f/2 is also not flawless. It could get a little soft wide open and it shows slight distortion as well as a moderate amount of vignetting. The latter two can be easily corrected in post-processing or in camera on later models.
Fujinon XF 23mm f/1.4 is massive compare to the built in 23mm f/2 lens built into the X100.
Bokeh
Bokeh is, of course, a very subjective quality. Personally, I find the bokeh of the lens mounted on the X100 alright. Not amazing by any stretch of the imagination, but pretty decent considering that it is a wide pancake lens with only a moderately fast f/2 maximum aperture. I have tried to compare it against my own 23mm f/1.4 Fujinon lens. You can find a comparison below. In the first example, the XF 23mm f/1.4 produces the smoother result in my eyes on f/2 but the difference is not very big.
If the background is further away it is even harder to tell the difference. Could you tell from this second example which photo was taken with which lens?
The XF 23mm f/1.4 is a sharper lens and it can open up more. At f/1.4 there is no competition anymore with the lens on the X100, but it is worth to notice the size and the price difference.
Samples
I have used the camera in as many situations as I could to gain experience with it and collect sample shoots. The following photos were taken during family weekends, walks in lunch breaks and I have even experimented with table-top camera photos with flash and softbox. Post-processing of the pictures varies from slight adjustments to heavy color grading to show what kind of results can be achieved with different approaches. I know that my little portfolio is far from a comprehensive demonstration, but I hope that it gives an idea and some of you will find it interesting.
More Leica M2 comparisons
I just cannot have enough comparison shots of these cameras. They are so similar yet very different.
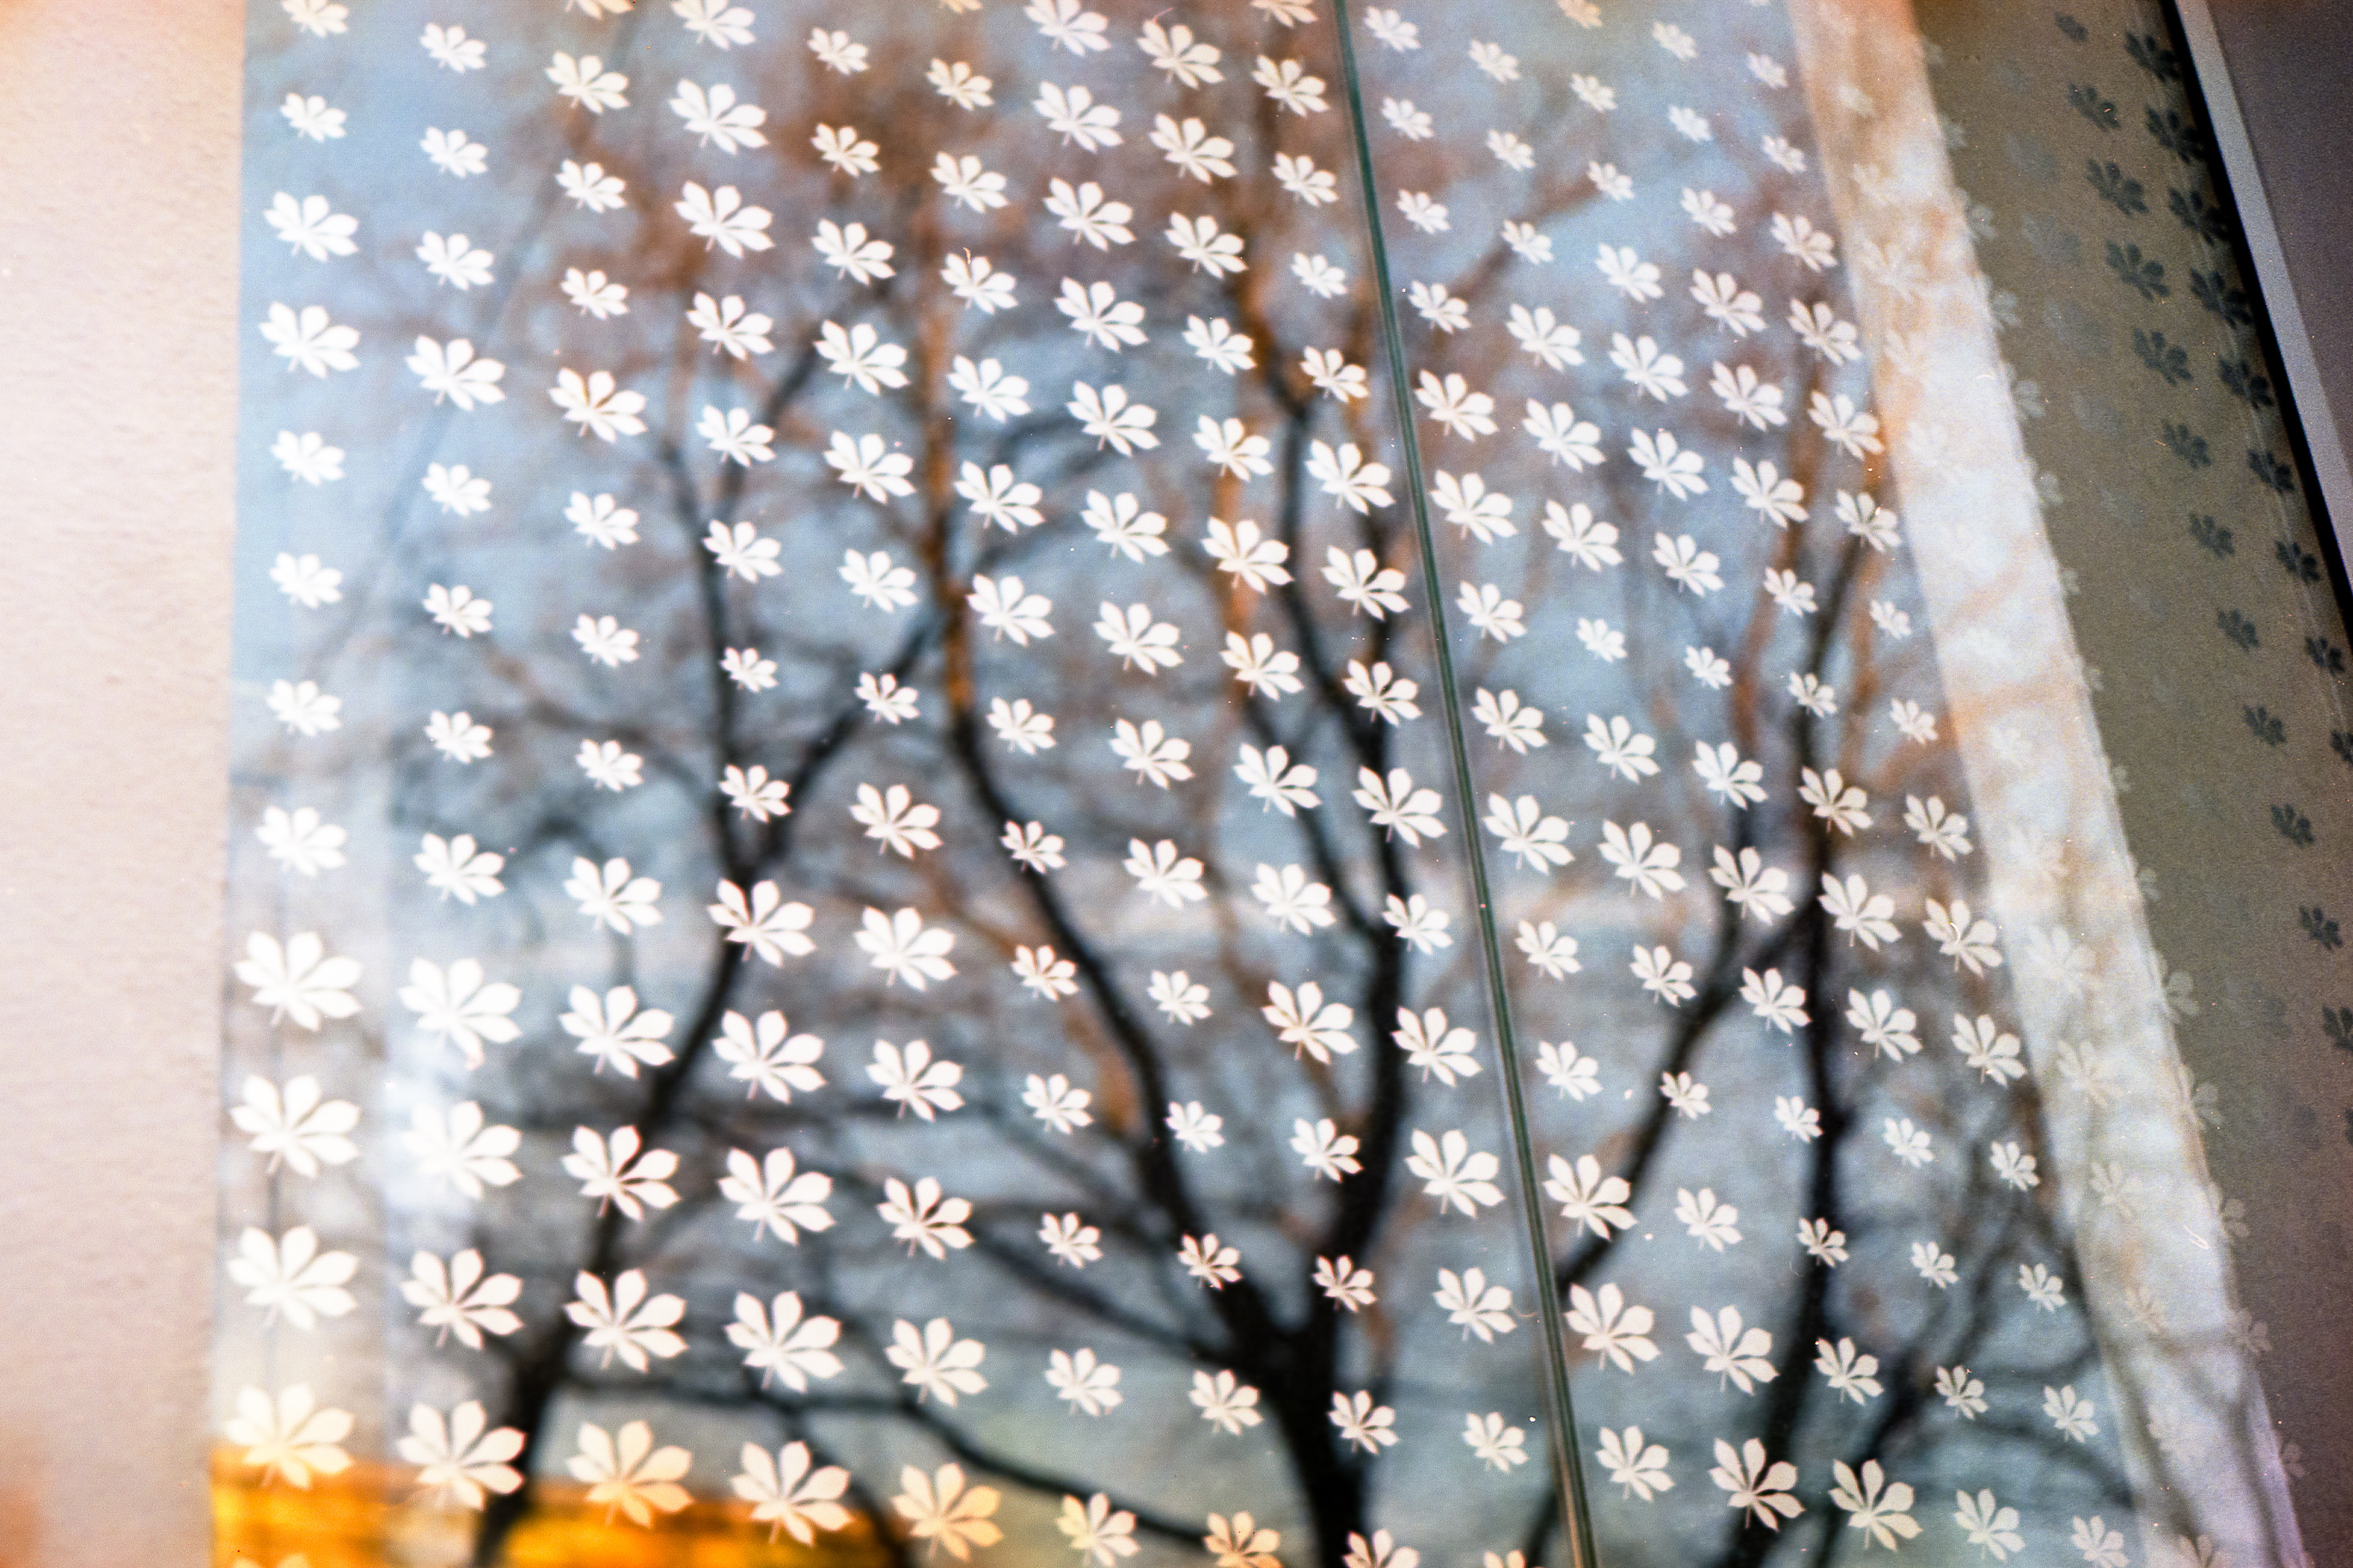
I have even recreated one of my early Leica shoots with the X100. Originally I use the Leica M2 and it was about 4 years ago. This is a terrible comparison as the installation has changed. No plastic wrap on the metal frame anymore, but we have got an extra cactus. To make matters worse, I have probably taken the first photo with a 50mm lens. Just like the cameras, the photos are similar in some ways, but they are also very much different.
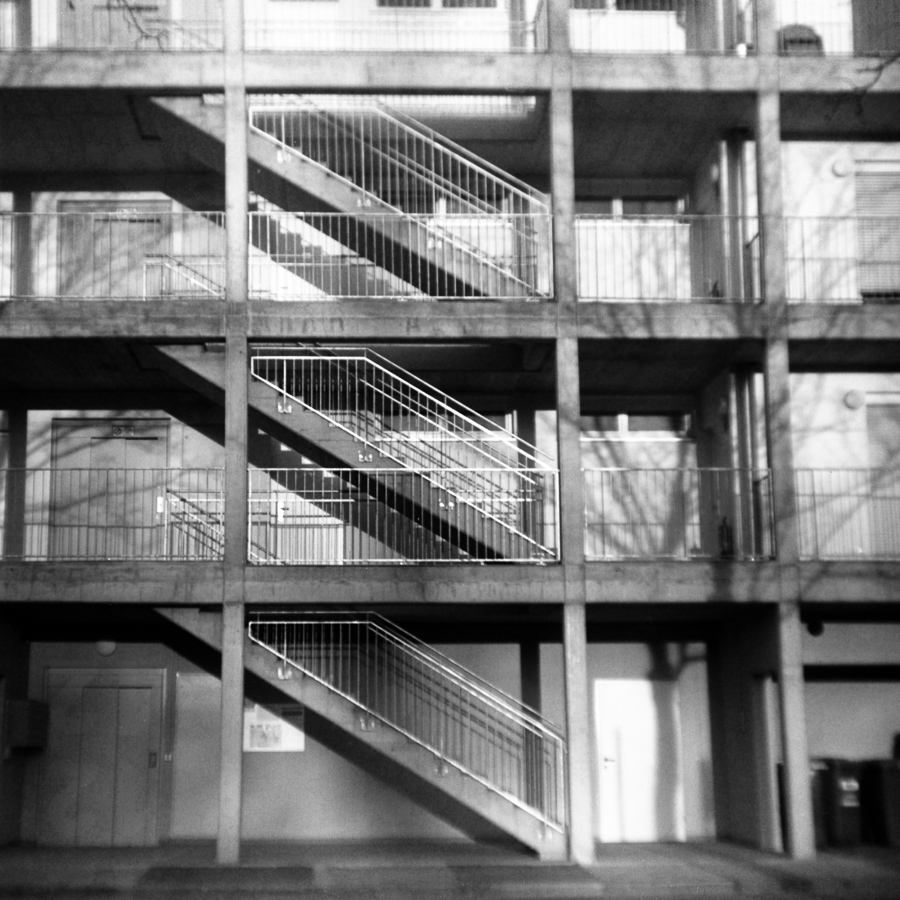
Klasse Tobias Rehberger. More information about this sculpture here.
Final thoughts
Do I like the Fujifilm X100 classic? Yes, I like it very much. It is light and small, good looking and at the same time very capable. But most importantly it provides a unique user experience. I love the viewfinder, the leaf shutter, the ND filter, the dials, the design and last but not least the photos I get out of it. A camera is more than the sum of its component and in this case, I can confirm that there is a character to it.
Why haven’t I bought one if I like it so much? I have got some unique cameras already. My heart is still at the film side of the photographic spectrum when I want to enjoy myself taking pictures. That is why I have a Leica M2. For my choice for a digital camera had to be more practical with interchangeable lenses. But it is a Fujifilm camera and it was the original X100 which planted the idea to consider this route at the first place.
Would I recommend it? I would definitely recommend the lineup. Perhaps a later model is a better choice with more mature AF system and a newer sensor. But I find the X100 classic perfectly usable today. Just make sure that the firmware is up to date.
Thank you Dominic to borrow me your camera and make this post possible.
If you have wondered, the map on the first picture is strange because it is a World Atlas from 1930. I have found this map in the paper garbage and found it fabulous for backgrounds. The inner side of the cover has the golden pattern which you can see on most of the pictures about the camera.
Last time when I wrote about my Zenit 3M, I could not show any sample photos as the shutter was very slow and ran uneven. It was the case only until I have found a neat little article Zenit E: Shutter Curtain Repairs with repair tips. I noted the risks stated in the article, but eventually I decided to engage some screw tightening in hope of bringing the camera back to service. Thankfully the Zenit E on which the tutorial was based on is very similar to my older Zenit 3M, and so the important screws are located exactly at the same spot. I grabbed a screw driver and after 15 minutes of careful tinkering the shutter was good as new. All speeds became distinct and I have not noticed any more the uneven operation. I had no idea if the speeds very accurate, but considering what I had before, it was a definitive improvement.
The next step was to load some film, attach a stylish neck strap and take the camera with me everywhere for a while. Because the camera was with me for a longer time, I had a chance to take some photos of it in all it’s glory in different environments.
I have to say that shooting with the Zenit is a lot of fun, but at the very least a special experience. Operation is very minimalistic, I have hard time to imagine more stripped down SLR experience. The mirror does not return automatically after firing the shutter. When the shutter is not cocked, the viewfinder is dark, only when film is advanced the mirror is being lowered. Only when the mirror reached it’s position the full image is projected to the screen. Speaking of viewfinder, it is simply a ground glass with round edges and no additional information presented. My finder has a light orange tint and the world simply looks like if I were watching an 80’s movie through it. The unique image in the finder is perfectly complementing the retro look of this camera which combined with the simplistic operation is what makes the experience appealing to me.
Zenit 3M finder
First I have shoot a roll of badly expired Kodak Gold 100 and I have left my light meter at home to thrown in some more variables into the mix. Despite all the odds, the first roll came out just fine. Swirly bokeh from the cult classic first generation Helios 44, plenty of noise and shifted colors from the expired film, but no issues with exposure.
Next I loaded a fresh roll of Ilford HP5 Plus and I taken the camera to a trip to the mountains. The camera worked fine for the most part. But the temperature started to drop as we hiked higher. At the end the camera was really cold and the shutter sounded like it has started to struggle again. I guess my fix was not flawless after all.
I (over) developed the film in Rodinal and again it came out with flaws which was due to my errors and not because of the shutter except the very last frames where the shutter got “frozen”.
Nowadays, I am experimenting more with the Helios 44 lens on digital bodies, but it is good to know that I can mount this really lovely lens to it’s native camera. The Zenit will come in handy because my desire for old school SLR experience is proven to be recurring.
At the end of this post, I have to place here a warning. Repairing cameras are always risky, one may damage the camera and film could be also lost if repair is not successful. Please be careful and let your gear serviced by experts unless you are really know your way. In any ways always watch out for the risks.
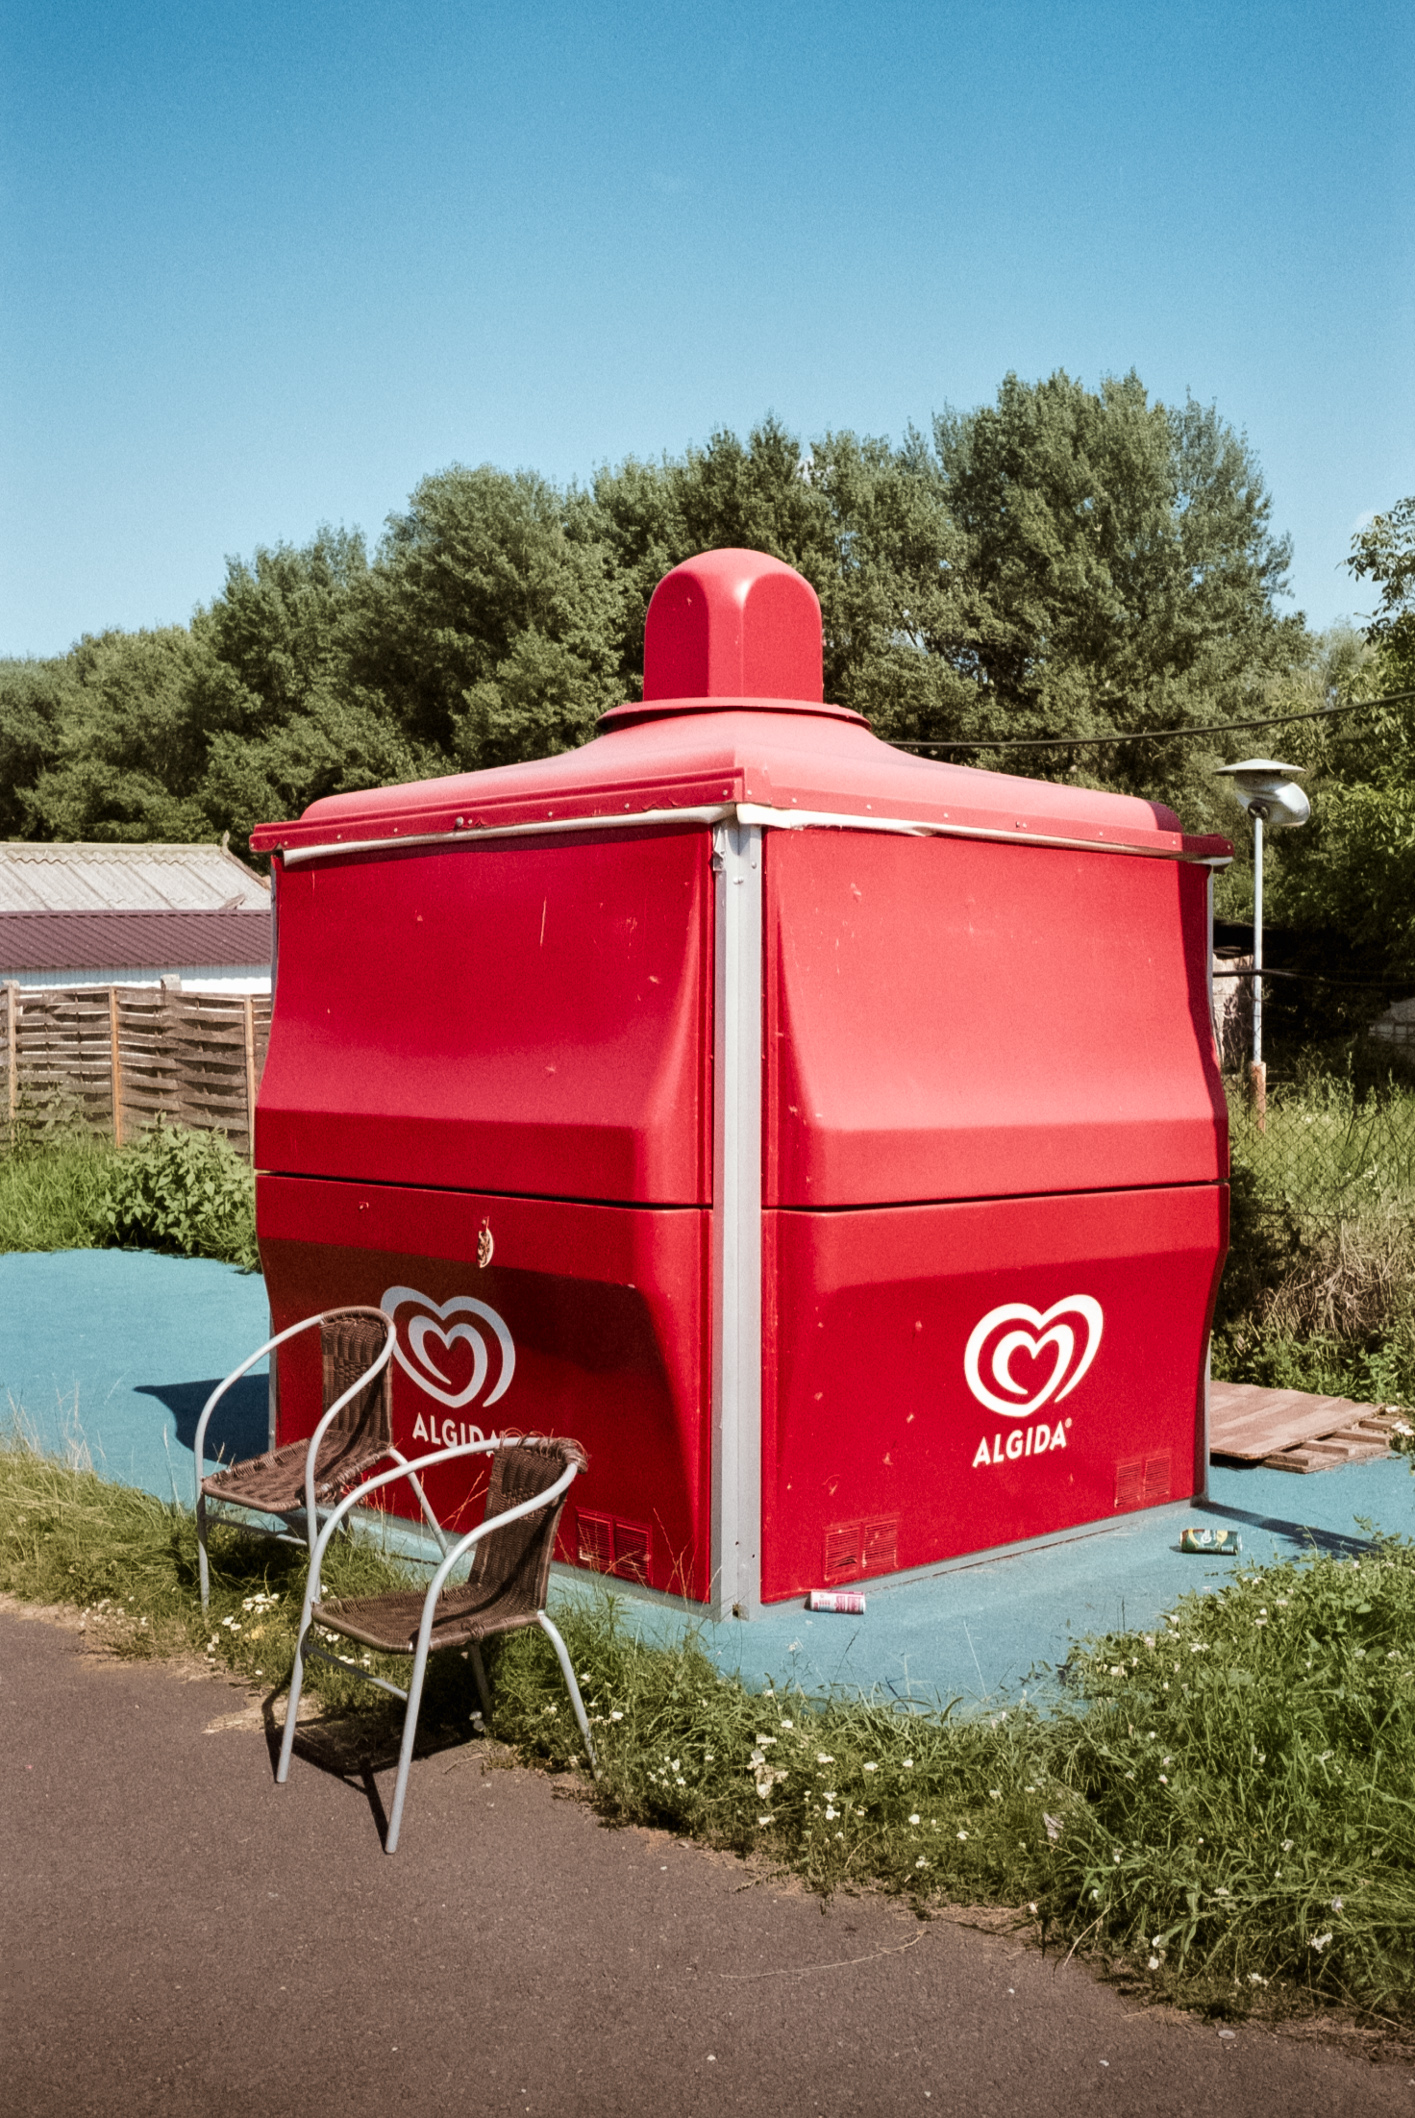
We were on a family visit at my father a few weeks back from now. As usual we had a great food and many things to talk about. Also as usual I have spotted something in his garden. A stack of beautify worn wooden boxes many of which had navy green painting and interesting signs on their sides. I was staring them for a brief moment with my suspicious look (I practice a lot in the mirror). I was immediately considering all possible combinations and alignments of them in relation to the direction of light and possible angles of framing. I must have had a look on my face of a hardcore Stanley Kubrick when he discovers a perfect massive monolith in his fathers’s backyard after a long night watching Space Odyssey. I asked if I could use them as background for a few shoots and also about their origin and current use.
As it turned out these were military ammunition boxes originally, but now they are used to store and transport machine parts new and used alike. This meant that there were plenty of scratches, oil marks and shiny metal particles all over them which made them even more exciting to me. At this time they were all empty so I could use them how I wanted. I always have a camera with me and because my Leica was in service I was revisiting old friends from the shelf. That day my bag hosted my lovely Yashica TL Super paired with the mighty 80mm Pancolar. This lens is a sole reason why I still have an M42 mount camera and this Yashica is a great match indeed.
Anyways, I took a few shoots about the Yashica and a series about my father’s Mometta II and I thought they are worthwhile to feature them on the blog. If you would like to read my Yashica TL Super review, you can find it here. These shoots were all taken hand held with my wife’s Sony NEX 6 and I had no softbox or any reflectors with me. Luckily the weather was overcast and overall I am happy with the results. I am curious thought what will I find during the next family visit and if I should better prepare myself with a complete studio setup :-).
Since then I finished the film in the Yashica as well as from the Zenit3M I used recently. The Leica is also back now and I am looking forward to try it. In any case when the film comes back from the lab and I find some time to scan and edit, I will show the results from this kit as well.
The members of the Mometta camera family are really quite special to me. There are not so many cameras were made in Hungary at the first place, but since these are 35mm rangefinder cameras with a quite unique design it was only a matter of time until one appeared on the blog. I could get my hands on the Mometta II which is possibly the most widely available model, but it features all the main characteristics of the entire lineup. In addition to the great camera finding, there was a roll of film in the camera possible older than four decades. If you like to know what was on it, keep reading.
Hungarian Leica
The first camera in the line was called Momikon (1954-1956) which name follows the same pattern of the Zeiss Ikon as the company behind the camera was called Magyar Optikai Művek (Hungarian Optical Works) MOM for short. Later the name has been changed to Mometta in 1955.
There were several variants produced in a relatively small amount of time, but the differences were not fundamental. Possibly the biggest change was in the last generation with the Mometta III whereby an interchangeable M42 mm lens mount was introduced. Production was ceased in 1962.
The goal with the design of the Momikon was to create a compact 35mm camera which can approach the ruggedness as well as the image quality represented by Leica on a much lower price point. It was targeted that the camera was somewhat affordable by an ordinary factory worker. The price of a Mometta in 1955 was 1490 Hungarian Forints and an extra 190 HUF for the ever-ready case. In contrast, the average monthly gross income at the time was around 1080 HUF. Of course, the lower price point did not come without compromises such as the fixed lens, no flash sync etc.
Body design
Mechanical comparison of Mometta and Leica
The camera has an adorable, in my opinion, borderline funny look. It is a little fat due to the unusual alignment of the film transfer. The film has to bend in an angle which in theory provides better film flatness in combination with the strong film pressing plate.
The image size is also quite irregular. The frame is 24x32mm as opposed to the normal 24x36mm. I could not find any information about the reasons for this design choice. I assume it has to do something with film efficiency. The 4mm per frame does not seem a lot, but it could mean that 40 frames can be made with a roll for 36 regular shoots.
It can be a problem for shooting positive film as dia frames will be impossible to find for this size.
The viewfinder is combined with the rangefinder and it is surprisingly big and bright considering the age and class of this camera. The rangefinder is less complex compared to the ones used in Leicas, but it is a very durable construction. Adjustments are supposed to be relatively simple to carry over and they are rarely required.
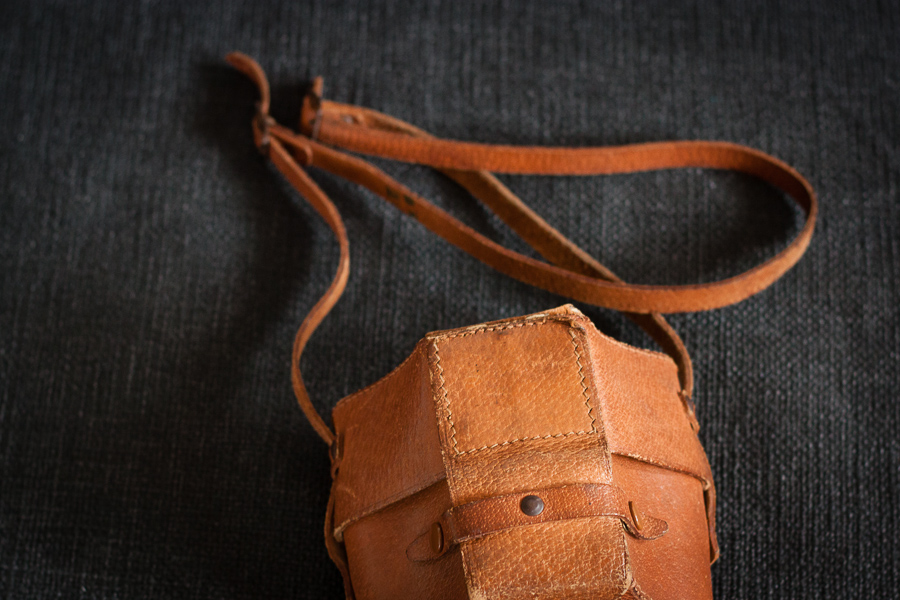
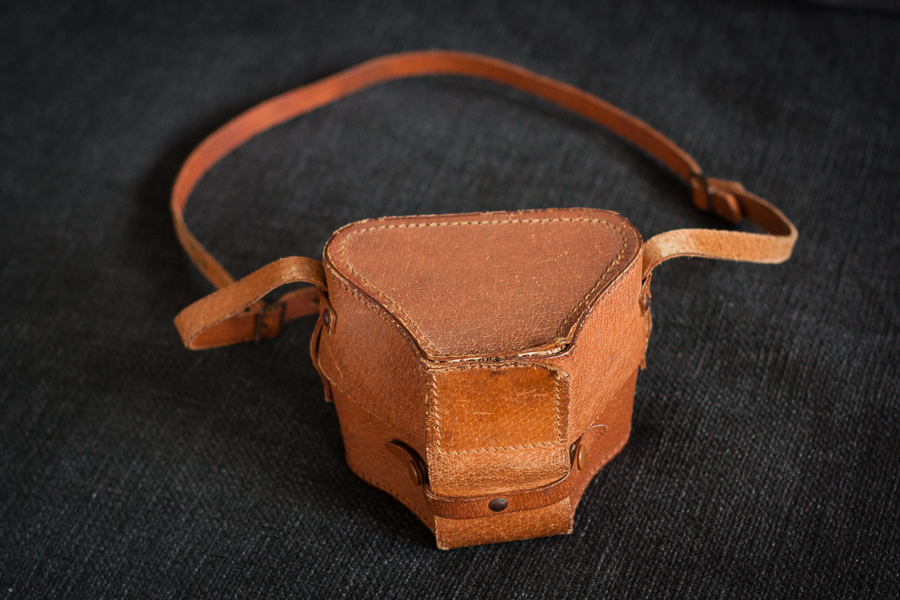
The ever-ready case is simply beautiful in my opinion. It is small, stylish and protects the camera very well. It even has a little pocket with a small white plastic plate in it for quick erasable notes. My only problem with it that the front part cannot be detached and so it cannot be used as a half case even though the body does not feature hooks for a neck strap. (The Mometta III has rings on the side of the camera for the strap.)
The lens
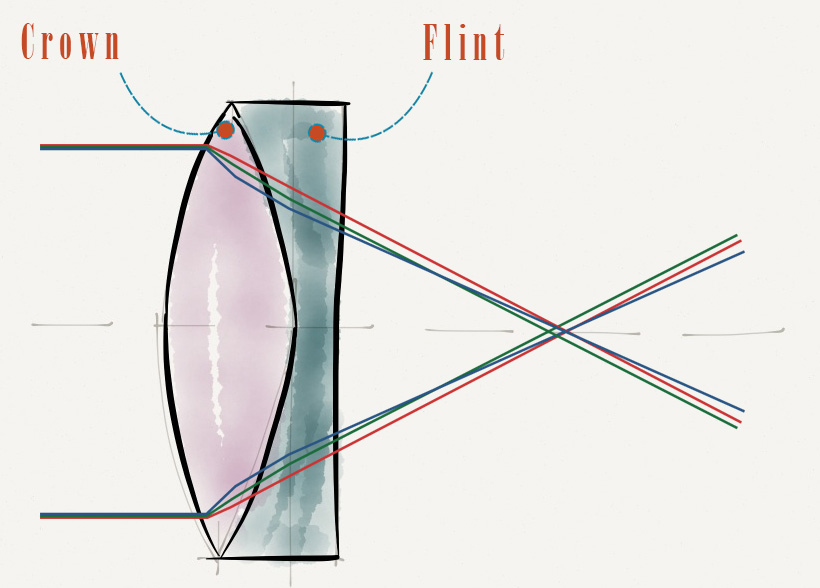
The lens is a 50mm f/3.5 Tessar type construction with an anti-reflective coating called Ymmar. The lens was calculated by Imre Újvári and it has a decent reputation. From the photos I have seen taken with it, the lens is very interesting indeed. Stopped down has enough sharpness for most scenarios while wide open in some cases it has a swirly bokeh which is beloved by many. On most versions except the very early ones, the lens barrel is quite deep and acts as a lens shade.
The lens is built into every model except the Mometta III. In this mark III version, an M42 thread mount was introduced, though the only lens I could find reference of for this camera was the Ymmar 50mm.
The film inside
I could not tell how many shots were left in the camera or if there were a film in it at all, I decided to shoot some random frames with it and then try to rewind.
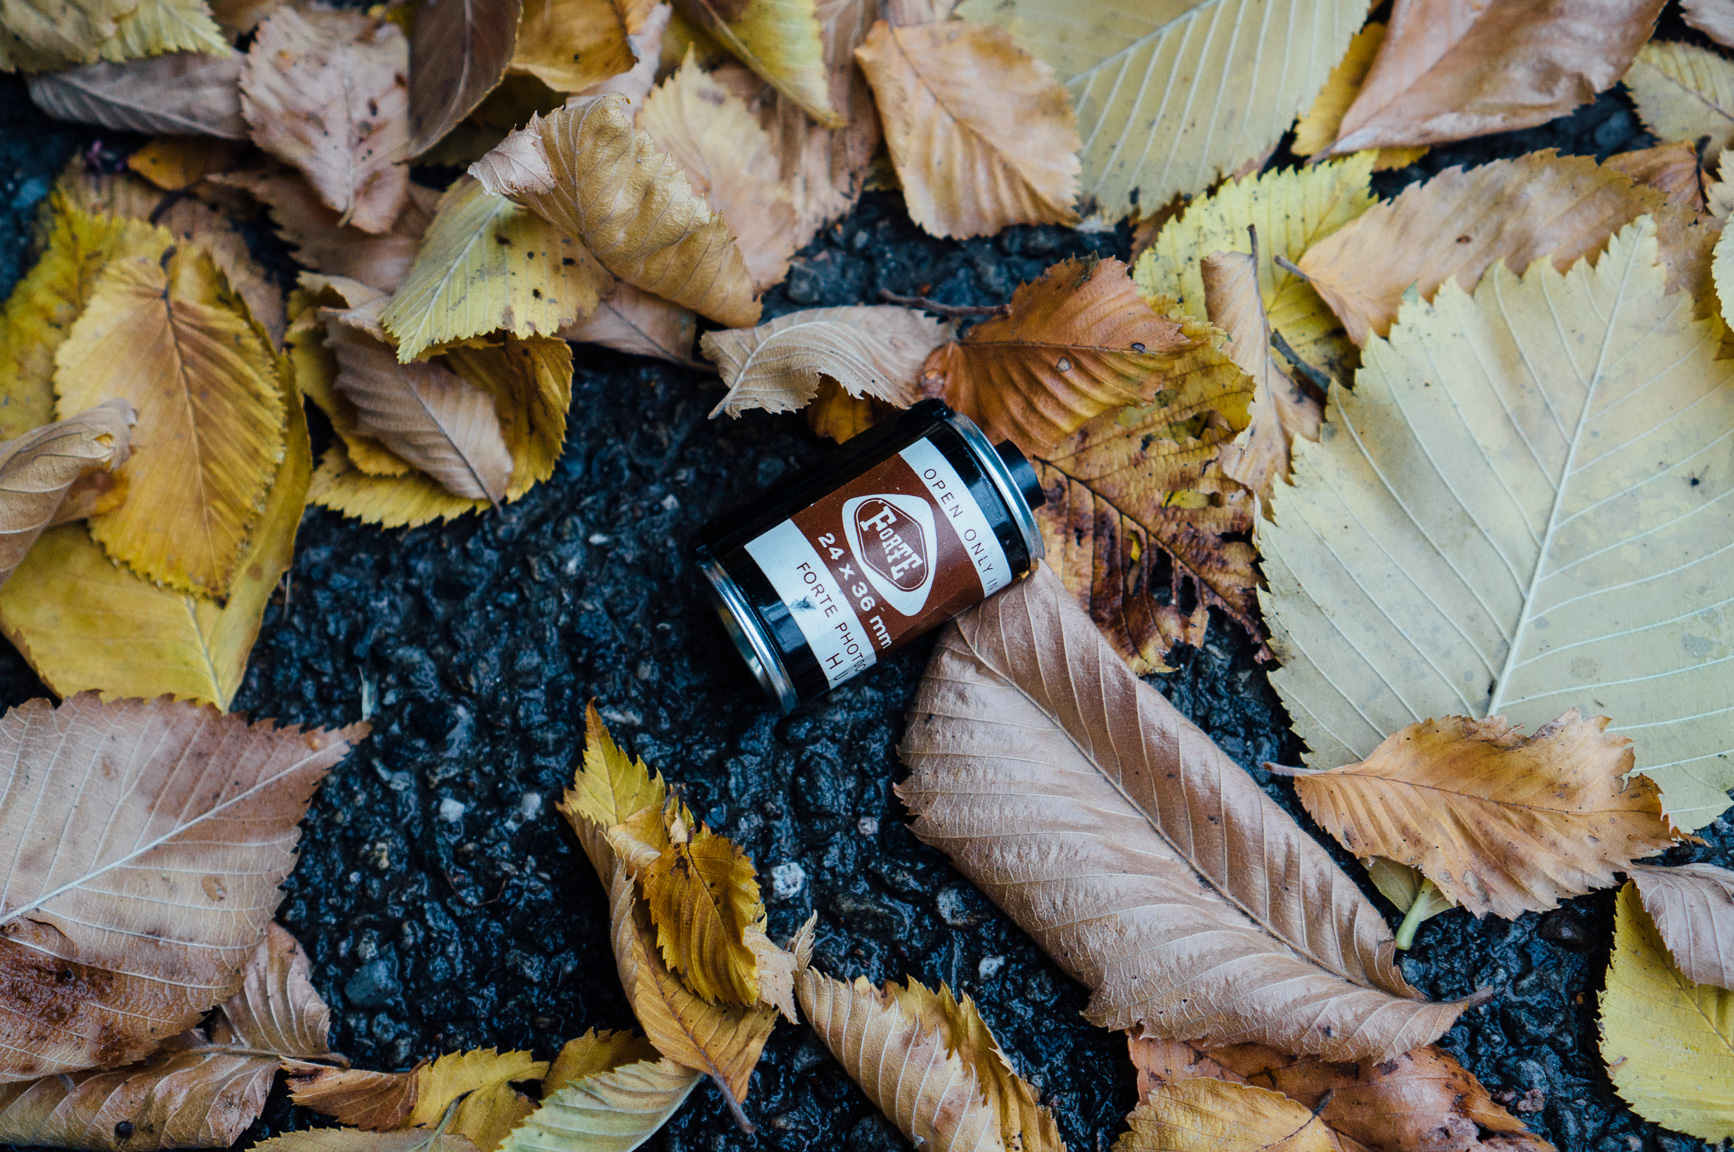
It turned out that there was a roll of Fortepan 27 (17 Din/ ISO 40) black and white negative film in it. I am not sure about the age of the film, but from the design and based on the age of the camera I believe it had been loaded between the early 60’s to 70’s. In any case, this film could be at least 40 years old and no one has ever seen these photos until now.
The canister was so handsome that I tried to avoid damaging it for all costs. So, I tried to retrieve the film with a film retriever. Ultimately I have managed to get the film out without destroying the canister, but I think some light might have got into it.
As I found out, only a few shots have been taken on this role and even those got some light leak marks. But the sharpness and the crazy bokeh of the lens can be seen already from this limited sample. Also, it impresses me how well this film survived. It was exposed and kept undeveloped over decades in probably far from ideal conditions, yet they turned out relatively fine.
Random photo with the Mometta II in 2016
In addition to all that new shoots like this were also possible with this film.
Forte, by the way, was a Hungarian photochemical company manufacturing papers and film from 1922 to 2004, but unlike Film Ferrania in Italy, they have not been revived by crowdfunding and the factory looks like a post-apocalyptic site nowadays (click if you are interested).
Final thoughts
This Mometta II was bought by my father on a flea market and for now, he keeps it for himself. Therefore I only had a very short time to play with it. It had a very slow shutter, but nothing which could not be fixed with some maintenance work, so I undoubtedly got very interested. I will definitely find a way to spend more time with this little gem and take more photos with it.
The Mometta II is not particularly expensive, but it has a higher asking price then FSU cameras due to it’s relative rarity compare to them. The shutter is not synchronized so flash photography could be an issue as well as finding dia frames because of the unusual frame size. Supply of spare parts could also be a hard, therefore repairing and maintaining them might be problematic.
But for someone like me who likes to have a small easy to use good looking (not to mention special) camera in the bag for available light photography, it is certainly an interesting option.
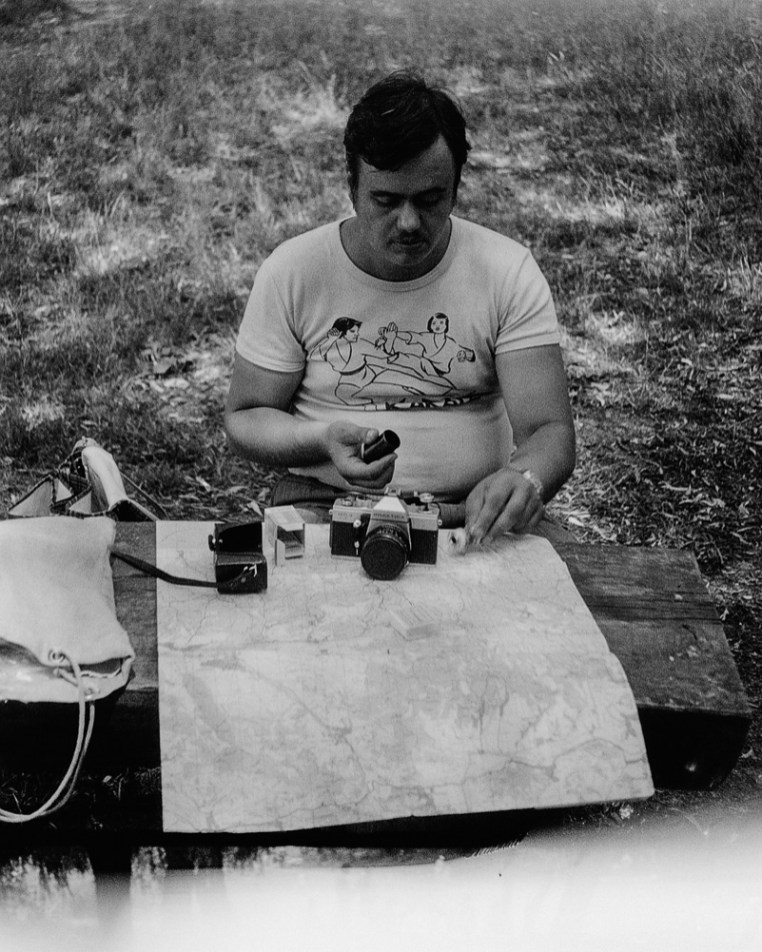
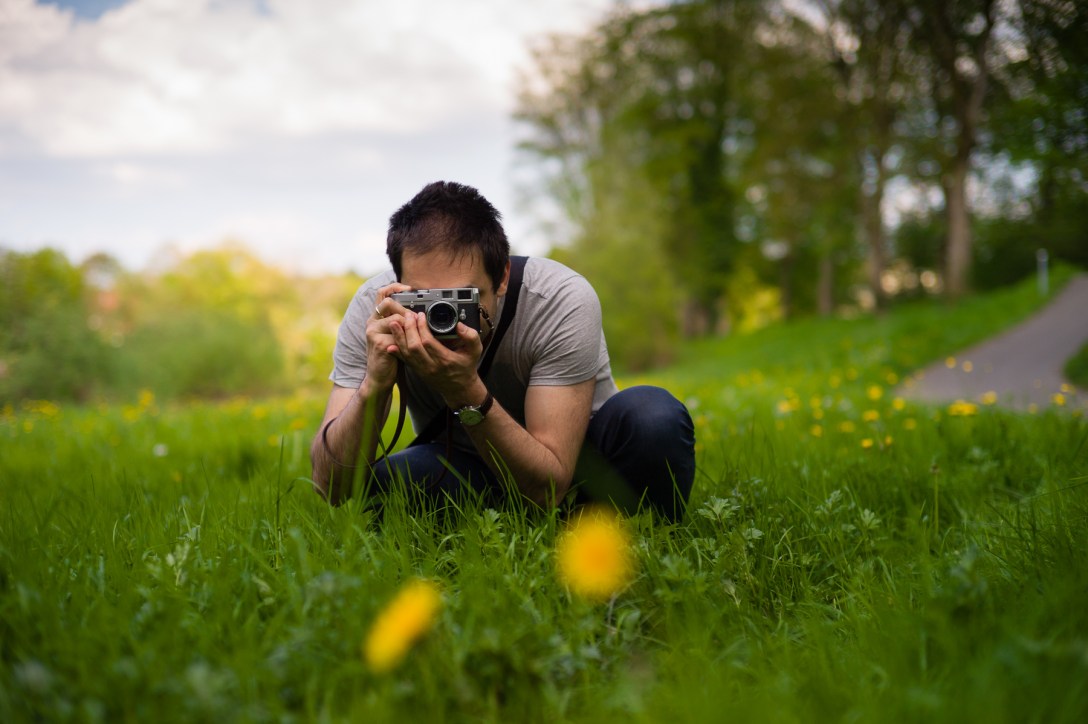
Two friends with the same passion for photography, both using rangefinder cameras almost indistinguishable from the distance. The cameras are matched with fast 50mm lenses from the same brand and color.
Sounds like these photographers or at least their choice of gear is quite the same. While this statement is true to some degree, there are significant differences. In fact, there are more differences than the obvious technological dissimilarity between the capturing media used by the cameras (Ilford Delta 100 film in the Leica M2, Kodak CCD sensor in the M9).
Gábor, Leica M9 P, Carl Zeiss Sonnar 50mm f/1.5 ZM
Ramón uses a digital Leica M9 P which of course captures color information and renders in a very unique way. Many including himself claim that under ideal circumstances the CCD sensor in this camera creates much more pleasing results than other sensors used in other digital cameras with the same sensor size. This is a topic can be argued for a long time, but at the end of the day, it is his subjective view and his decision to use a rangefinder with this sensor.
Ramón, Leica M2, Carl Zeiss Planar 50mm f/2 ZM, Ilford Delta 100, Rodinal 1+50, 20°C, 8 min
At the same time, I was using a classic Leica M2 with a black and white film. Even though the output of the digital camera is also appealing, the analog workflow is still favorable to me. It is partly because I enjoy the process of creating the image in this old-fashioned way, but also I can achieve the film look what I am looking for much more naturally.
My primary lens is a Zeiss Sonnar f/1.5 which I love for many reasons but mainly because of its bokeh. Ramón has a Planar f/2 from the same ZM series, although I believe this is not his standard lens. Both lenses are fast 50mm primes, yet they are quite different. The Planar is reliably excellent lens, which can be praised for its great sharpness and generally beautiful bokeh.
The Sonnar is a bit more hectic with the potential of surprises both in positive and negative ways. This lens can be bit soft wide open, but the bokeh is just phenomenal most of the time and from f/2 sharpness is already more than enough to me. The Sonnar has a bad reputation of focus shifting which is change of the focus plane when adjusting aperture. I personally don’t have any issues focusing with this lens. We switched lenses for the day, so we could experiment and see the differences. At the end of the day we enjoyed using these lenses, they both performed well on digital sensor and on film.
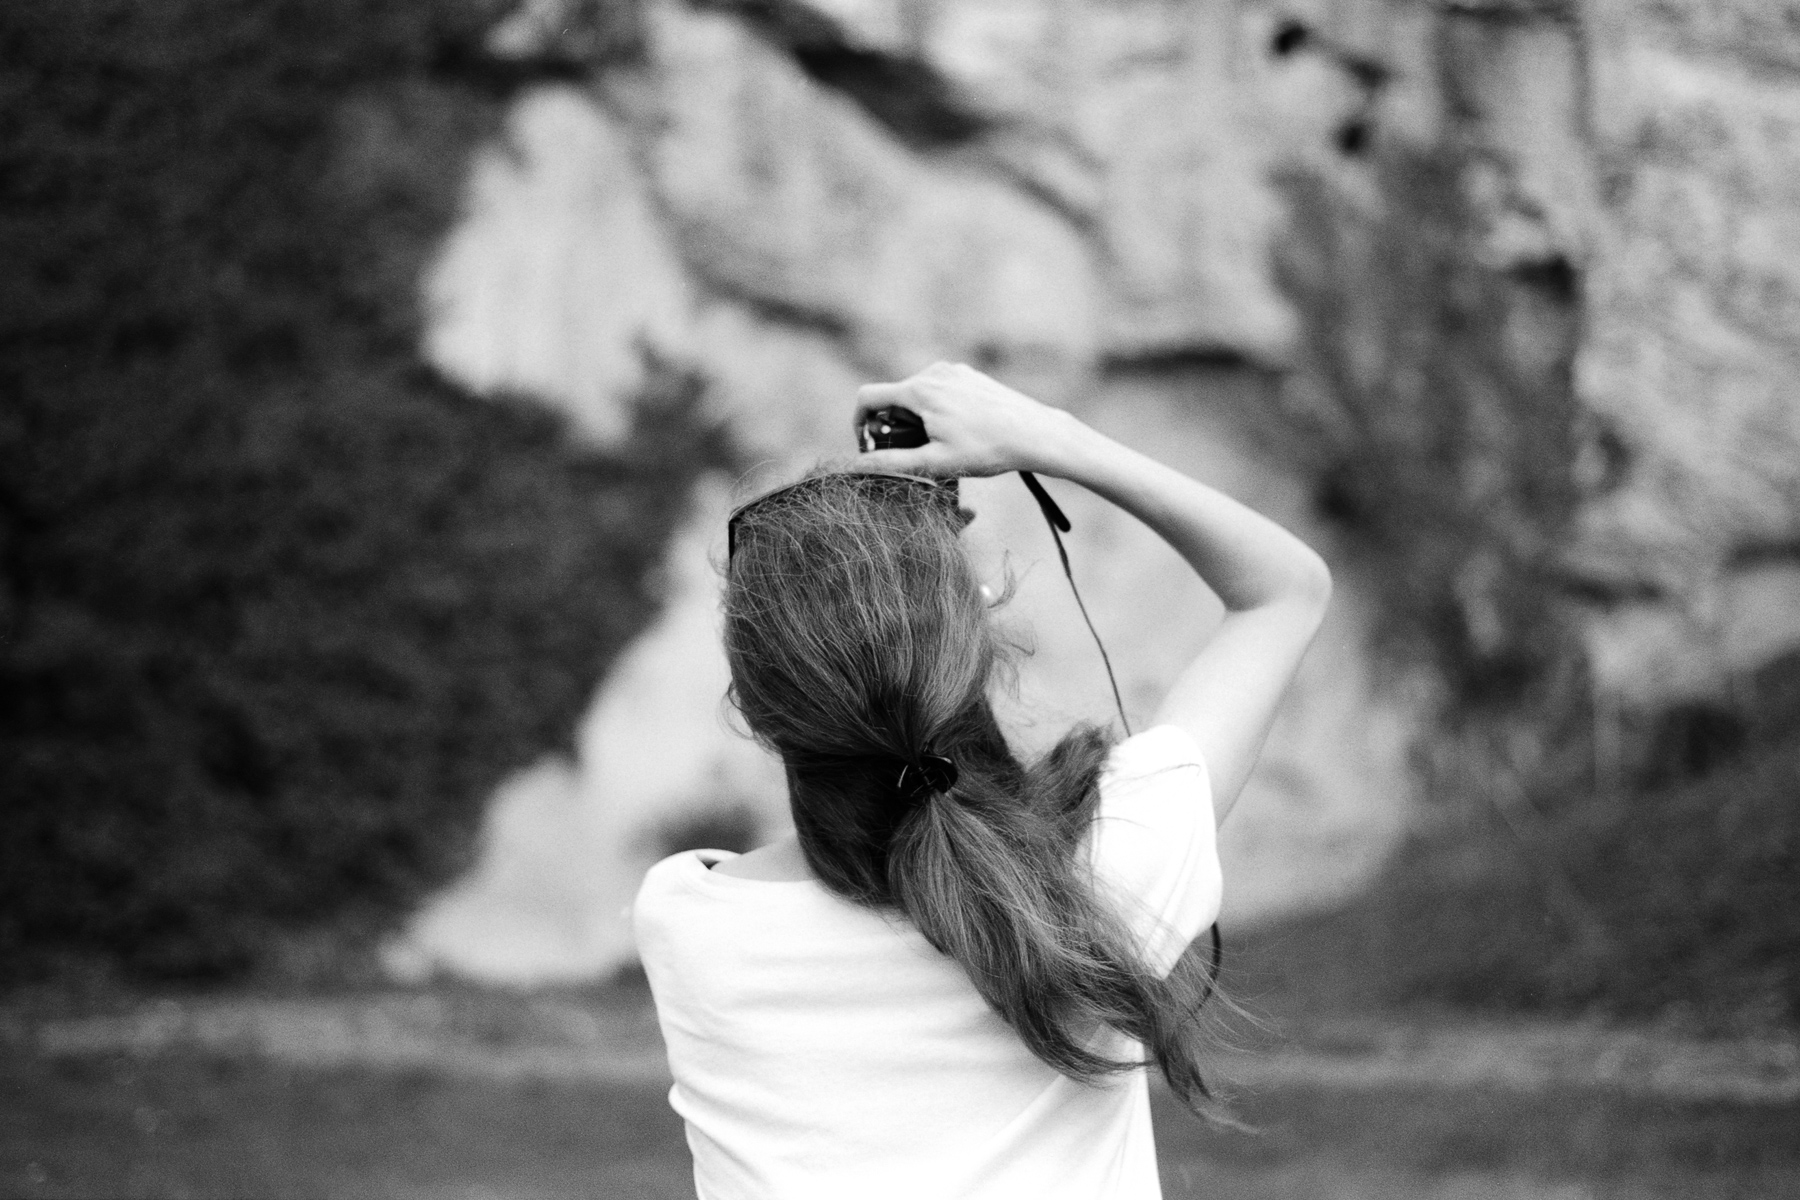
Also note that we use the cameras with different style. One of us covers only 1 eye with the viewfinder and keeps the other eye free open while the other covers his entire face with the camera and thus limited with single eye framing. Naturally this difference can be explained by the magnification used on the viewfinders, but it is also hugely a personal preference.
The great similarities and the differences between the cameras and lenses made me wonder can be photographers categorized at all by the type of gear they use? I guess the answer is controversially yes and no. Surely we use the same style of camera with the same focal length. This would put us into a technical category of normal lens rangefinder shooters. But even if we would use the exact same gear we would end up different results which we would have achieved in different ways. I think the most distinguishing feature in the photography of 2 individuals is not within their camera, but behind of it.
Digital cameras have been around for a while by now. In fact, we have access to pixels so long ago that recently it became fashionable to dress digital cameras into retro looking shells so they resemble the look and feel of old film cameras. Up until now, the more modern looking/more functional design was generally desired, but we reached the point when people started to look back to the golden age of the film era with strong nostalgia and today the retro look become interesting.
Naturally, camera manufacturers were ready to satisfy this need and the market is literally flooded with retro-styled cameras like the Nikon Df, which promises nothing less but the experience of pure photography. While the term “pure photography” can be very much overloaded and interpreted in many ways, what they probably mean is that this camera handles and feels similarly than the now classic Nikon film cameras. Simplicity, mechanical-like external controls, full frame sensor, compatibility with vintage lenses, limited feature set (e.g. no video) to keep the focus on the essence of photography and of course that retro look are supposed to deliver this promise.
But when we start to wrap modern digital cameras into so-called “classic” look and market them with the message that this is the closest you can get to film photography experience the question arises can we already talk about classic digital cameras as well. If so how do they relate to the cutting edge technology inside modern retro shaped cameras? But most importantly, how can the true digital classics stand against the newly invented marketing ideas such as “pure photography”?
Importance of the 5D
Canon EOS 5D with Carl Zeiss Jena Sonar 180mm f/2.8 (Pentacon Six mount)
This camera was introduced in 2005 which means it is pretty old with modern standards. But also, it was the very first somewhat affordable full frame digital SLR. Technologically there was nothing revolutionary about the 5D at all. We have seen full frame DSLR cameras before, and many other parts of it were reused from other cameras like the focusing system which was borrowed from the 20D. But it was very small for a full frame camera and it was cheap enough to be accessible by normal mortals for the first time. Also, it took damn good images on very respectable noise levels at the time. In this respect, it is hard to deny that this camera was indeed important and maybe it was the camera which started the era of consumer full frame SLRs and even it paved the way for full frame mirror-less cameras alike.
5D pure photography
I am not sure that we can already talk about classic digital cameras. Also, I think it should not be up to me to define what can be marked as classic and what cannot. But let’s be speculative for the time of this post and agree for a moment with those who already call the original Canon EOS 5D as 5D classic and consider it as a true classic digital camera. Let’s just see if the true digital classic can in many ways match up against something which supposed to make us remember what was it like to shoot with a film classic. I borrowed the elements of the Nikon Df pure photography campaign to use them as a basis for my absolutely crazy comparison.
Sensor size/pixel pitch
Both the Canon 5D and the Nikon Df features standard 35mm film size sensors. This means that field of view of any lens is the same as on 35mm film camera. There is no crop factor to consider.
The Nikon Df has 16.2Mp while the Canon 5D only has 12.7 effective megapixels. The Nikon using a more modern sensor which adds micro-lenses to each individual photodiode and thus utilizing the surface of the sensor more effectively. The Canon, on the other hand, leaves gaps between the photodiodes but due to the smaller megapixel count the atomic pixel size is still higher ( 8.2µ vs 7.30µ). In theory, it would mean better low light performance to the Canon as bigger pixels could capture more light, but the processing pipeline of the Nikon is light years ahead, so the ancient Canon is no competition in low light.
But if we think about this with “pure photography” in mind. If you shoot in good light as our film photographer ancestors would certainly preferred to do so and you keep your ISO low as most film emulsions were/are available in a range of ISO 50-1600, than there are probably not much of a difference between the two cameras. The difference megapixel count is negligible for every day use and noise levels should be pretty close at low ISOs.
Simplicity
One of the big selling points of the Nikon Df is that it lacks video even though the big brother Nikon D4 (using the same sensor and processor) has it. It indeed helps to focus on photography as you have no chance to accidentally switch to video and there are no useless menu items to confuse the photographer.
The good news is that the Canon 5D had no video points the first place, not even live view. Back then it was actually not sure that mirror reflex cameras suppose to do video ever.
The 5D is very minimalistic in terms of features. It only has the basics, and therefore the menus are very simple. There is literally nothing which could distract you from framing. In fact, it is a bit too minimalistic. One of the features I really miss is the possibility to set Auto ISO. Well, you could not change your film speed either.
Body Shape
Both cameras are quite beefy in my opinion. The Nikon Df supposed to look a bit like a classic Nikon like the FM. In reality, it is still quite thick as a brick and looks like a classic camera only from a good distance. I still think it would have been possible to make the Df like an FM in terms of dimensions. We know it is possible, there are successful attempts to hack the guts of a mirror-less camera into classic film bodies. The 5D is without a doubt, not a beauty, it has a general Canon DSLR look.
Canon EOS 5D with Canon 40mm f/2.8 pancake
External controls
In the “golden days”, we had many dials to control camera settings like aperture, shutter speed, and focus. Nowadays we have many more things to control and we have an electronic coupling for everything.
Canon EOS 5D, Canon 40mm f/2.8
Understandably it can be very rewarding to use similar controls to the ones we used on mechanical cameras. Somehow it has sense, as everybody understood the mechanical connection between the aperture ring and the aperture blades. I think it has a sense even today to expose these controls in an old fashion way. But only in the case of a camera which is built for the enthusiast photographer whose goal is to enjoy photography rather than being the most effective picture maker machine. The Nikon Df does a good job in this respect, even though I heard that not all controls are nice to use or logical, but I could not try it myself until now. What I can tell for sure is that the 5D exposes the main settings in a modern, but very effective way. I usually switch the camera on once a day and leave it that way. I use aperture priority mode with mainly manual lenses with aperture rings and I mainly adjusting ISO and exposure compensation only. Most of the time I don’t touch any menus at all.
Legacy lens support
The Nikon Df is made to be usable with vintage Nikon glass which is great as many old Nikkors are gorgeous. But the Canon EOS system has a shorter distance between the lens mount and the sensor. This way many other branded lenses can be used on a Canon EOS body with an adapter including Nikon lenses. To be fair you can have an adapter like M42 for Nikon as well, but you either lose the possibility to focus to the infinity or you need to pick an adapter which has additional lens element in it. The later means higher cost and possible degradation in image quality.
All in all, you can put way more kind of lenses to the 5D than you could attach to the Df. But be careful because some old lenses may mount but extract to deep into the camera body when focusing. This could damage the mirror. Always do some research on which lenses can be safely mounted.
Canon EOS 5D with Carl Zeiss Jena Pancolar 80mm f/1.8
The Carl Zeiss Jena Pancolar 80mm f/1.8 M42 thread mount lens, for instance, can be mounted safely to a cropped frame Canon body. But because the mirror in the 5D is bigger due to the bigger sensor, this lens should not be focused on the infinity because the rear lens element can touch the returning mirror. It can be fixed by sacrificing the possibility of focusing to the far distance. I use this lens mainly for close portraits and for this use it is not a problem.
Canon EOS 5D, Canon 40mm f/2.8, Carl Zeiss Jena Pancolar 80mm f/1.8 (M42), Olympus Zuiko 50mm f/1.4 (Olympus OM), Carl Zeiss Jena Tessar 50mm f/2.8 (Exa)
Viewfinder experience
The Nikon Df viewfinder has 100% coverage while the 5D has only 96%.
But it is not possible to change the focusing screen on the Nikon which flaws the of legacy lens support. Today focusing screens are made for autofocus lenses. They are very bright but extremely hard to use for manual focus because the depth of field is not really visible and there is no optical focusing aid built in. On the other hand, I think that using the back screen in live view is not an option if you are pursuing the classic photographic experience.
I would rather use a slightly smaller finder with a proper focusing screen.
Slow down
I think it is generally a good idea to slow down and take the time to compose frames instead of bursting in rapid fire mode. Trust in the law of big numbers in order to achieve the desired photo certainly works, but I would not call it a classic approach. Let’s see what these cameras can do in order to force the photographer to slow down.
On the Nikon side, dial-based controls, manual lenses and a wrong type of focusing screen is certainly slow one down. On the Canon side we have no auto ISO and when using autofocus lenses a truly mediocre (painfully slow) autofocus system makes it impossible to act like a machine gun. Also, the burst rate of the 5D is only 3 frames per second.
Finally, the 5D has an awful back screen. It is small, dim, inaccurate in color (greenish cast) and generally useless. But of course, it is a huge plus side in this comparison as the small worthless screen means that you will only face the result of your photography when you download your images. It really reminds me of the feeling of waiting for the images to return from the lab. You never knew what had you done until you get back the developed film, and in this case, until you get to a computer with a proper screen. The good news is that the results look so much better on a proper display that I always positively surprised when I get my images downloaded from the camera.
Old Ladies, (Gyöngyössolymos 2014),Canon EOS 5D ,Carl Zeiss Jena Pancolar 80mm f/1.8
Eszti (Budapest, Hungary), Canon EOS 5D, Canon 50mm f/1.8 II
Gyöngyösi Zsinagóga (Gyöngyös), Canon EOS 5D with Canon 40mm f/2.8
Conclusion
What makes a classic camera and especially the question of can we at all speak about digital classics is still an open debate.
On the other hand, it is quite easy for me to say that the 5D Mark I or 5 classic if you like, can still fulfill many photographers needs. It certainly is able to deliver most of the recent marketing promise of “pure photography” (apart from the classic outfit). In fact with the interchangeable focusing screens, a bigger variety of adaptable lenses and even slower operation it fits better this promise than the camera which for this marketing campaign was created.
I think both the Canon 5D and the Nikon Df could be just the right camera for you. The Df is certainly stylish and has a lot more power under the hood. If the best possible low light performance to date is important than no question that the Df is the clear winner.
But consider that 5D is now a really affordable (500-1000€) full frame camera with the capability to be used as a “pure photography” tool if you don’t mind the not so “classic” look. It is better suited for manual focus lenses, and it still takes stunning images. Last but not least the original 5D could be already a classic on its own right.
5D on Camerajunky (Graz, Austria), Sony Nex 6, Jupiter 8
This classic camera was undoubtedly one of the biggest and most dividing celebrity of the 80’s. At least among professional 35mm SLR cameras of course. It created quite significant waves in the world of professional photography because with it Nikon finally put the vote on automation and electronics as the new lead design principles.
Nikon and me
I am not dedicated to any brands, so there is no particular reason why I haven’t wrote about any Nikons until now. In fact my very first camera was a digital Nikon Coolpix 3500. It was hideous to use and broke horribly, but still it was my very first camera.Not much later I owned for a short time a Nikon F75 which was the first and until now the only camera which I’ve ever sold. It was a great tool, but it had a monstrous hunger for not so cheap CR2 batteries and it was way too modern for me anyway. The little Coolpix is still lying around somewhere in a box with serious electronic injuries. Who knows just like any other (now classic) camera, maybe one day it will get repaired too.
By the time it was very hard to accept these changes by the majority of professionals who simply did not trust anything which was depending on batteries more than a powering of a light-meter. It is a bit hard to imagine today but at that time it had a perfect sense. But the change was already on the doorstep and it was inevitable. The previous F models were already masterpieces mechanically anyway, there was very little room for possible improvements in the purely mechanical realm.
The F3 was their first electronically controlled single digits F camera and despite of the early resistance by the community, it found the way to tremendous success and changed the face of the camera market once and for all.
In fact what Nikon did with this camera was nothing really revolutionary or unexpected as all the technology was already existed and tested by lower-end models of theirs or by the competitors. They simply selected the best components available and remixed them in a very attractive package.
I could write a lot more about the exciting history of this camera, but there are other more competent people who just did it very well before of me. So instead of a week attempt of a complete and deep introduction of this camera, I simply try to give an overview filtered through my own experience.
I can faithfully recommend this site for the historical overview and for all possible technical details.
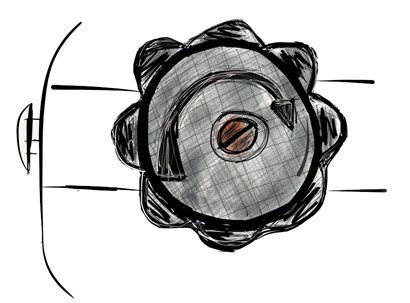
Nikon F3 HP official structural illustration
How did I get this camera
Nowadays my collector nature is being held a back because of the lack of time and dozens of higher priority projects. This is not necessarily a bad thing, sooner or later I need to settle and start to master the gear I already have. The negative side-effect is that I am running out of (new) old cameras to review. But fortunately it turned out that I can try out and write about a camera without actually owning it. I have a good friend who has a grandfather with a really good taste and since he moved to digital he gave his old Nikon gear to his grandchild. At first I just spot a box of T-max on the shelf at the place of Andrea’s and I asked her in which camera she intend to use it. Eventually she showed me a really nice bag full with vintage gear including the F3 with motor drive, many great lenses, matching flash unit and many more gems. Few weeks later (when I have recovered the shock, found my jaw and gathered enough courage) I asked her if I could try out the gear. She said yes, so the post you are reading now couldn’t be written without her kindness.
Data sheet
Type TTL auto-exposure 35 mm. Single Lens Reflex Camera.
Produced 1980-2001
Film type 24mm x 36mm
Weight 780g (body without lens, but with HP prism, batteries and film loaded)
Dimensions (HP version) 148.5 x mm height, 101.5 mm width, 69 mm depth
Shutter speeds 8s-1/2000s, B, Aperture priority, 1/60s can be used mechanically without batteries
Sync speed 1/80s
Viewfinder various interchangeable finders
Exposure meter full-aperture TTL centre-weighted exposure measurement at (80/20)
Batteries Two 1.5V silver-oxide batteries SR44 (Eveready EPX-76) or alkaline manganese batteries LR44
Self-timer 10s delay electronic self-timer
Hot shoe special accessory shoe on the rewind knob supporting TTL flash units; PC synchro socket.
Motor drive optional MD4 motor drive up to 5.5 frames per second with mirror lock-up
Mirror lock-up
Depth of field preview
AE-lock
Multiple exposure lever
Exposure compensation
First and second impressions
When I first had a closer look, I was not exactly impressed. The camera was bit dusty and showed marks of very extensive use. Nothing serious, but I really had the impression that the camera may had some mechanical issues. Nevertheless I took my time, and cleaned the dust and smudges carefully. During the process I had to realize two very important things. First of all never give up on an F3, these cameras are very hard to kill, no matter how they look like there probably nothing wrong inside. Second of all it has many buttons and switches which I had no idea what are they good for. I have seen many unusual designs like left handed Exactas and other marvels, but the F3 control layout gave us some rounds with Google and the user manual.
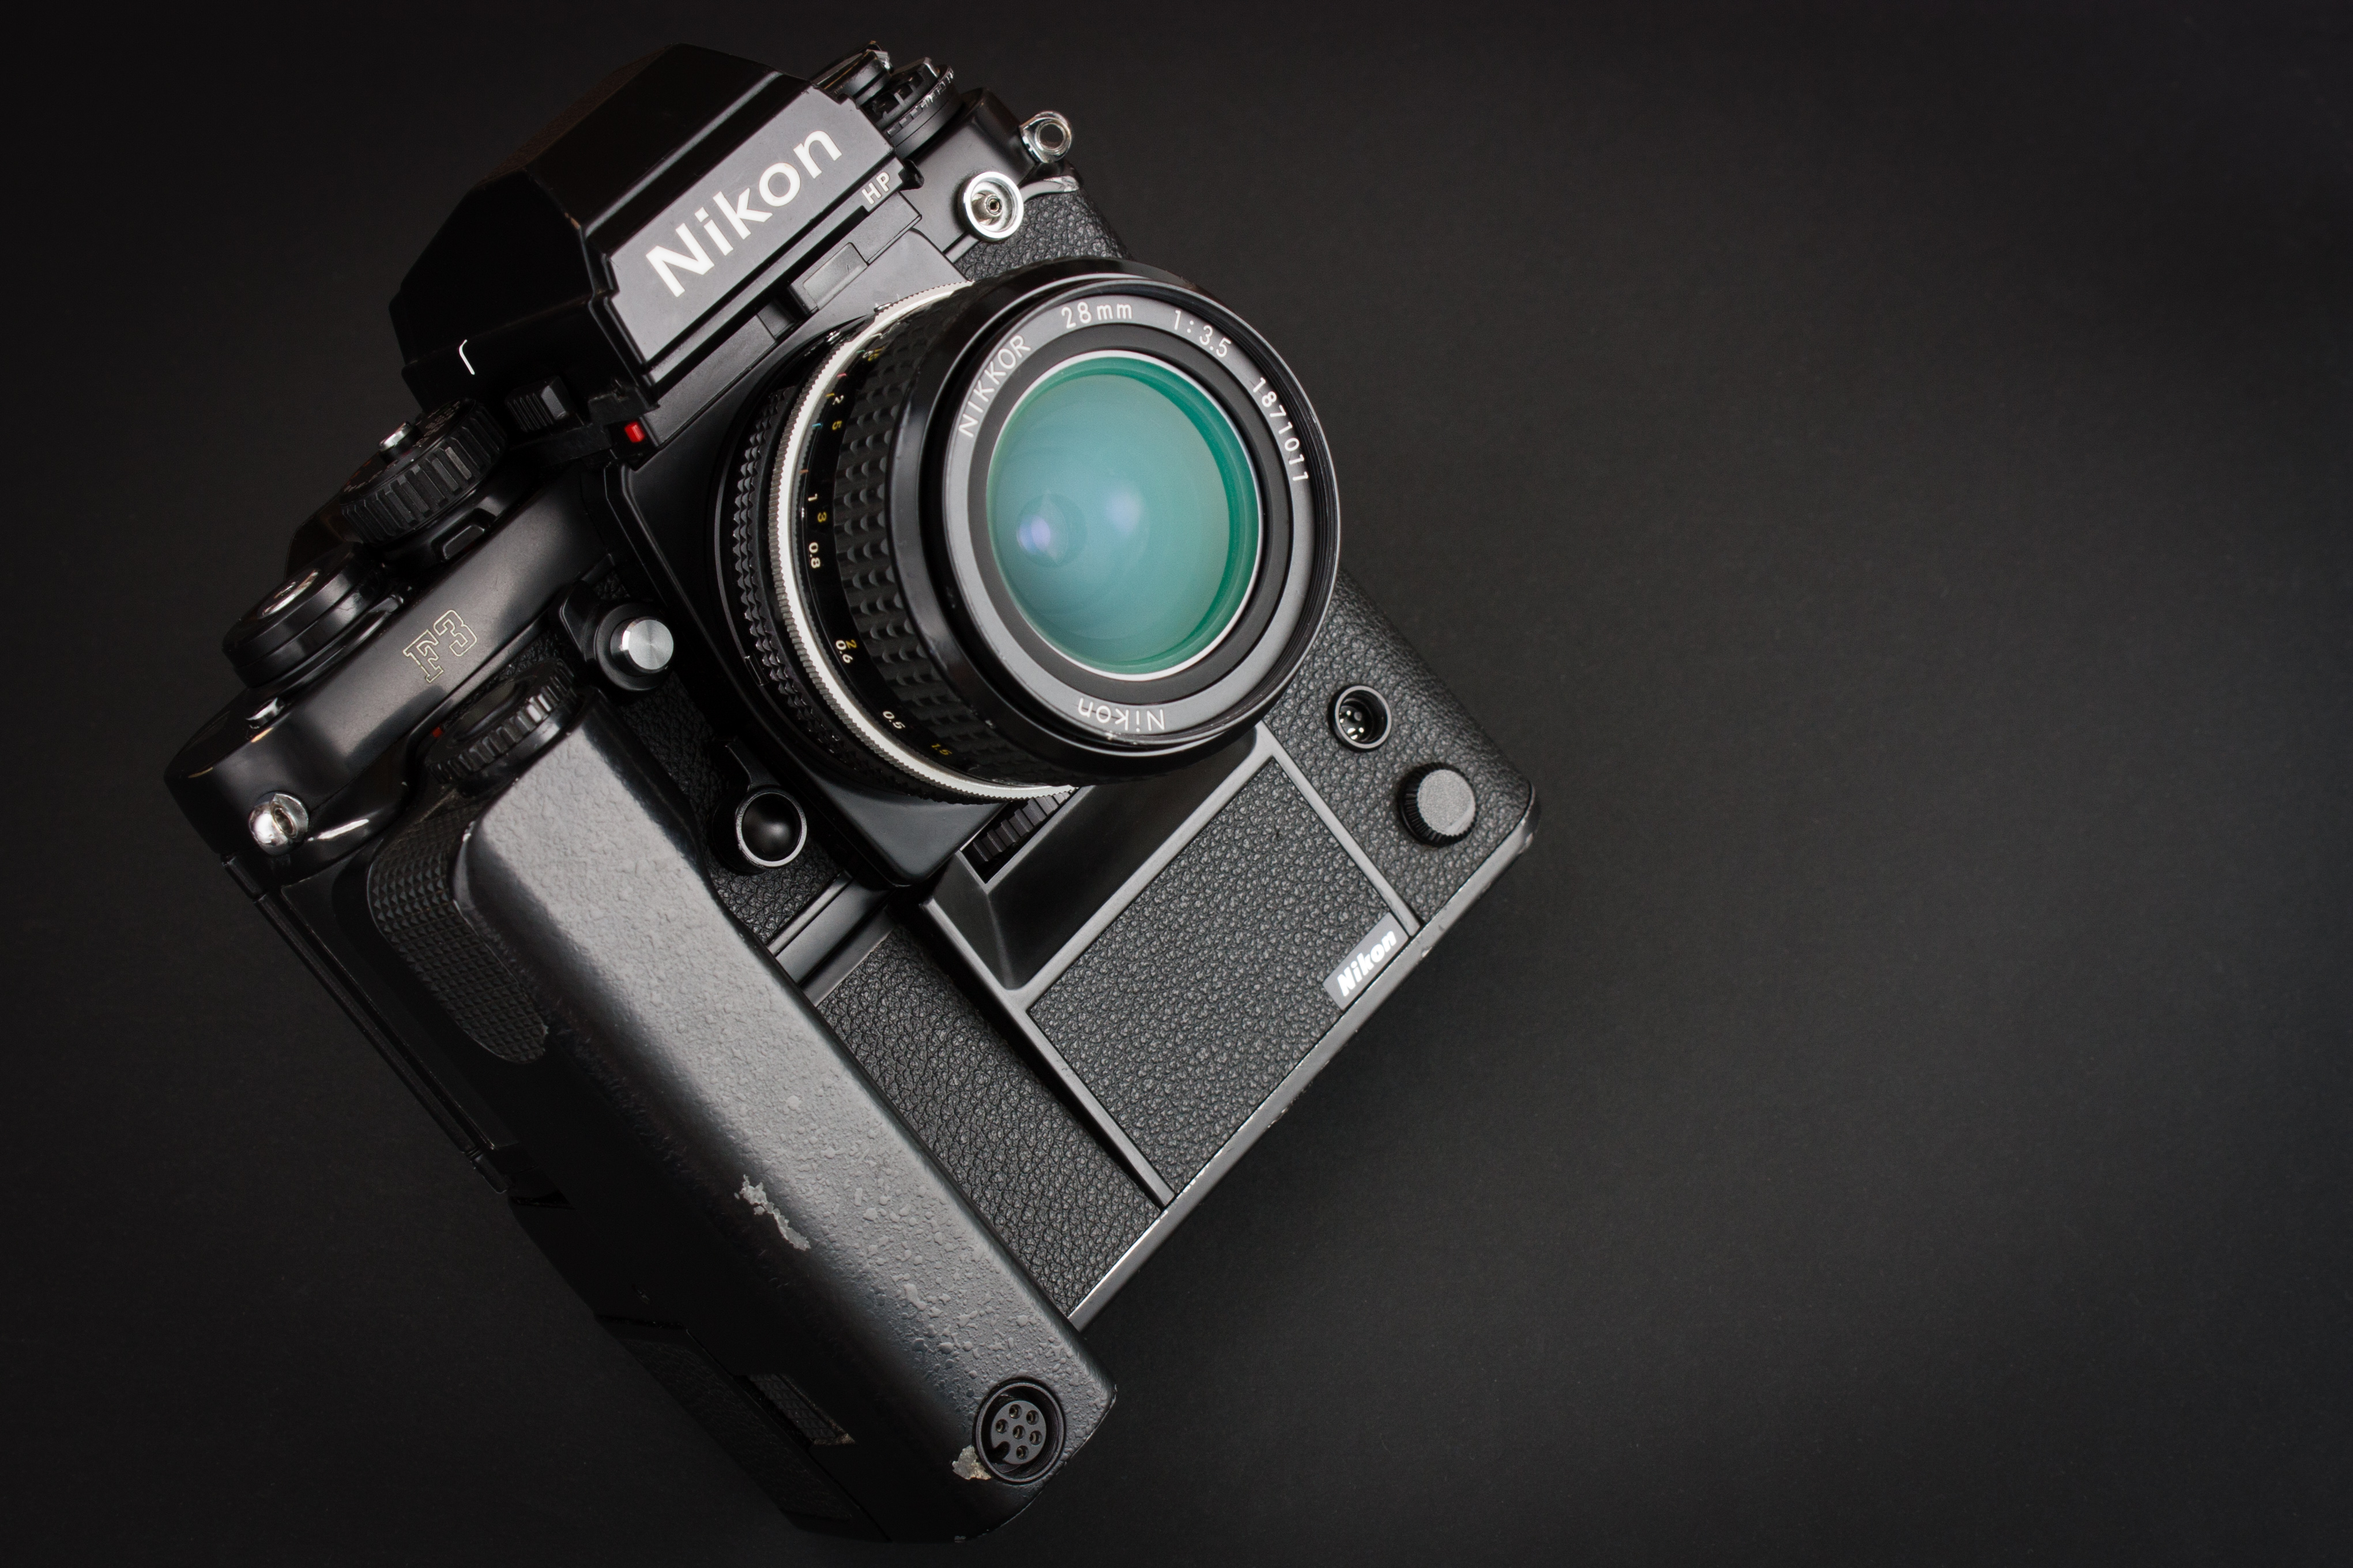
Nikon F3 with MD-4 motor drive, Nikkor 28mm f/3,5 and HP prism.
I also cleaned the lenses belonging to the F3 and since they were protected with filters all of them were in an excellent condition. They feel a bit dry to me in terms of lubrication, but otherwise focusing very smoothly and precisely. Maybe they act completely normally, only I am not so familiar with Nikon AIS lenses.
After I finished the cleaning of the gear and finally powered up the camera, the moments I spent with trying out every part of it lead me to the conclusion. You can trust this camera. The more I use it, the more I trust. The sound of the shutter, the feel of the advance lever, the snappiness of the motor drive all ensure this feeling. After all this image what a professional camera should show about itself.
Things I love about the F3
As I said the Internet is loaded with much more established articles about the Nikon F3, therefore the very best I can do is to share my personal opinion about it. Let’s start with the things I most appreciate in this camera.
Look and feel
Nikon F3 in leather half case with Nikkor 105mm f/2.5 and HP prism.
The F3 is an important milestone in the history of Nikon, but not only because of the technological aspects. This was the first Nikon which appearance was designed by the Italian designer Giorgetto Giugiaro. He introduced the red mark on the grip, which is an unmistakable characteristics of every Nikon SLRs since then. Indeed, this camera looks different from every previous models and can be distinguished with ease from the competitors as well.
Personally, I like the previous F shapes better, but I have to admit that the F3 looks all right and it also handles great at the same time. The small grip contributes to the secure holding, and I find it very clever how it fits together with the motor-drive.
Butter smooth operation (excellent mechanics)
Every part of the camera carries the marks of mechanical excellence. Even the smallest moving piece is doing its job with minimal resistance and completely free from any inappropriate noise.
There is virtually no difference in the operation of the film advance lever with and without film loaded into the camera. It is really that smooth that you can have a hard time to say that the camera loaded.
The mirror flips up quietly and gently as well, it produces very little camera shake compare to my other SLR cameras.
Viewfinder experience
For me one of the most important aspect in a camera is the viewfinder experience, and this is where the Nikon F3 really shines.
First and foremost this camera features a modular design, which allows you to choose from a huge variety of focusing screens and finders. This particular kit came with a HP prism and with my all times favorite waist level finder.
Nikon F3 in leather half case with Nikkor 50mm f/1,4 and HP prism. Waist level finder next to it.
The HP abbreviation stands for High eye Point which provides a proper picture in the finder from the viewing distance up to 2,5 cm. This is especially beneficial for those who wear glasses, having larger than average nose or don’t want to squeeze their eyeball into the finder window. Although I don’t wear glasses, I still find convenient to use this finder too. The downside is that the image is slightly smaller than the one found in the usual prism. The finder window is round shaped, which looks very nice and professional in my opinion . The prism also features a window-blind to prevent light entering and thus altering metering results when shooting on a tripod.
I mentioned that waist level finders are very close to me, I have got used to the work with them with my Pentacon Six. Due to the lack of any additional optical elements (prism, mirrors), this finder gives the brightest and crispest image possible which indeed looks marvelous when using the F3.
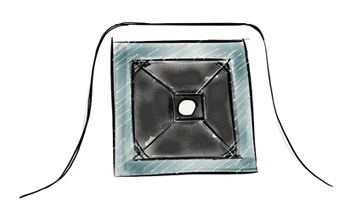
Viewfinder mock
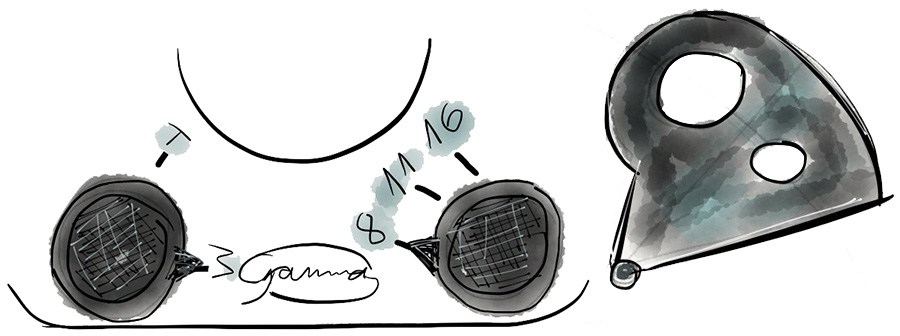
But the best part of this camera is the way it indicates shooting parameters in within the finder.
A small LCD display shows the shutter speed settings, while the actual aperture marking (from the lens itself) is projected into the finder. In other words, you really see your lens marking in the viewfinder. I simply cannot imagine any cooler solution for this problem.
These information windows are built into the body, therefore all compatible finders benefit from them. The same information can be read in the HP prism and in the waist level finder.
Light metering
But how is the light metering done? Traditionally the metering cell/s are located in the prism. Obviously it cannot be the case with the waist level finder, besides all readings are passed from the body to the finders.
In case of the of the Nikon F3, the metering cell is located in the body to support the interchangeable viewfinder design. The cell is located at the bottom of the mirror box facing backwards to the direction of the film. There is a small secondary mirror underneath the main mirror in order to transfer the light for metering. The main mirror is semi transparent at the middle thus the secondary mirror can reflect part of the light to the metering cell. The secondary mirror moves synchronously with the main mirror.
This layout has another benefit of being capable to measure the light reflected back from the very surface of the film being exposed. This way real time exposure control is possible which is essential with TTL flash photography.
1/80s before the first frame
Have you ever tried to load a semi automatic camera with the lens cap on? I committed this mistake quite a few times with my Olymous OM 4. Normally, because the lens cap is on, the camera calculates a very long exposure time so you need to wait a lot before you could get to the next frame. This could be really annoying especially when you are in hurry. Of course, if you set your camera to manual mode during loading, this is not an issue at all, but somehow I walk into this trap quite often.
It seems that the engineers of Nikon knew my kind and built in a mechanism which sets the shutter speed to 1/80s until the frame counter reaches the 0 marking. This prevents me to fire a 30s exposure during film loading.
This can be a disadvantage to those who tries to get the maximum amount of frames out of every roll, but personally I think it is a really nice and clever feature.
Small touches everywhere
The Devil is in the details. If you take a closer look on this camera, you can notice a numerous fine details which aren’t that necessary to operate the camera, but contribute to the overall feeling. They make you feel confident that the camera you are holding is a very special and fine tool.
Some of the little details are not unique to this particular model, but characteristics of the Nikons at this era. For example I like the screw cap of the battery compartment. It has a small plastic holder, which positions the batteries and it has a clear graphical indication, how the batteries should be placed.
There is a lock on literally everything which can be accidentally moved such as shutter speed dial, film rewind, exposure compensation and mechanical shutter release. There is no way, you accidently change a setting or open the camera.
Ever-ready case is the best I have seen apart from 3rd party manufacturers. It can be used as a half case, it lets you see the film notes at the back and it is very stylish.
The window blind on the prism, the mechanical shutter release, the way they implemented multiple exposure control are all very fine details.
Things I don’t like so much
Actually it is very hard to find anything to not to like on this camera, but I have managed to put together a short list.
Weird switches
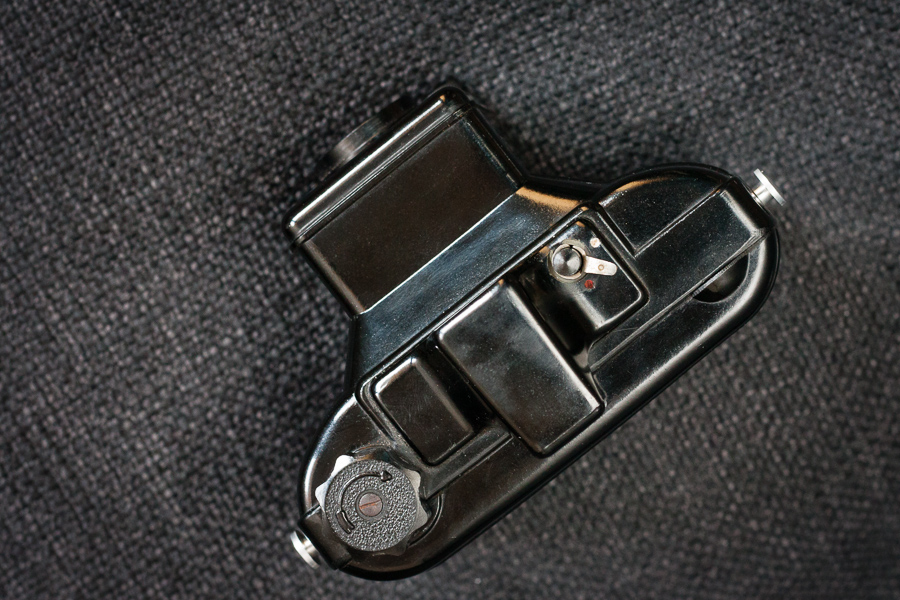
Nikon F3 weird switches (Can you spot the self-timer? it is actually around the shutter speed dial)
Probably because the F3 is a completely new breed of industrial design among Nikon cameras, they had to make compromises here and there. Some switches such as self-timer and the on-off switch are a bit small and less intuitive to use. It took me some time to figure out what is the self-timer switch is doing. But the weirdest button of all is the little red rectangle just below the finder. This is used to illuminate the shutter speed information screen in the finder. It is hard to find and even harder to press during composing a frame. You need to use one of your fingernails to be able to push it.
Hot shoe
Because of the interchangeable viewfinder design, the hot-shoe could not be placed at the top of the prism, therefore and alternative solution was needed. The Nikon F3 has a very interesting non standard flash shoe combined with the film-rewind lever. This part of the camera gives home to the film speed settings and exposure compensation. To use flash, you need a special flash or an adapter.
Test shoots and answer to the scanner crisis
I have asked specifically the guys at my favorite camera shop and photo lab to scan my negatives without over-compressing the resulting jpg files. But they managed to give me once again 50% compressed garbage, therefore I officially gave up on them and decided to give another shoot to my old scanner. This time however, I tried out SilverFast (again) instead of the factory software I used and finally I have found the common understanding with this software. It really gave a new life to the old scanner of mine. I love the possibility to reduce noise by multiple scanning. I still think that this is not the final solution for my scanning crisis, but for the time being it is an acceptable compromise.
Click on the photos for full resolution versions so you can really see the quality of the scans! If you feel like, I would be happy to read your opinion in the comments section about the quality of these shoots and of course about the photos themself.
I know that this is not a fair comparison since the OM4 was released a few years later, yet both cameras represents the top of the manual focus models in their respective brands. Both of them shares the formula of manual focus, electronically controlled horizontally travelling shutter with mechanical back-up, aperture priority auto exposure, somewhat similar light metering system with TTL flash control and separate motor drive. It would be better to compare the titanium versions, but at the moment I have my hands only on the normal F3.
Obviously the OM4 Ti feels more solid despite its lighter weight. It is smaller and you really can feel that this is a weather sealed titanium body. The F3 feels also solid in my hands, but not the same. I prefer my OM 4 Ti when it comes to build quality. Again the F3 titanium would probably compare differently.
The multi-spot light metering system of the OM 4 is also superior to the F3, although I had no issues so far with the Nikon even when using flash. On paper though the Olympus offers more in this aspect. It has to be said that the OM 4 is a newer camera, therefore this comparison is not entirely fair neither.
Olympus OM 4 Ti vs Nikon F3
The viewfinder experience is better on the Nikon due to the fact that not only the shutter speed, but the aperture values are shown in the finder. However the OM4 warns you right in the in the viewfinder when exposure compensation is active while the Nikon shows nothing. Both cameras can benefit from a wide variety of focusing screens, but of course the Nikon has the possibility to change the whole finder.
In terms of electronics, I feel more confident with the Nikon, somehow it feels as a more bulletproof system to me. The clever solution of fix 1/80s for the first shoots before the 0 frame and the very long battery life all gives me a good feeling. The Olympus has a very mature system, but I had some troubles with week batteries and the battery life is also less.
At the end both cameras are excellent choices and I think both can do the job equally well. The F3 offers more features such as mirror lock-up, multiple exposure, interchangeable finders, high eye-point prism, but the OM 4 is smaller, features a very unique and excellent light metering and flash system and has a rather classical look.
But no camera worth anything without compatible lenses. I think that the OM lineup is strong enough, but Nikon is definitely has a serious advantage here. So if you are about to choose between these 2 cameras or similar models, consider your lens needs first.
I own the OM4 and I will need to give back the F3 soon, and while I really enjoyed the time with the Nikon, I still appreciate the Olympus look so my camera-bag remains intact.
Conclusion and recommendation
If you would like modern, but manual focus camera which you can trust with no compromise in features and don’t mind the size, than this is the camera for you. I think the F3 is affordable today and you can use a really impressive set of affordable quality lenses as well. The motor drive is not my thing, but indeed it can make this camera a speed daemon (~5 fps) as long as you can handle the focus. TTL flash photography is also among the features, but keep in mind that you need a special adapter or a compatible unit.
I really like this camera, it is a pleasure to use, it does look stylish and it has the coolest aperture indication in viewfinder ever. So if you like it, grab one in good conditions and you will not need another camera for a long time because this oe will never let you down.
The Fed 5 is one of the most feature-packed Soviet rangefinders which does not require a battery. It is virtually undestroyable, I bet it is going to stay operational way after mankind extinct and the cockroaches rule the world. Since it has no battery an EMP blast cannot ruin it. A nuclear winter could not make any difference neither as the kit lens (Industar-61L/D) is already rumored to be slightly radioactive.
The fact is that the lens is actually is not more radioactive than a potato (not from Chernobyl). It contains a rare-earth element called Lanthanum which indeed has a radioactive isotope but that is very rare and not used for the glass in this lens. Do these properties make the Fed the Ultimate Post-apocalyptic Camera (UPAC)? Who knows, but I hope nobody will need to prove that I was wrong or right about this.
Anyway, I hope I have managed to catch your attention with this little intro, if you want to read my personal experience with the Fed and/or want to be a bit entertained, click more!
My feelings about my Fed5 are very ambivalent, I simply cannot decide that I actually like it and should shoot more with it or I would better keep it in the dark deep down in the cabinet. It was the very first camera in my vintage camera collection and this fact itself grants the special label in my virtual camera catalog.
So here is the camera which kicked in my collector instinct and triggered the process which leads to this classic camera blog you are reading right now, yet I wrote I have mixed feelings about it. Let’s just say that the beginnings of our relationship were not an easy ride.
Never trust your old man
At least don’t trust his film development skills if he did not touch his film development kit like 20 years ago!
Shortly after I received the camera, I and some of my film enthusiasts friends set up a nice shootout in the neighborhood. They came to visit from another part of the country so we did visit all the nice places we could reach in 1 day. Of course, we burned through a couple of rolls of black and white film through our cameras. We had a great time, great locations, superb light and most of all very high level of excitement about the results.
First shooting with the Fed 5 (Ricoh Gr Digital)
We were so eager to develop our films in the bathroom that we completely trusted my father’s rusty memories and we did not “waste” much time for research. We did almost everything right, we kept the development instructions found on the film boxes, but we placed the films into the tank, not in complete darkness, but we used red darkroom lights.
As a result, all of our precious frames were ruined. Only 2 shoots survived somehow but they were also badly damaged by our careless treatment. Later I have enlarged these photos and despite they are not the top quality, I like them a lot. Eventually, these are the first photos I developed myself.
This first-time “failure” was almost inevitable for a bunch of reckless fools who we were. It taught me to be more patient when it comes to film photography and I think it is somewhat the point. You cannot rush with film and old gear, you must wait some time for the results. The waiting for the magic to happen is really spiced up the process to me. If you want the output fast, go pick up a digital camera (I also have some).
Great things
The feature set is quite outstanding among other Fed cameras and I think it provides (on paper) everything which I would ever need in a classic camera.
It has a single stroke film advance lever which is connected to an automatic film counter mechanism. This lever is a huge improvement over the previous film advance knob used in the Fed 3.
The coupled range-finder/viewfinder is also handy, and diopter correction is possible and for the first time, it is not prone to accidental adjustments.
Also, it has a hot-shoe which is quite a big thing, so convenient flash usage became possible, and an additional flash-cable port is also available.
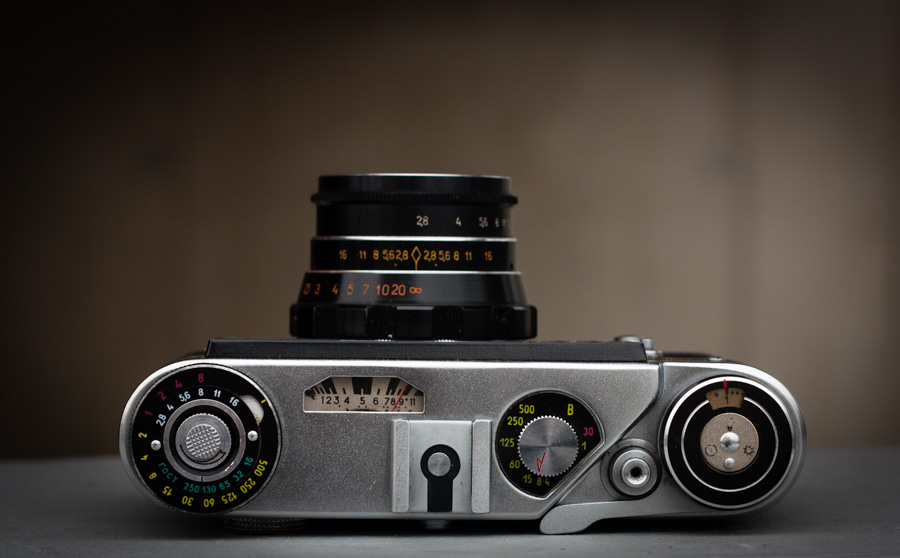
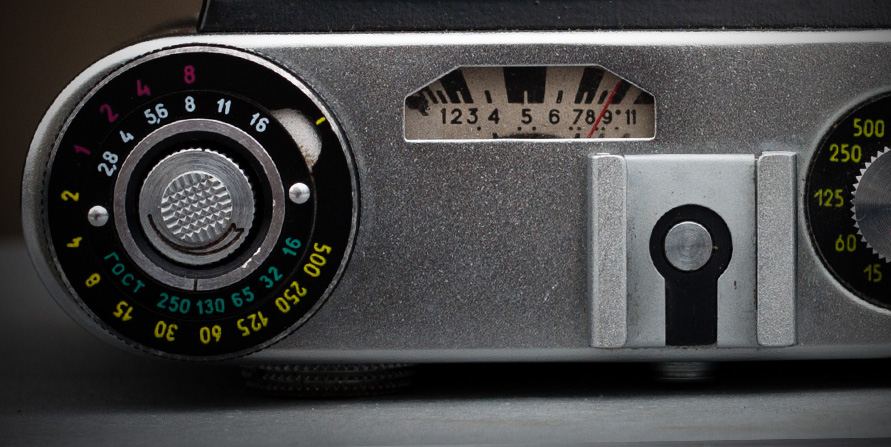
The camera features a built-in light meter which does not require any power source apart from the light it is measuring, so you can never run out of batteries. The needle display of the meter and the related mechanical calculator makes the top plate rather cool looking.
The top plate looks so great that it inspired me to make a little comic where a similar instrument is used as a radiation meter on an imaginary space station.
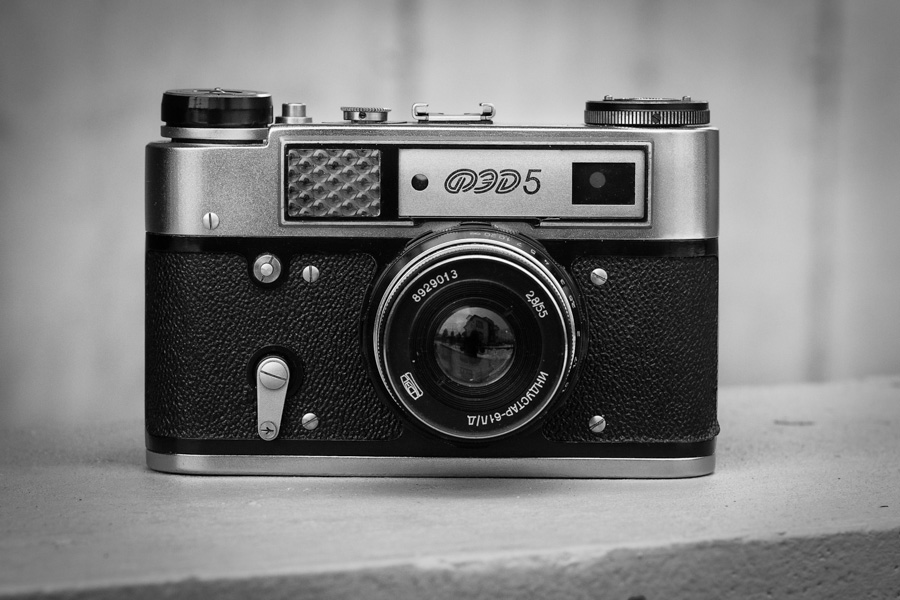
It is ugly
As we all know everything comes with a price. This case the built-in light meter required a hell lot of extra space and eventually, it leads to a new shape which is very unpleasant to my eyes. I like the shapes of the older Fed (1,2,3) models. The older it gets the better it looks (and the closer to the Leica 2). The fed 4/5 are very brick like in my opinion because of the enlarged top part.
Fed 5
Fed 5
Fed 5
Hard to use
Yeap, this camera is nothing but easy to use. First of all the viewfinder is small and dark. Maybe it is only my version, but the glass has a very heavy greenish cast, which holds back a lot of light. In addition, it is very hard for me to see the boundaries of the frame. In general, it is a challenge to compose with this viewfinder. Don’t get me wrong, it is absolutely usable and I had no problem with focusing so far, but the composition is an issue.
The frame counter is a nice to have feature, but it adds some extra resistance when you try to advance the film. It could give you the impression that something is broken inside the camera. I have got used to FSU cameras, so strange sounds and resistance during film advance are not new things to me, but this camera could be scary even for me.
The light meter is completely worthless, as selenium cells do not age well and they became inaccurate after a few decades for sure. Mine is working acceptable in good light, but as it gets darker the more it gets unreliable. I think it is possible to replace the cells, but usually, I can take my time to measure the light with an external meter. Still, it is too bad that the light-meter is actually the reason for the new shape (I don’t like) and now it is more or less serves as extra weight I need to carry.
Conclusion
On one hand, the Fed5 has a poor viewfinder experience and I am not the biggest fan of its shape. On the other hand, this is my first vintage camera. It never failed me and actually, this is the only L39 mount rangefinder camera of mine which has a reliable shutter so I can test such lenses only with this body.
I am mainly an available light shooter, but I like to have a hot-shoe and I already used the one on my Fed.
If you are looking for a rangefinder but you have a small budget and you want to use flash, you can’t go wrong with this camera. It will survive all of us and keep going to take pictures as long as somebody can press the shutter. Plus it can be turned into an effective melee weapon against polar bears.
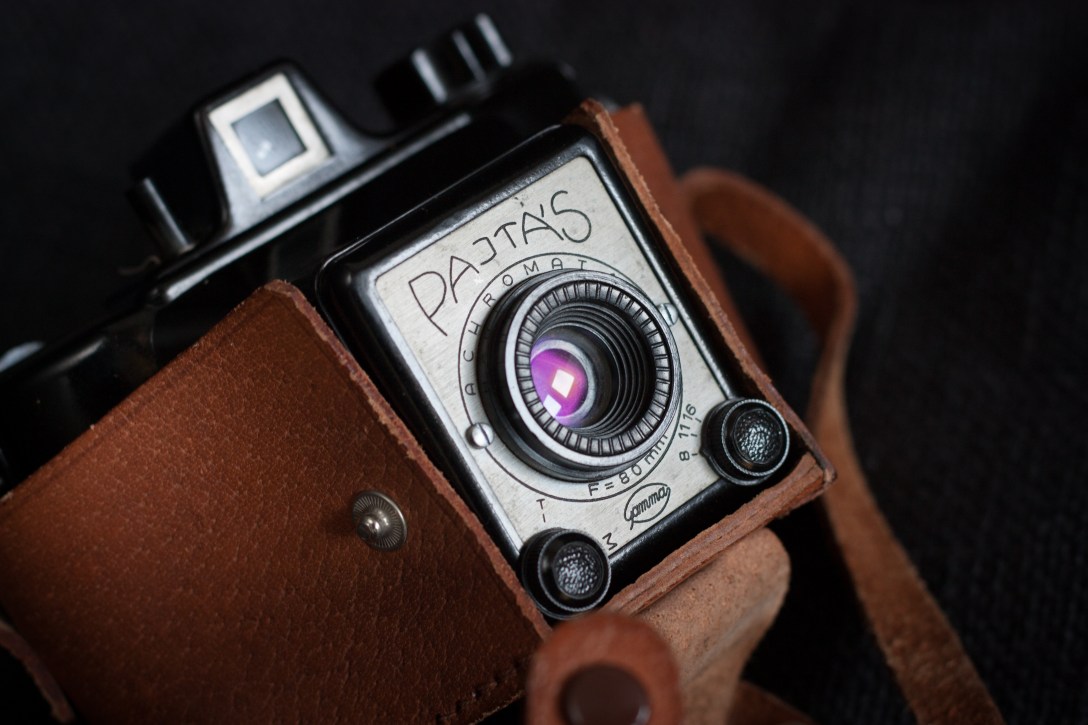
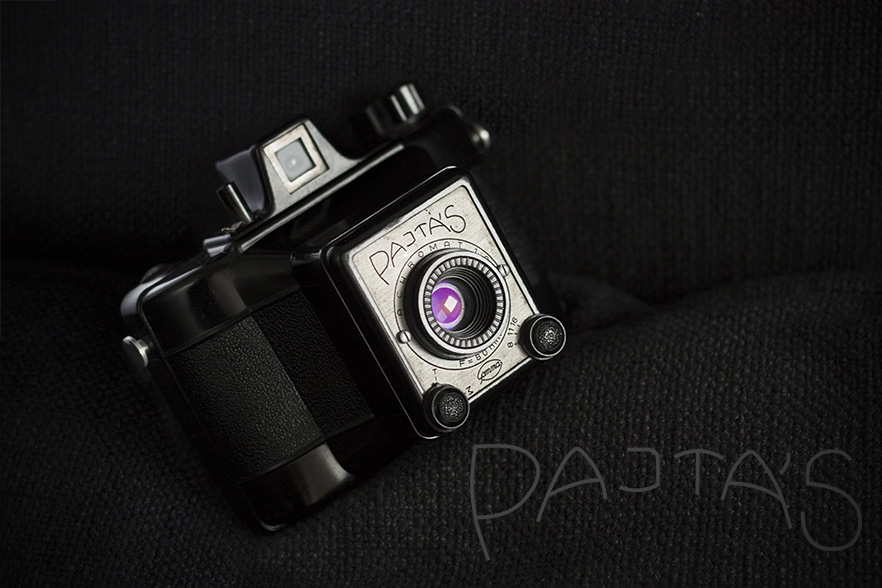
Pajtás is a simple box camera made in Hungary in the 50’s/60’s and as you would suggest this was not a high-end piece of technology even at those times.
Normally I seek for perfection in photography and related equipment and I try to write about cameras here which are capable to produce respectable results or at least represent fine craftsmanship. The Pajtás is far from perfect in any of the aspects of build and image quality, therefore it was not particularly exciting for me until now. So why do I yet write about this camera and most importantly why should you read this review, knowing that I will probably conclude that this camera is crappy but lovely at the same time?
My first and probably strongest reason is that this camera is one of the not too many which were made in my homeland and therefore holds a significant value for me. It also means that this camera is not as well known outside of my region so unless you live in Hungary or nearby, there is a pretty good chance that you have never heard of it.
On the other hand, the Pajtás could be interesting for those who like the history of photography or history in general because of several reasons. First of all this camera features an Achromat lens which can give us an insight into the dawn of photography as the very first daguerreotype cameras had lenses with similar construction. In other words, the images taken through the lens of this box machine can show us a little bit of the taste of the character of the photographs that were taken centuries ago.
In addition, this camera is an iconic relic of industrial design from a not too distant, yet completely different era where the market was driven by strange forces. These were among the toughest years of socialism in Hungary. Production was planned in 5 years cycles and there was literally nothing that was impossible to sell. In these times this camera was the affordable and available option for almost a generation.
Through these glasses, we might see this camera a little different and at least for me, it is special to hold and even better shoot with it.
All in all, if you are interested in history, strange unique cameras, or even Lomography than this article is for you.
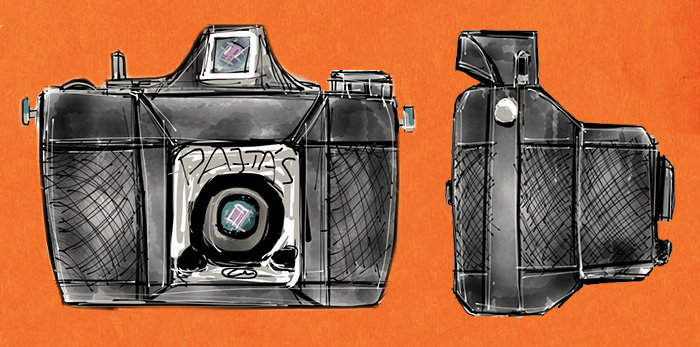
Pajtás drawing
The story
As always I try to collect as accurate information about the history of a camera as possible, but it is possible that I state something wrong. If I did, please send me an e-mail or leave a comment. Corrections are always welcome.
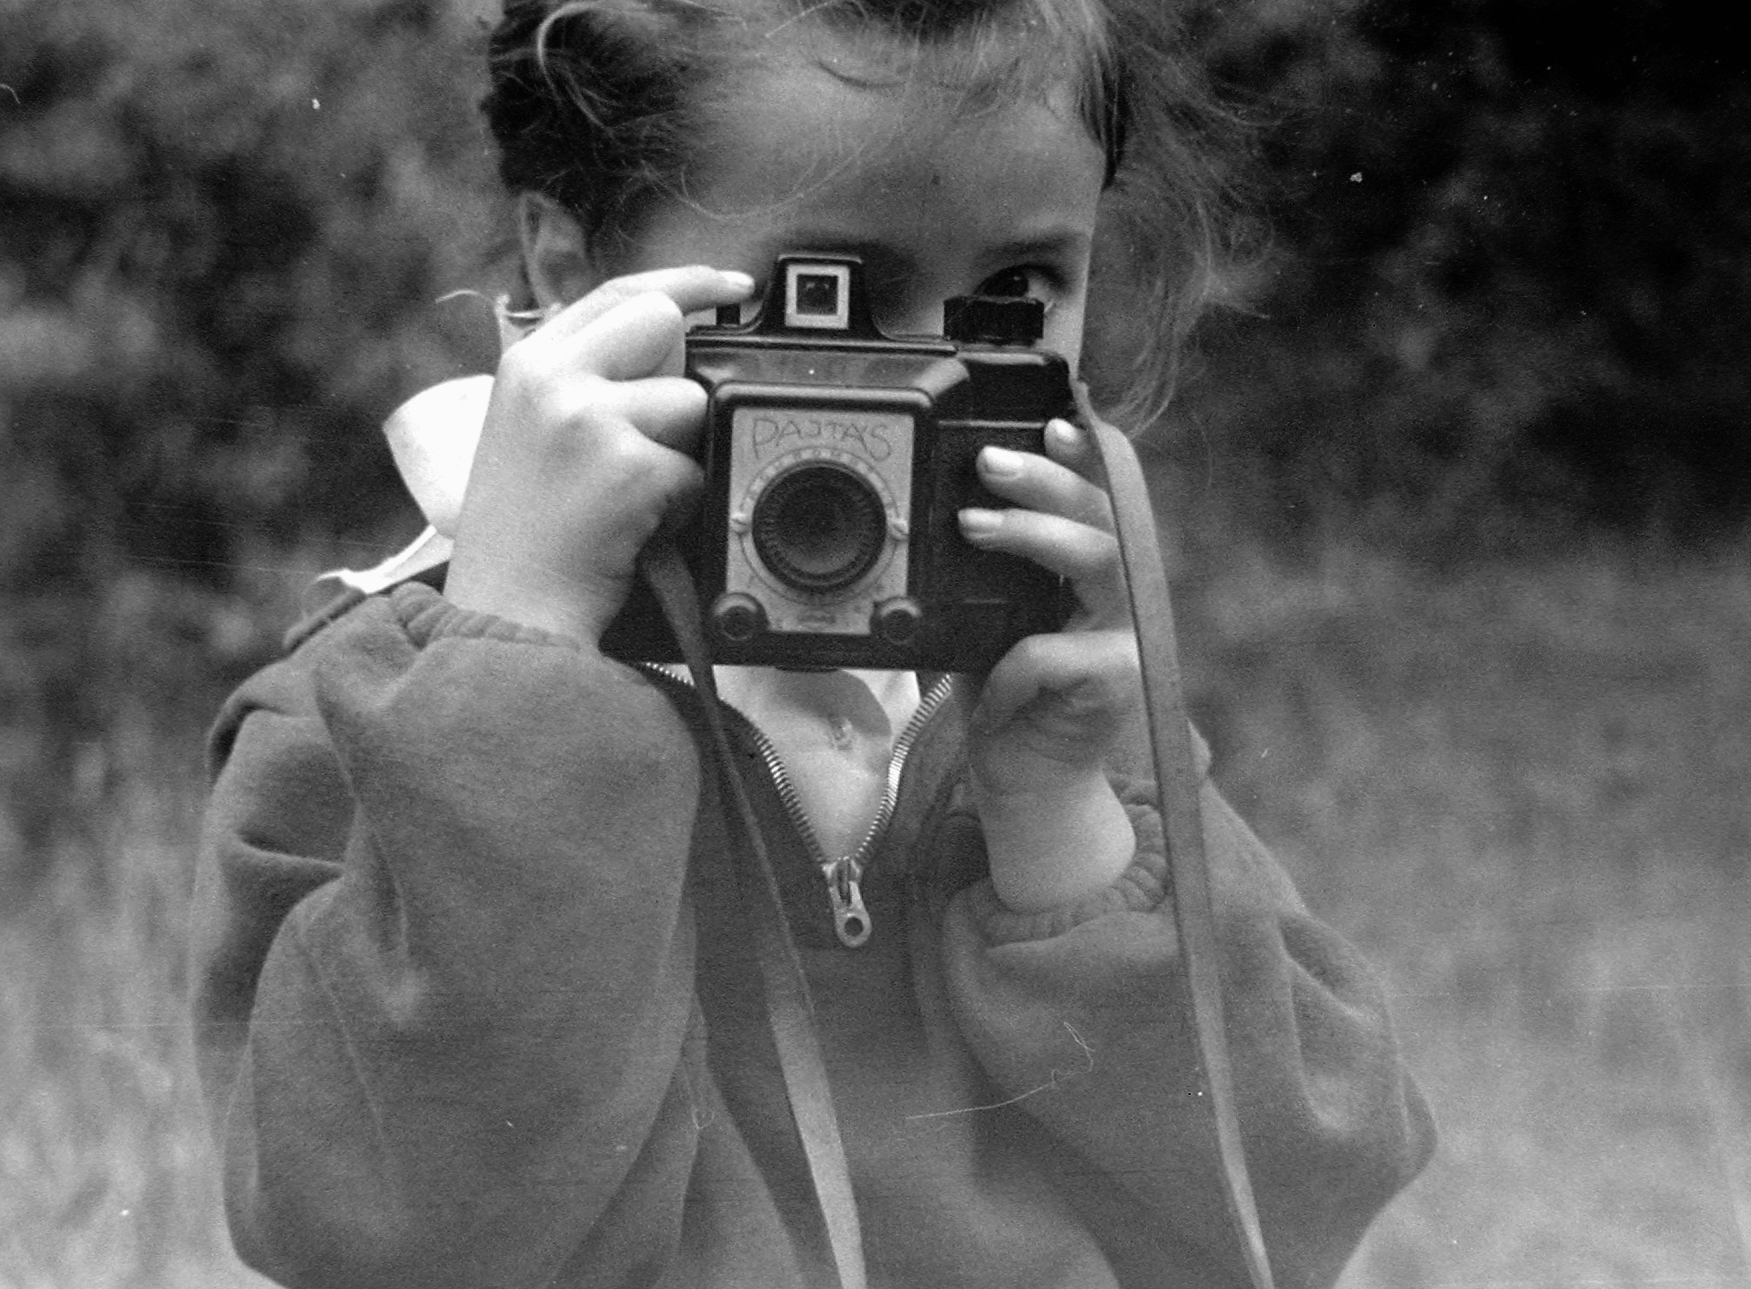
Around 1960, This photo is part of the Fortepan collection of 19041 amateur photos. It is licensed under CC share alike Hungary.
The members of the young pioneer organization were called Pajtás in socialist Hungary. It was the equivalent of the word comrade for young people. Oddly I had no idea about this meaning of this word until I started to read about this camera. But it has to be said that I was born in the 80’s when socialism was already quite melded in Hungary.
As the name suggests, the camera was intended for a young audience and it was extremely successful. It was affordable, reliable and most importantly available, so many had received a Pajtás as a present for various occasions such as graduation.
The camera was made between 1955-1966 by Gamma although the emblem has changed to FFV from 1960. FFV stands for Fővárosi Finommechanikai Vállalat (Metropolitan Works for Precision). Interestingly Gamma is still an existing company, even though they don’t manufacture cameras anymore.
The designer was János Barabás (1900-1973) who was mainly responsible for lens design at Gamma and we can thank him for the many great lenses used by Hungarian cameras.
The price of the camera in 1964 was 160 HUF and it was possible to buy a leather case for an additional 45 HUF. [1]
The camera is almost as simple as possible. It is made of Bakelite which allowed mass produce it on a low price.
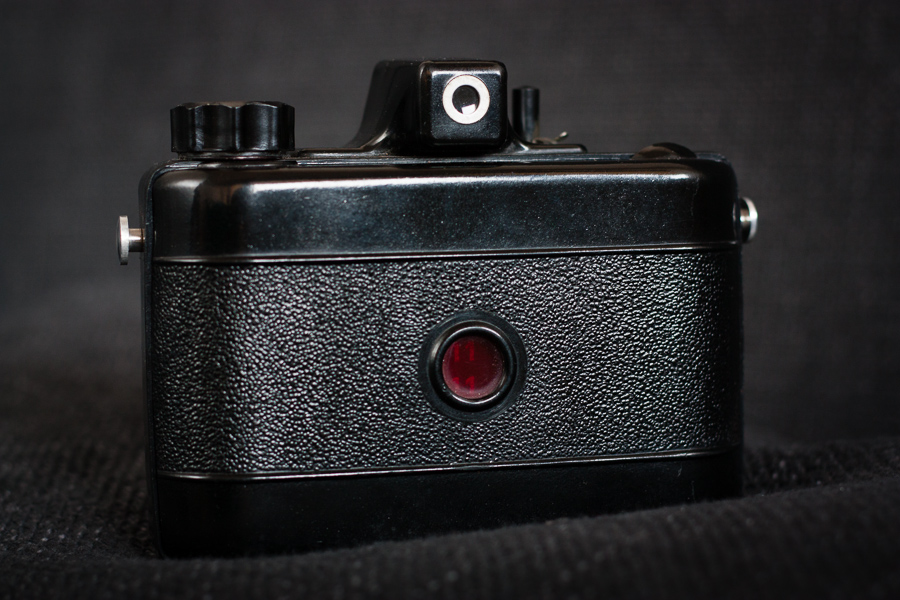
The back has another nice feature, a little red window which keeps us informed about the number of the actual frame. Basically, the back of the film (in fact the covering paper) is visible through this window so you can see the printed numbers on the paper. While this is a robust solution, it is advisable to cover this window most of the time, especially if you use higher sensitivity film.
The film can be advanced by a knob at the top of the camera while you have to keep an eye on the frame counter window. There is no other way to determine how much you need to advance the film but to look at the window. This mechanism also makes it easy to take multiple exposure or overlapping shoots.
Pajtás film advance knob
Pajtás shutter release
The shutter release is a simple column and a rotating switch around it with two positions. The red dot means locked and obviously, the white mark indicates that the shutter is free to press.
Viewfinder
Since it is not possible to focus with this camera, the viewfinder is rather simple. It contains a lens for correct framing, but this is not a great pleasure to use. It is bright enough but considerably blurry to my eyes. To be fair, this viewfinder does the job just well enough. It gives you some approximation about what will be on your photograph and if your subject is not too close the parallax error is not significant.
Pajtás top
To be fair, this viewfinder does the job just well enough. It gives you some approximation about what will be on your photograph and if your subject is not too close the parallax error is not significant.
(Left) shutter-speed and aperture settings, (right) aperture mechanism concept
There are only 2 shutter speeds available M (Moment)1/30 sec and T (Time) which stands for bulb. There is a better offering in aperture settings though you can select f/8, f/11, and f/16 options. Both the shutter speed and the aperture settings can be selected with dedicated dials on the front plane of the camera right below the lens.
Pajtás in leather case
All apertures are completely rounded and as far as I can see (without disassembling the camera) it is done by a metal plate with 2 holes on it. When the maximum f/8 aperture is selected, the plate is completely off the way, but as you turn the switch for selecting smaller apertures the appropriate hole slides into place behind the lens.
Pajtás in leather case
The leather case is pretty nice, it protects the camera very well. In the meantime, it has a hole in the back to read the frame-counter without dismounting the camera. My only concern is that you cannot separate the front part of the case (covering the lens) so you cannot use it as a half case.
The lens
The lens is an 80mm f/8 Achromat manufactured by MOM (Hungarian Optical Works). It is a classical landscape lens consisting of 2 elements: a positive crown and a negative flint element.
The lens which was designed and manufactured by Charles Chevalier for Daguerre was an achromatic landscape lens in the 1830s. Although that lens was different from the one that can be found in the Pajtás, the basic concept is the same. The achromatic lens was a huge step because for the first time it corrected some of the main aberrations which can be found in an optical system.
Achromatic doublet
An achromatic lens or achromat is a lens that is designed to limit the effects of chromatic and spherical aberration. Achromatic lenses are corrected to bring two wavelengths (typically red and blue) into focus in the same plane.
These lenses are typically featuring low apertures because the rays entering the lens far from it’s axis need to be cut off by the stop in order to maintain image quality.
The lens used in the Pajtás camera gives no big surprises. It is focused to the hyperfocal distance so everything on the photo from some near distance will be sharp. It is also supported by the relatively small aperture, that is why depth of field is quite big.
The lens looks coated as I can see some purple cast on it when the light is appropriate. In general, it is not too prone to flare. Of course, there are not many elements in the lens so there are not many surfaces to bounce and reflect on. On the other hand, the interior of the camera is highly reflective so flocking could probably improve image quality and contrast.
Image quality and sample shoots
As you would expect, the image quality is not at all amazing. It is decent from a camera like this and I have to admit there is some charm of the strong character. Sure, most of the effects produced by the lens can be mocked by clever applications on any smartphone, but that is not the same. You must know that you work with a high random factor when you shoot with this camera.
So far I shot only 1 roll of Lomo Lady Gray 400 film with this camera as the first trial. In general, an ISO 400 film is probably too fast for this low shutter speed, but since winter is coming and we are having many dark days it was a good choice. I have some Hungarian Forte Supercolor 100 film in my refrigerator (expired in 1995) which could be a stylish combination with this camera.
Distortion test (Graz, Austria), Pajtás, Lomo Lady Gray 400, Kodak D76, Canoscan 9900F
The lens is sharpish in the center but blurs everything off around the edges. It sometimes even creates the impression of shallow depth of field, but this is not the case.
Distortion is apparent, but I couldn’t hold the camera perfectly perpendicular against the staircase and my scanner is also not the best in keeping the film flat. Anyhow, I think that the geometrical distortion is not the biggest issue compromising image quality here.
The numbers and circle signs on this shot (almost all shots have some) belong to the back of the covering paper of the film. I am not sure how they managed to get to the photos, but they did. If anyone has any idea, I would be happy to read it in the comments.
Also, there are signs of light leaks on almost all of my shots. This most likely happened, because the camera does not seal light perfectly. I am seriously considering to use some black tape next time I put the film into my Pajtás.
There is no flash connection on this camera, so in theory, you cannot use flash with it. On the other hand, the 1/30 of a second is slow enough to fire flash manually at the right time. But probably the best strategy is to shoot in bulb mode in very low light or in complete darkness and fire the flash while you keep the shutter release pressed. I have done some successful experiment with the latter technique so I can recommend giving it a try.
Conclusion and recommendations
The Pajtás is not a rare camera, it is extremely cheap and just as light to carry. It is extremely easy to use as well. I believe it is even able to produce nice images in good hands.
Because of the simple construction there is literally nothing which could break in it. It is relatively safe to pick one with good cosmetics as it is almost certain that it will work properly. Eventually, this is not the camera we would expect completely accurate shutter speed from.
My only concern is the back which is a bit flimsy to me, but it can be secured by some black tape. And of course the Bakelite body is very rigid and therefore fragile, so it is advisable not to drop it.
If you like box cameras and the imperfection of the images they produce, or you are a fan of the retro design, then this camera could be a good choice for you.