To follow up the previous post where the focus was on the retro stylish look of the Yashica TL Super, here are some of the shoots out the roll which was in the very same camera. All of these photos have been taken during our last visit to Hungary in the middle of October. The film is Fuji Superia 400, which is lately my choice of color negative film due to it’s versatility and because I had quite a few rolls of it left from my Irish trip from last year. This film works great for me in almost all circumstances from low light situations (when combined with fast glass) to sunny daylight. This time I had mostly enough though not plenty of light as the weather was generally overcast. But the colors of the autumn are well retained and the scattered light helped with the portraits.
I used a single lens, my big favorite the Pancolar 80mm for the entire roll. I try to force myself to carry only one lens at the time. This helps me learn the quirks of the given setup by focusing on it for a longer period. Also if I have only one lens available I need to solve every situation with it which could help me leave my comfort zone and thus contribute to my creative development.
This lens has it’s caveats and sweet spots to learn as well. Others may observe these differently as many aspects of the character of a lens can be judged subjectively. I find myself shooting with the Pancolar most of the time wide open or close to it. This is where the character is mostly evident in the form of beautiful smooth bokeh when the background is right. The lens is plenty sharp in the center at least for my eyes and subjects. Stopping down to medium apertures where the depth of field is still small enough to have some background blur makes it evident that the iris is very far from circular. This case the background can be very busy which is not always desirable. In addition contrast can be too high to my taste especially for portraits.
Of course the photos from this post were not the only ones from this roll. The Yashica was with me on a family hike in the south of Austria where both the light and my subjects were different. I will publish a selection from those shoots in the next post with the hope that I can show the versatility of this film and my single lens approach.
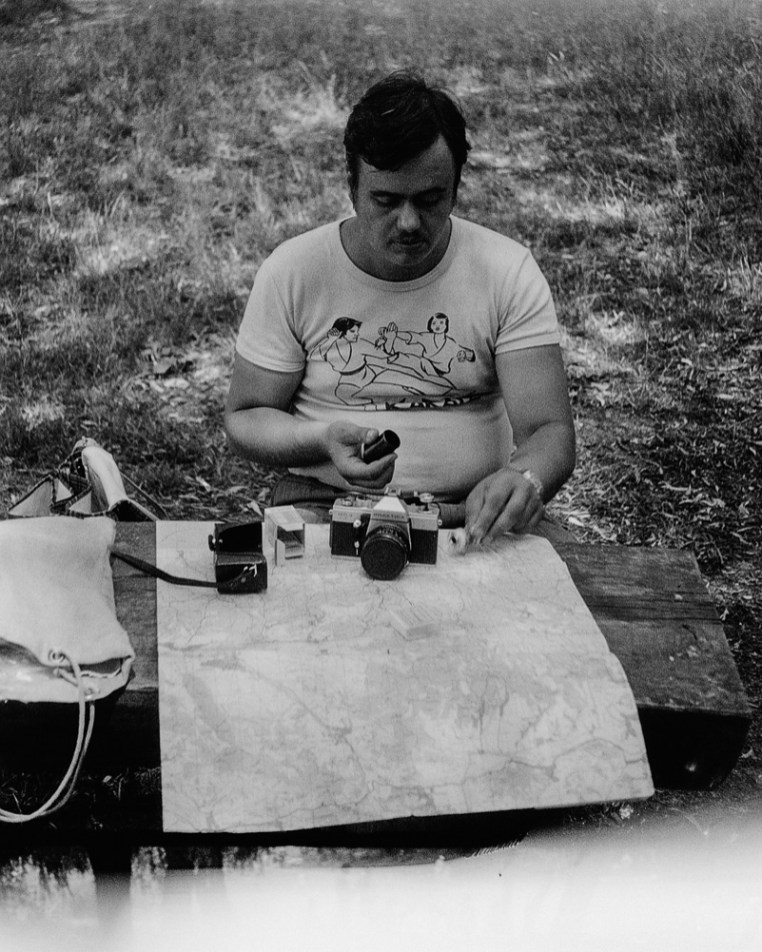
We were on a family visit at my father a few weeks back from now. As usual we had a great food and many things to talk about. Also as usual I have spotted something in his garden. A stack of beautify worn wooden boxes many of which had navy green painting and interesting signs on their sides. I was staring them for a brief moment with my suspicious look (I practice a lot in the mirror). I was immediately considering all possible combinations and alignments of them in relation to the direction of light and possible angles of framing. I must have had a look on my face of a hardcore Stanley Kubrick when he discovers a perfect massive monolith in his fathers’s backyard after a long night watching Space Odyssey. I asked if I could use them as background for a few shoots and also about their origin and current use.
As it turned out these were military ammunition boxes originally, but now they are used to store and transport machine parts new and used alike. This meant that there were plenty of scratches, oil marks and shiny metal particles all over them which made them even more exciting to me. At this time they were all empty so I could use them how I wanted. I always have a camera with me and because my Leica was in service I was revisiting old friends from the shelf. That day my bag hosted my lovely Yashica TL Super paired with the mighty 80mm Pancolar. This lens is a sole reason why I still have an M42 mount camera and this Yashica is a great match indeed.
Anyways, I took a few shoots about the Yashica and a series about my father’s Mometta II and I thought they are worthwhile to feature them on the blog. If you would like to read my Yashica TL Super review, you can find it here. These shoots were all taken hand held with my wife’s Sony NEX 6 and I had no softbox or any reflectors with me. Luckily the weather was overcast and overall I am happy with the results. I am curious thought what will I find during the next family visit and if I should better prepare myself with a complete studio setup :-).
Since then I finished the film in the Yashica as well as from the Zenit3M I used recently. The Leica is also back now and I am looking forward to try it. In any case when the film comes back from the lab and I find some time to scan and edit, I will show the results from this kit as well.
The members of the Mometta camera family are really quite special to me. There are not so many cameras were made in Hungary at the first place, but since these are 35mm rangefinder cameras with a quite unique design it was only a matter of time until one appeared on the blog. I could get my hands on the Mometta II which is possibly the most widely available model, but it features all the main characteristics of the entire lineup. In addition to the great camera finding, there was a roll of film in the camera possible older than four decades. If you like to know what was on it, keep reading.
Hungarian Leica
The first camera in the line was called Momikon (1954-1956) which name follows the same pattern of the Zeiss Ikon as the company behind the camera was called Magyar Optikai Művek (Hungarian Optical Works) MOM for short. Later the name has been changed to Mometta in 1955.
There were several variants produced in a relatively small amount of time, but the differences were not fundamental. Possibly the biggest change was in the last generation with the Mometta III whereby an interchangeable M42 mm lens mount was introduced. Production was ceased in 1962.
The goal with the design of the Momikon was to create a compact 35mm camera which can approach the ruggedness as well as the image quality represented by Leica on a much lower price point. It was targeted that the camera was somewhat affordable by an ordinary factory worker. The price of a Mometta in 1955 was 1490 Hungarian Forints and an extra 190 HUF for the ever-ready case. In contrast, the average monthly gross income at the time was around 1080 HUF. Of course, the lower price point did not come without compromises such as the fixed lens, no flash sync etc.
Body design
Mechanical comparison of Mometta and Leica
The camera has an adorable, in my opinion, borderline funny look. It is a little fat due to the unusual alignment of the film transfer. The film has to bend in an angle which in theory provides better film flatness in combination with the strong film pressing plate.
The image size is also quite irregular. The frame is 24x32mm as opposed to the normal 24x36mm. I could not find any information about the reasons for this design choice. I assume it has to do something with film efficiency. The 4mm per frame does not seem a lot, but it could mean that 40 frames can be made with a roll for 36 regular shoots.
It can be a problem for shooting positive film as dia frames will be impossible to find for this size.
The viewfinder is combined with the rangefinder and it is surprisingly big and bright considering the age and class of this camera. The rangefinder is less complex compared to the ones used in Leicas, but it is a very durable construction. Adjustments are supposed to be relatively simple to carry over and they are rarely required.
The ever-ready case is simply beautiful in my opinion. It is small, stylish and protects the camera very well. It even has a little pocket with a small white plastic plate in it for quick erasable notes. My only problem with it that the front part cannot be detached and so it cannot be used as a half case even though the body does not feature hooks for a neck strap. (The Mometta III has rings on the side of the camera for the strap.)
The lens
The lens is a 50mm f/3.5 Tessar type construction with an anti-reflective coating called Ymmar. The lens was calculated by Imre Újvári and it has a decent reputation. From the photos I have seen taken with it, the lens is very interesting indeed. Stopped down has enough sharpness for most scenarios while wide open in some cases it has a swirly bokeh which is beloved by many. On most versions except the very early ones, the lens barrel is quite deep and acts as a lens shade.
The lens is built into every model except the Mometta III. In this mark III version, an M42 thread mount was introduced, though the only lens I could find reference of for this camera was the Ymmar 50mm.
The film inside
I could not tell how many shots were left in the camera or if there were a film in it at all, I decided to shoot some random frames with it and then try to rewind.
It turned out that there was a roll of Fortepan 27 (17 Din/ ISO 40) black and white negative film in it. I am not sure about the age of the film, but from the design and based on the age of the camera I believe it had been loaded between the early 60’s to 70’s. In any case, this film could be at least 40 years old and no one has ever seen these photos until now.
The canister was so handsome that I tried to avoid damaging it for all costs. So, I tried to retrieve the film with a film retriever. Ultimately I have managed to get the film out without destroying the canister, but I think some light might have got into it.
As I found out, only a few shots have been taken on this role and even those got some light leak marks. But the sharpness and the crazy bokeh of the lens can be seen already from this limited sample. Also, it impresses me how well this film survived. It was exposed and kept undeveloped over decades in probably far from ideal conditions, yet they turned out relatively fine.
Random photo with the Mometta II in 2016
In addition to all that new shoots like this were also possible with this film.
Forte, by the way, was a Hungarian photochemical company manufacturing papers and film from 1922 to 2004, but unlike Film Ferrania in Italy, they have not been revived by crowdfunding and the factory looks like a post-apocalyptic site nowadays (click if you are interested).
Final thoughts
This Mometta II was bought by my father on a flea market and for now, he keeps it for himself. Therefore I only had a very short time to play with it. It had a very slow shutter, but nothing which could not be fixed with some maintenance work, so I undoubtedly got very interested. I will definitely find a way to spend more time with this little gem and take more photos with it.
The Mometta II is not particularly expensive, but it has a higher asking price then FSU cameras due to it’s relative rarity compare to them. The shutter is not synchronized so flash photography could be an issue as well as finding dia frames because of the unusual frame size. Supply of spare parts could also be a hard, therefore repairing and maintaining them might be problematic.
But for someone like me who likes to have a small easy to use good looking (not to mention special) camera in the bag for available light photography, it is certainly an interesting option.
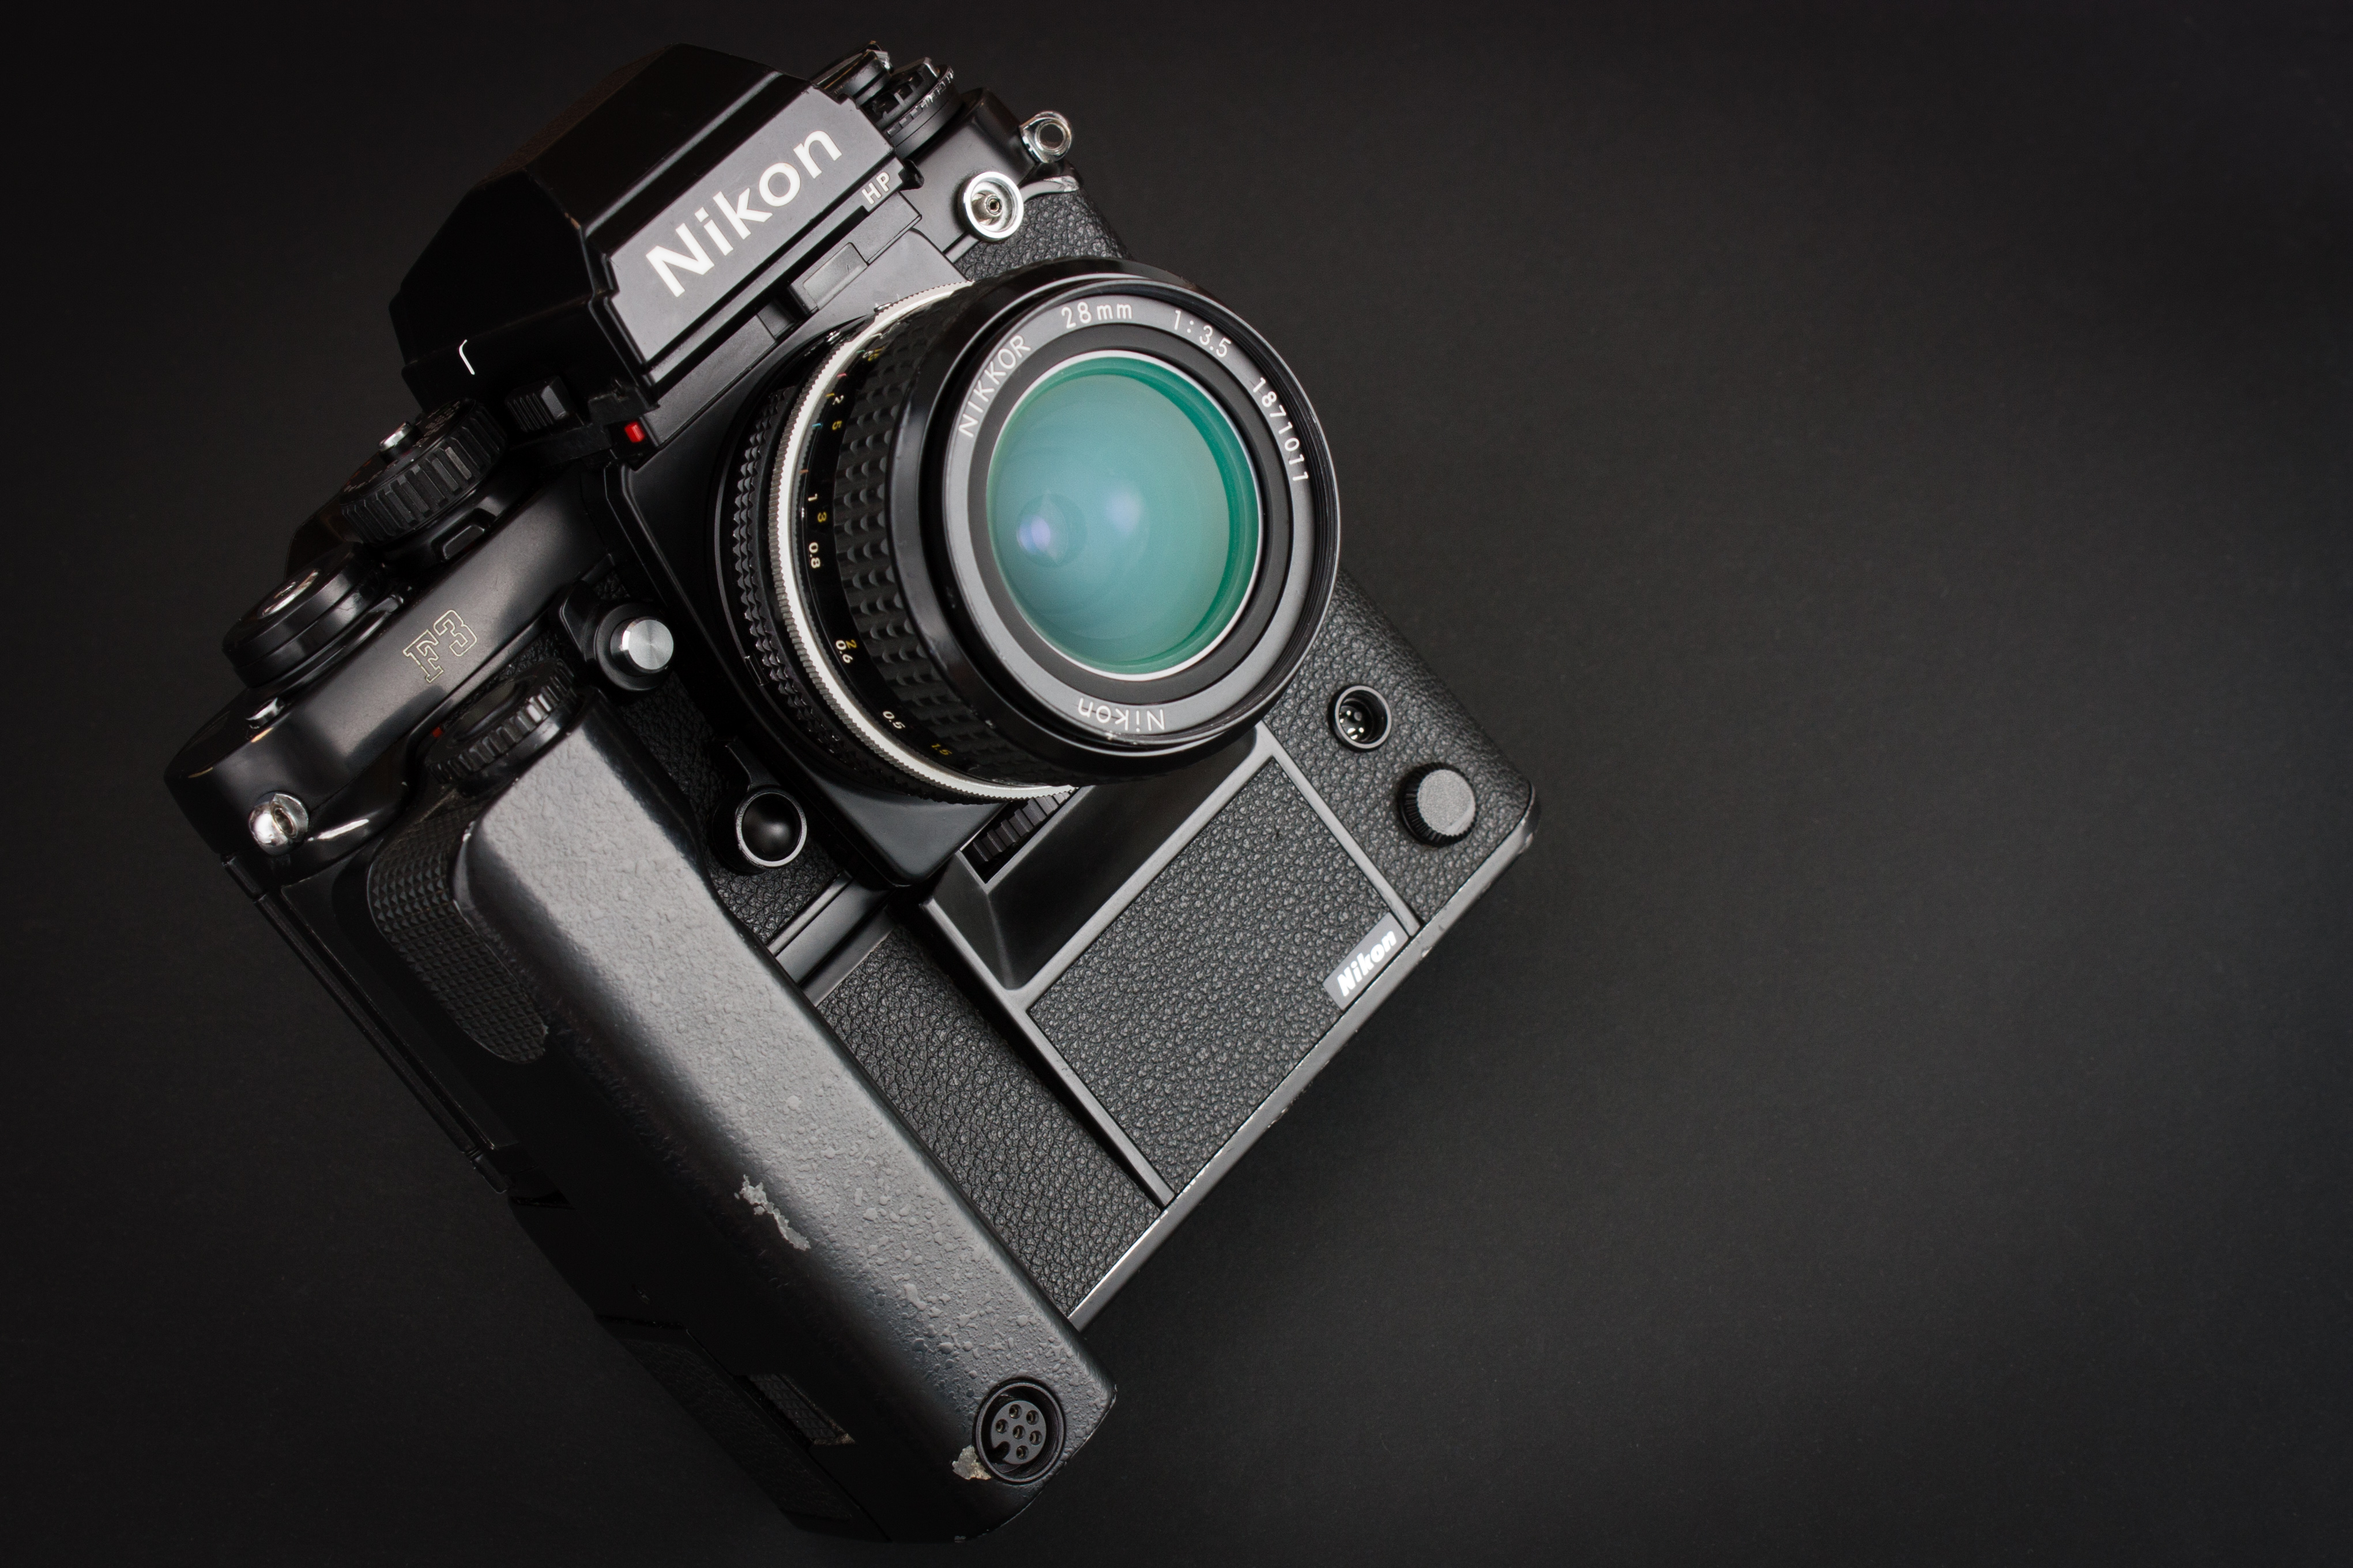
This classic camera was undoubtedly one of the biggest and most dividing celebrity of the 80’s. At least among professional 35mm SLR cameras of course. It created quite significant waves in the world of professional photography because with it Nikon finally put the vote on automation and electronics as the new lead design principles.
Nikon and me
I am not dedicated to any brands, so there is no particular reason why I haven’t wrote about any Nikons until now. In fact my very first camera was a digital Nikon Coolpix 3500. It was hideous to use and broke horribly, but still it was my very first camera.Not much later I owned for a short time a Nikon F75 which was the first and until now the only camera which I’ve ever sold. It was a great tool, but it had a monstrous hunger for not so cheap CR2 batteries and it was way too modern for me anyway. The little Coolpix is still lying around somewhere in a box with serious electronic injuries. Who knows just like any other (now classic) camera, maybe one day it will get repaired too.
By the time it was very hard to accept these changes by the majority of professionals who simply did not trust anything which was depending on batteries more than a powering of a light-meter. It is a bit hard to imagine today but at that time it had a perfect sense. But the change was already on the doorstep and it was inevitable. The previous F models were already masterpieces mechanically anyway, there was very little room for possible improvements in the purely mechanical realm.
The F3 was their first electronically controlled single digits F camera and despite of the early resistance by the community, it found the way to tremendous success and changed the face of the camera market once and for all.
In fact what Nikon did with this camera was nothing really revolutionary or unexpected as all the technology was already existed and tested by lower-end models of theirs or by the competitors. They simply selected the best components available and remixed them in a very attractive package.
I could write a lot more about the exciting history of this camera, but there are other more competent people who just did it very well before of me. So instead of a week attempt of a complete and deep introduction of this camera, I simply try to give an overview filtered through my own experience.
I can faithfully recommend this site for the historical overview and for all possible technical details.
Nikon F3 HP official structural illustration
How did I get this camera
Nowadays my collector nature is being held a back because of the lack of time and dozens of higher priority projects. This is not necessarily a bad thing, sooner or later I need to settle and start to master the gear I already have. The negative side-effect is that I am running out of (new) old cameras to review. But fortunately it turned out that I can try out and write about a camera without actually owning it. I have a good friend who has a grandfather with a really good taste and since he moved to digital he gave his old Nikon gear to his grandchild. At first I just spot a box of T-max on the shelf at the place of Andrea’s and I asked her in which camera she intend to use it. Eventually she showed me a really nice bag full with vintage gear including the F3 with motor drive, many great lenses, matching flash unit and many more gems. Few weeks later (when I have recovered the shock, found my jaw and gathered enough courage) I asked her if I could try out the gear. She said yes, so the post you are reading now couldn’t be written without her kindness.
Data sheet
Type TTL auto-exposure 35 mm. Single Lens Reflex Camera.
Produced 1980-2001
Film type 24mm x 36mm
Weight 780g (body without lens, but with HP prism, batteries and film loaded)
Dimensions (HP version) 148.5 x mm height, 101.5 mm width, 69 mm depth
Shutter speeds 8s-1/2000s, B, Aperture priority, 1/60s can be used mechanically without batteries
Sync speed 1/80s
Viewfinder various interchangeable finders
Exposure meter full-aperture TTL centre-weighted exposure measurement at (80/20)
Batteries Two 1.5V silver-oxide batteries SR44 (Eveready EPX-76) or alkaline manganese batteries LR44
Self-timer 10s delay electronic self-timer
Hot shoe special accessory shoe on the rewind knob supporting TTL flash units; PC synchro socket.
Motor drive optional MD4 motor drive up to 5.5 frames per second with mirror lock-up
Mirror lock-up
Depth of field preview
AE-lock
Multiple exposure lever
Exposure compensation
First and second impressions
When I first had a closer look, I was not exactly impressed. The camera was bit dusty and showed marks of very extensive use. Nothing serious, but I really had the impression that the camera may had some mechanical issues. Nevertheless I took my time, and cleaned the dust and smudges carefully. During the process I had to realize two very important things. First of all never give up on an F3, these cameras are very hard to kill, no matter how they look like there probably nothing wrong inside. Second of all it has many buttons and switches which I had no idea what are they good for. I have seen many unusual designs like left handed Exactas and other marvels, but the F3 control layout gave us some rounds with Google and the user manual.
Nikon F3 with MD-4 motor drive, Nikkor 28mm f/3,5 and HP prism.
I also cleaned the lenses belonging to the F3 and since they were protected with filters all of them were in an excellent condition. They feel a bit dry to me in terms of lubrication, but otherwise focusing very smoothly and precisely. Maybe they act completely normally, only I am not so familiar with Nikon AIS lenses.
After I finished the cleaning of the gear and finally powered up the camera, the moments I spent with trying out every part of it lead me to the conclusion. You can trust this camera. The more I use it, the more I trust. The sound of the shutter, the feel of the advance lever, the snappiness of the motor drive all ensure this feeling. After all this image what a professional camera should show about itself.
Things I love about the F3
As I said the Internet is loaded with much more established articles about the Nikon F3, therefore the very best I can do is to share my personal opinion about it. Let’s start with the things I most appreciate in this camera.
Look and feel
Nikon F3 in leather half case with Nikkor 105mm f/2.5 and HP prism.
The F3 is an important milestone in the history of Nikon, but not only because of the technological aspects. This was the first Nikon which appearance was designed by the Italian designer Giorgetto Giugiaro. He introduced the red mark on the grip, which is an unmistakable characteristics of every Nikon SLRs since then. Indeed, this camera looks different from every previous models and can be distinguished with ease from the competitors as well.
Personally, I like the previous F shapes better, but I have to admit that the F3 looks all right and it also handles great at the same time. The small grip contributes to the secure holding, and I find it very clever how it fits together with the motor-drive.
Butter smooth operation (excellent mechanics)
Every part of the camera carries the marks of mechanical excellence. Even the smallest moving piece is doing its job with minimal resistance and completely free from any inappropriate noise.
There is virtually no difference in the operation of the film advance lever with and without film loaded into the camera. It is really that smooth that you can have a hard time to say that the camera loaded.
The mirror flips up quietly and gently as well, it produces very little camera shake compare to my other SLR cameras.
Viewfinder experience
For me one of the most important aspect in a camera is the viewfinder experience, and this is where the Nikon F3 really shines.
First and foremost this camera features a modular design, which allows you to choose from a huge variety of focusing screens and finders. This particular kit came with a HP prism and with my all times favorite waist level finder.
Nikon F3 in leather half case with Nikkor 50mm f/1,4 and HP prism. Waist level finder next to it.
The HP abbreviation stands for High eye Point which provides a proper picture in the finder from the viewing distance up to 2,5 cm. This is especially beneficial for those who wear glasses, having larger than average nose or don’t want to squeeze their eyeball into the finder window. Although I don’t wear glasses, I still find convenient to use this finder too. The downside is that the image is slightly smaller than the one found in the usual prism. The finder window is round shaped, which looks very nice and professional in my opinion . The prism also features a window-blind to prevent light entering and thus altering metering results when shooting on a tripod.
I mentioned that waist level finders are very close to me, I have got used to the work with them with my Pentacon Six. Due to the lack of any additional optical elements (prism, mirrors), this finder gives the brightest and crispest image possible which indeed looks marvelous when using the F3.
Viewfinder mock
But the best part of this camera is the way it indicates shooting parameters in within the finder.
A small LCD display shows the shutter speed settings, while the actual aperture marking (from the lens itself) is projected into the finder. In other words, you really see your lens marking in the viewfinder. I simply cannot imagine any cooler solution for this problem.
These information windows are built into the body, therefore all compatible finders benefit from them. The same information can be read in the HP prism and in the waist level finder.
Light metering
But how is the light metering done? Traditionally the metering cell/s are located in the prism. Obviously it cannot be the case with the waist level finder, besides all readings are passed from the body to the finders.
In case of the of the Nikon F3, the metering cell is located in the body to support the interchangeable viewfinder design. The cell is located at the bottom of the mirror box facing backwards to the direction of the film. There is a small secondary mirror underneath the main mirror in order to transfer the light for metering. The main mirror is semi transparent at the middle thus the secondary mirror can reflect part of the light to the metering cell. The secondary mirror moves synchronously with the main mirror.
This layout has another benefit of being capable to measure the light reflected back from the very surface of the film being exposed. This way real time exposure control is possible which is essential with TTL flash photography.
1/80s before the first frame
Have you ever tried to load a semi automatic camera with the lens cap on? I committed this mistake quite a few times with my Olymous OM 4. Normally, because the lens cap is on, the camera calculates a very long exposure time so you need to wait a lot before you could get to the next frame. This could be really annoying especially when you are in hurry. Of course, if you set your camera to manual mode during loading, this is not an issue at all, but somehow I walk into this trap quite often.
It seems that the engineers of Nikon knew my kind and built in a mechanism which sets the shutter speed to 1/80s until the frame counter reaches the 0 marking. This prevents me to fire a 30s exposure during film loading.
This can be a disadvantage to those who tries to get the maximum amount of frames out of every roll, but personally I think it is a really nice and clever feature.
Small touches everywhere
The Devil is in the details. If you take a closer look on this camera, you can notice a numerous fine details which aren’t that necessary to operate the camera, but contribute to the overall feeling. They make you feel confident that the camera you are holding is a very special and fine tool.
Some of the little details are not unique to this particular model, but characteristics of the Nikons at this era. For example I like the screw cap of the battery compartment. It has a small plastic holder, which positions the batteries and it has a clear graphical indication, how the batteries should be placed.
There is a lock on literally everything which can be accidentally moved such as shutter speed dial, film rewind, exposure compensation and mechanical shutter release. There is no way, you accidently change a setting or open the camera.
Ever-ready case is the best I have seen apart from 3rd party manufacturers. It can be used as a half case, it lets you see the film notes at the back and it is very stylish.
The window blind on the prism, the mechanical shutter release, the way they implemented multiple exposure control are all very fine details.
Things I don’t like so much
Actually it is very hard to find anything to not to like on this camera, but I have managed to put together a short list.
Weird switches
Nikon F3 weird switches (Can you spot the self-timer? it is actually around the shutter speed dial)
Probably because the F3 is a completely new breed of industrial design among Nikon cameras, they had to make compromises here and there. Some switches such as self-timer and the on-off switch are a bit small and less intuitive to use. It took me some time to figure out what is the self-timer switch is doing. But the weirdest button of all is the little red rectangle just below the finder. This is used to illuminate the shutter speed information screen in the finder. It is hard to find and even harder to press during composing a frame. You need to use one of your fingernails to be able to push it.
Hot shoe
Because of the interchangeable viewfinder design, the hot-shoe could not be placed at the top of the prism, therefore and alternative solution was needed. The Nikon F3 has a very interesting non standard flash shoe combined with the film-rewind lever. This part of the camera gives home to the film speed settings and exposure compensation. To use flash, you need a special flash or an adapter.
Test shoots and answer to the scanner crisis
I have asked specifically the guys at my favorite camera shop and photo lab to scan my negatives without over-compressing the resulting jpg files. But they managed to give me once again 50% compressed garbage, therefore I officially gave up on them and decided to give another shoot to my old scanner. This time however, I tried out SilverFast (again) instead of the factory software I used and finally I have found the common understanding with this software. It really gave a new life to the old scanner of mine. I love the possibility to reduce noise by multiple scanning. I still think that this is not the final solution for my scanning crisis, but for the time being it is an acceptable compromise.
Click on the photos for full resolution versions so you can really see the quality of the scans! If you feel like, I would be happy to read your opinion in the comments section about the quality of these shoots and of course about the photos themself.
I know that this is not a fair comparison since the OM4 was released a few years later, yet both cameras represents the top of the manual focus models in their respective brands. Both of them shares the formula of manual focus, electronically controlled horizontally travelling shutter with mechanical back-up, aperture priority auto exposure, somewhat similar light metering system with TTL flash control and separate motor drive. It would be better to compare the titanium versions, but at the moment I have my hands only on the normal F3.
Obviously the OM4 Ti feels more solid despite its lighter weight. It is smaller and you really can feel that this is a weather sealed titanium body. The F3 feels also solid in my hands, but not the same. I prefer my OM 4 Ti when it comes to build quality. Again the F3 titanium would probably compare differently.
The multi-spot light metering system of the OM 4 is also superior to the F3, although I had no issues so far with the Nikon even when using flash. On paper though the Olympus offers more in this aspect. It has to be said that the OM 4 is a newer camera, therefore this comparison is not entirely fair neither.
Olympus OM 4 Ti vs Nikon F3
The viewfinder experience is better on the Nikon due to the fact that not only the shutter speed, but the aperture values are shown in the finder. However the OM4 warns you right in the in the viewfinder when exposure compensation is active while the Nikon shows nothing. Both cameras can benefit from a wide variety of focusing screens, but of course the Nikon has the possibility to change the whole finder.
In terms of electronics, I feel more confident with the Nikon, somehow it feels as a more bulletproof system to me. The clever solution of fix 1/80s for the first shoots before the 0 frame and the very long battery life all gives me a good feeling. The Olympus has a very mature system, but I had some troubles with week batteries and the battery life is also less.
At the end both cameras are excellent choices and I think both can do the job equally well. The F3 offers more features such as mirror lock-up, multiple exposure, interchangeable finders, high eye-point prism, but the OM 4 is smaller, features a very unique and excellent light metering and flash system and has a rather classical look.
But no camera worth anything without compatible lenses. I think that the OM lineup is strong enough, but Nikon is definitely has a serious advantage here. So if you are about to choose between these 2 cameras or similar models, consider your lens needs first.
I own the OM4 and I will need to give back the F3 soon, and while I really enjoyed the time with the Nikon, I still appreciate the Olympus look so my camera-bag remains intact.
Conclusion and recommendation
If you would like modern, but manual focus camera which you can trust with no compromise in features and don’t mind the size, than this is the camera for you. I think the F3 is affordable today and you can use a really impressive set of affordable quality lenses as well. The motor drive is not my thing, but indeed it can make this camera a speed daemon (~5 fps) as long as you can handle the focus. TTL flash photography is also among the features, but keep in mind that you need a special adapter or a compatible unit.
I really like this camera, it is a pleasure to use, it does look stylish and it has the coolest aperture indication in viewfinder ever. So if you like it, grab one in good conditions and you will not need another camera for a long time because this oe will never let you down.