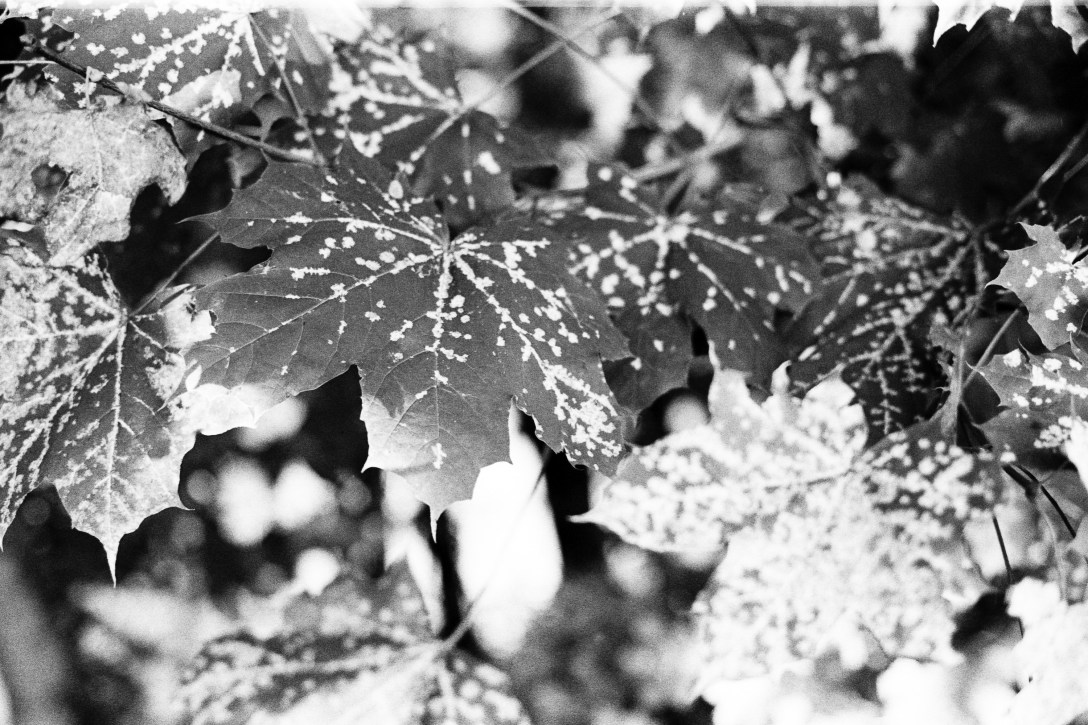
Light quality is extremely important to a photographer, just like snow for an Inuit. We have countless names for the different types of light while any average people would only call them “strong” or “weak”. The amount of light we get is very easy to measure and describe. But the quality is a far more subtle, much harder to formalize concept and therefore much more interesting to me. Modern cameras can handle low light extremely well thus photography is now possible under such difficult circumstances no one could be foreseen just until a few years before. But high sensitivity sensors with great quantum efficiency and extremely sophisticated noise reduction processing cannot create great photographs just by extending the lower bound of minimum illumination necessary to capture an image. Although these new tools certainly aid the photographing process, the quality of light (among other factors) is and always will be key to a good image.
I am currently experimenting with mainly available light, trying to find situations which work for me so I can get the results I like in a somewhat predictable manner. One of my favorite spots lately is the door of our balcony. In my opinion, this location has nearly ideal light conditions for portraits during most of the day. The balcony is relatively deep, and only the front is open (sides are solid walls), then comes the big door followed by a deep room with white walls and furniture.
This setup has a similar effect to a soft-box. Light comes through in a beautiful evenly distributed, soft way, which then decays rapidly as it penetrates into the room. A subject placed close to the door can be lit very well with a strongly directional but soft light while the background is lost in darkness.
I have taken several portraits at this place using different formats (APS-C, 35mm, 6x6cm), films and digital sensors, and a small, but representative selection can be seen in this post. I think it is interesting to see next to each other similar shoots using similar focal length but with vastly different capturing technology.
Brigi, Pentacon Six TL, Carl Zeiss Jena Biometar 120mm f/2.8, Fuji Acros 100 (expired), Rodinal, Canoscan 9900F Comment CAMERA 9900F View full size 1000×1000 Brigi
Eszti, Leica M2, Zeiss Sonnar 50mm f/1.5 ZM, Kodak Professional Elite Color 400, Canoscan 9900F
Eszti, Canon 5D, Canon 50mm f/1.8 II
The conclusion is that, no matter what your medium is, good light (and composition) could always give respectable results but technology does not save the day if the light quality is poor for the subject. But it is again another subjective property, what is poor light for a photographer for a given purpose, could be magnificent for another. Nevertheless, I think it is crucial to study light as a photographer, amateurs and professionals alike.
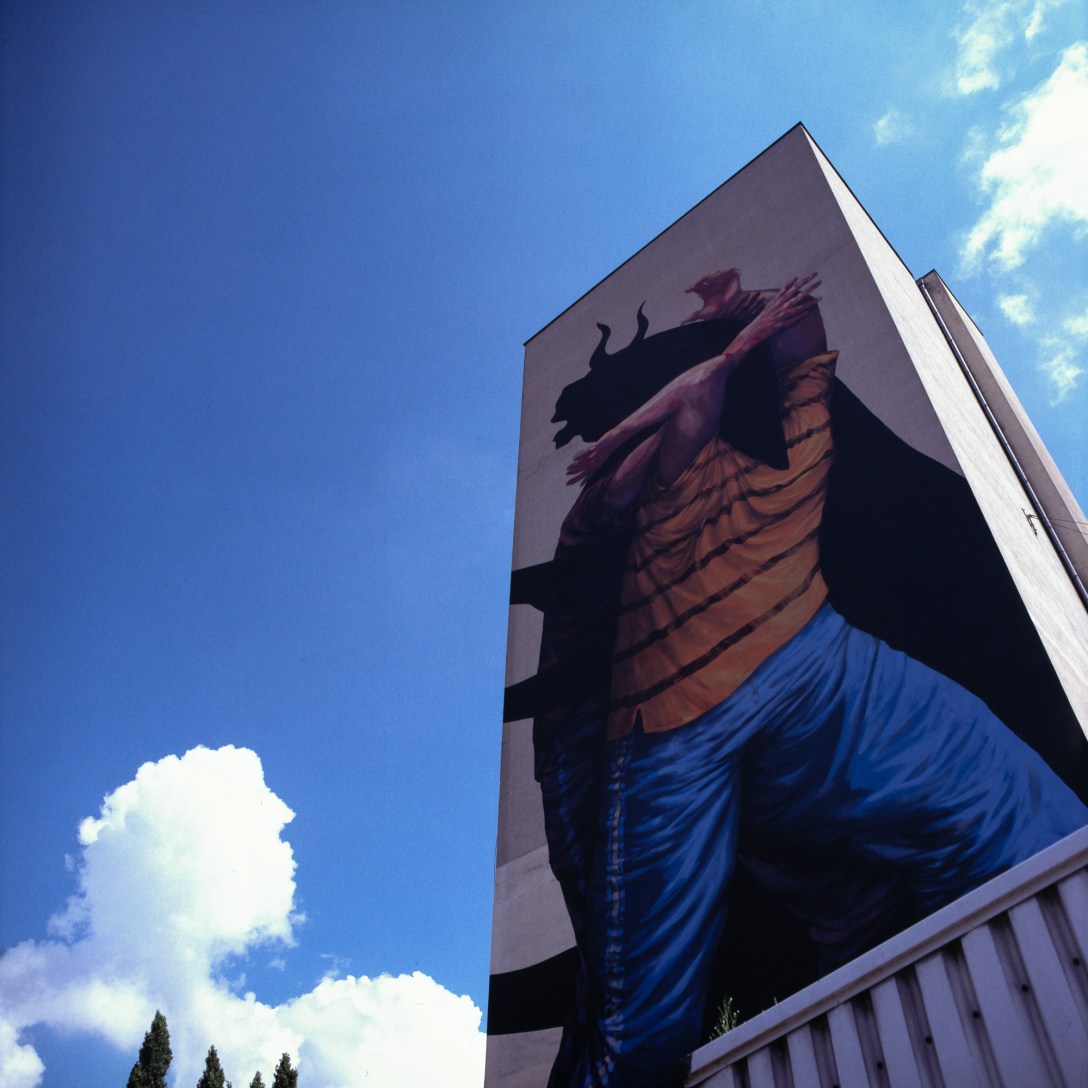
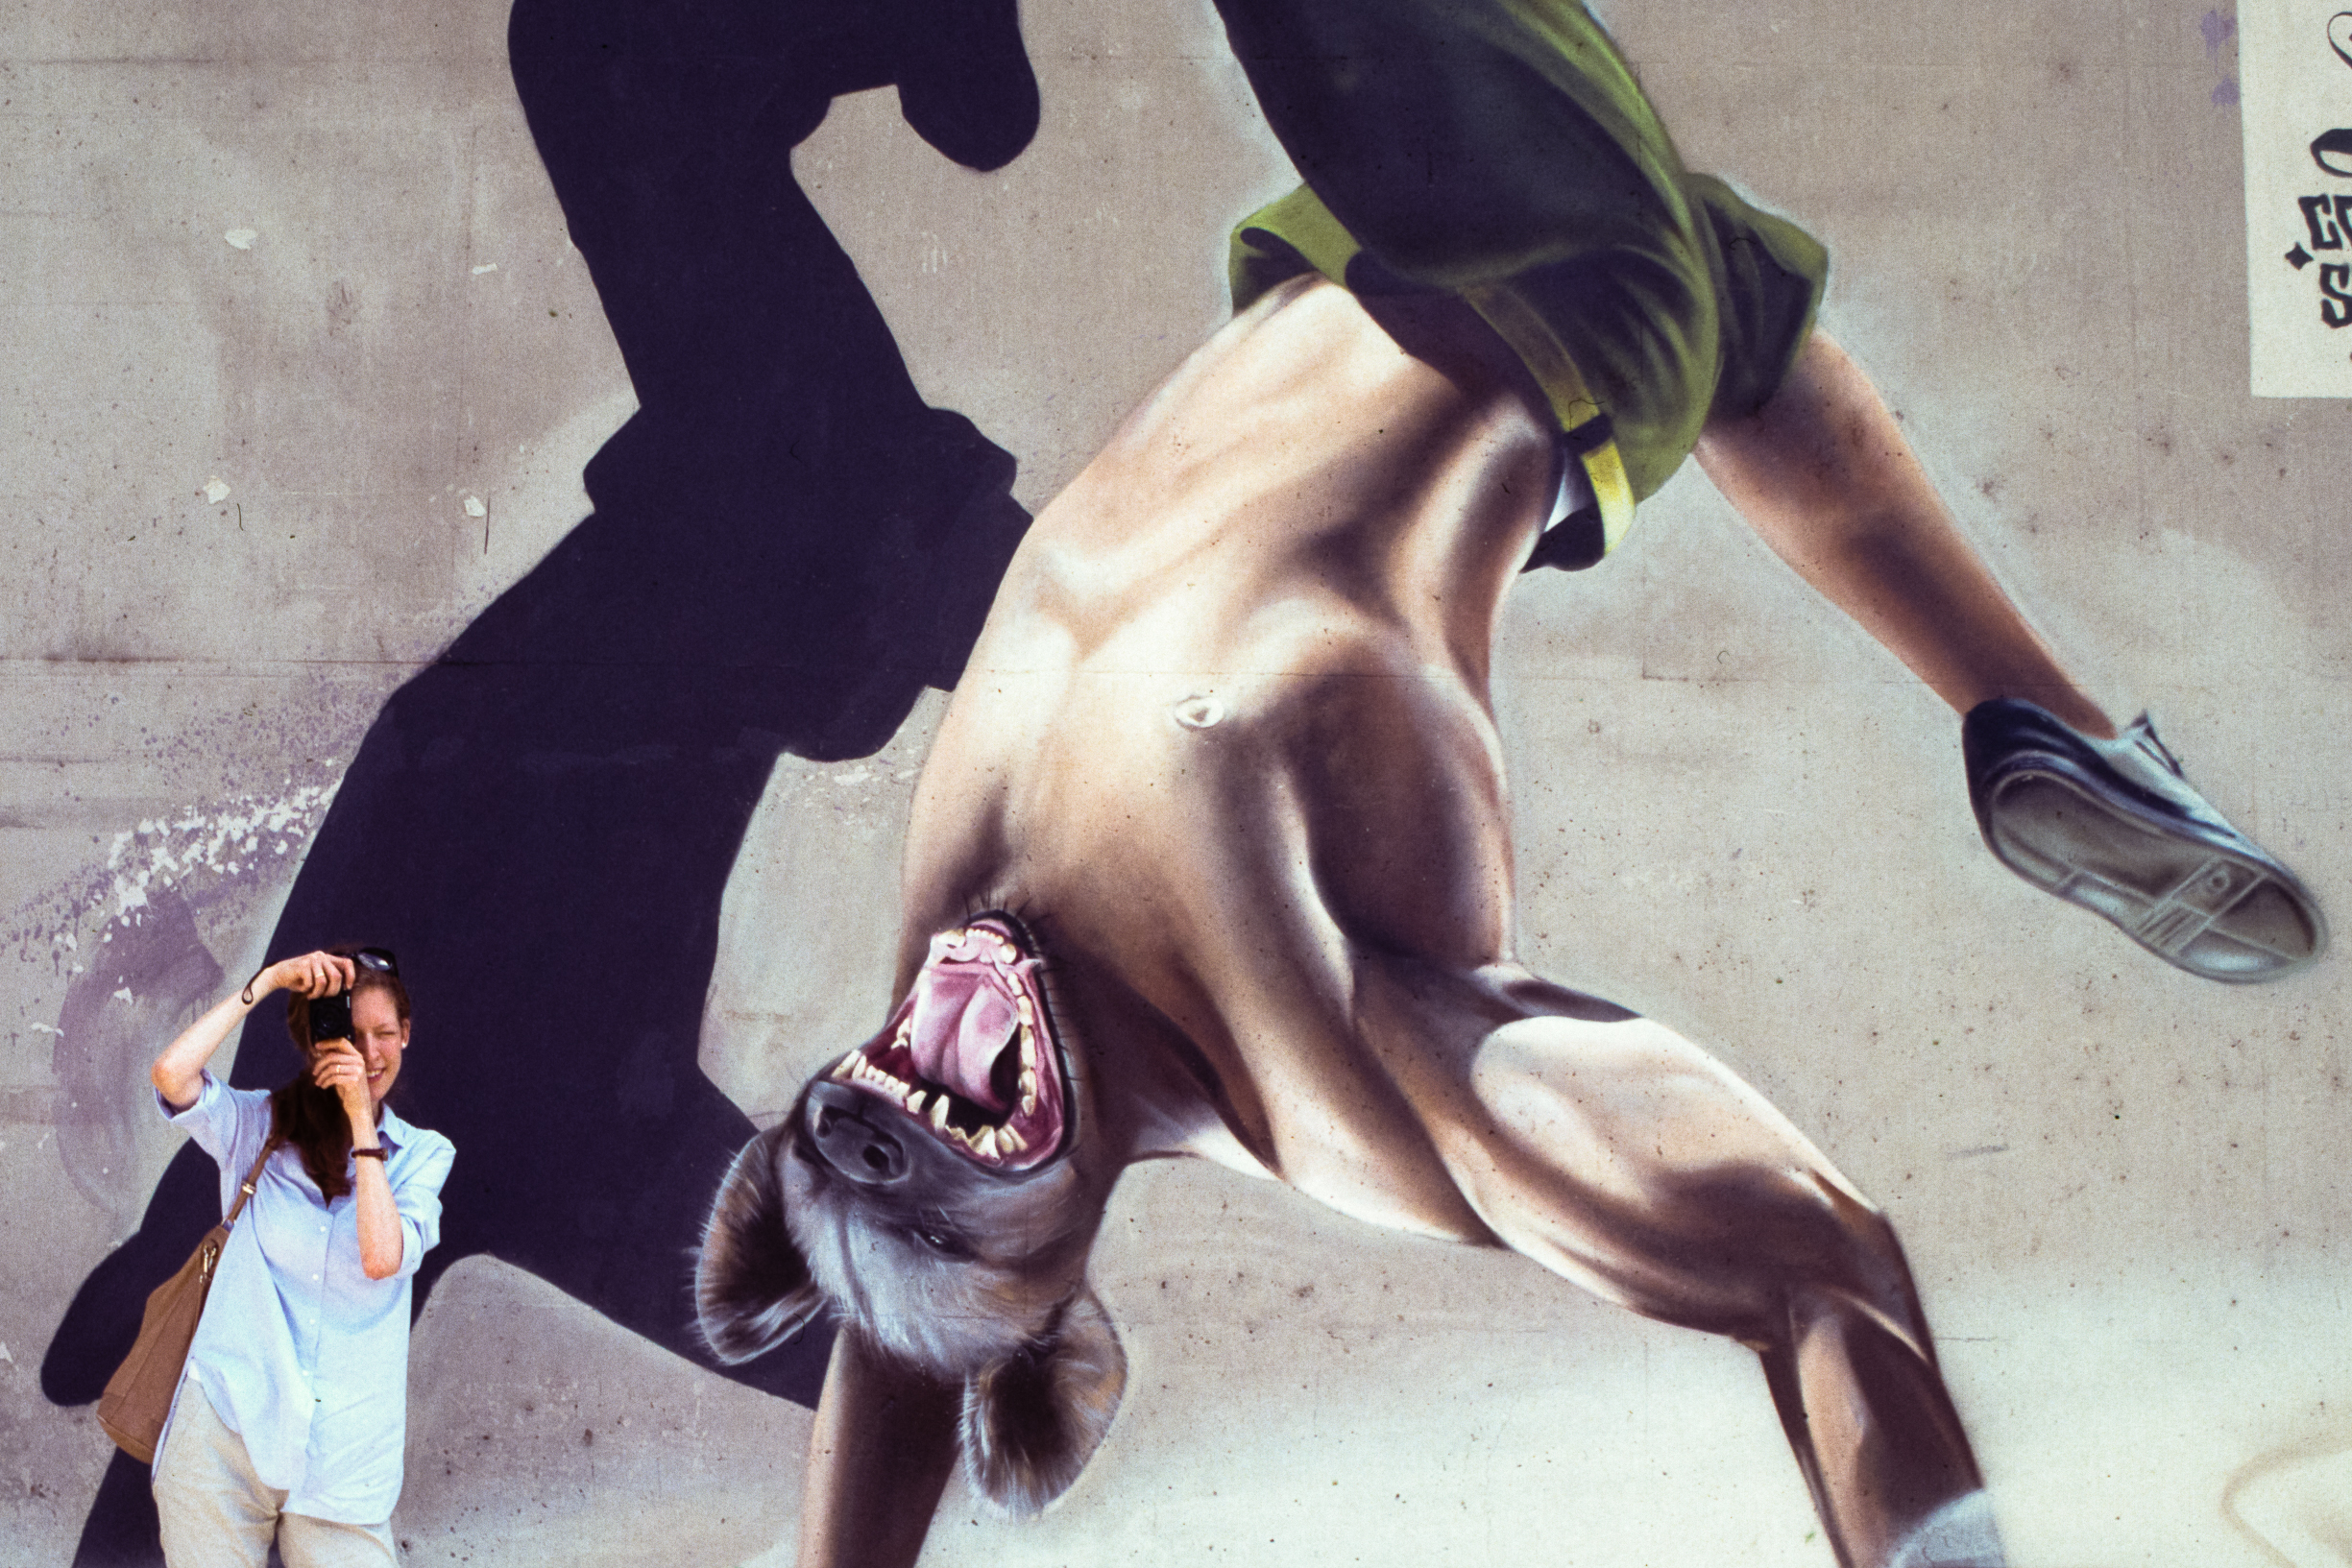
Walls are usually not the most exciting subjects to photograph. To use medium format slide film to do that is even more strange and could be considered as some sort of crime by some. After all, we live in a time when both film and labs which are able to develop slides are more and more scare.
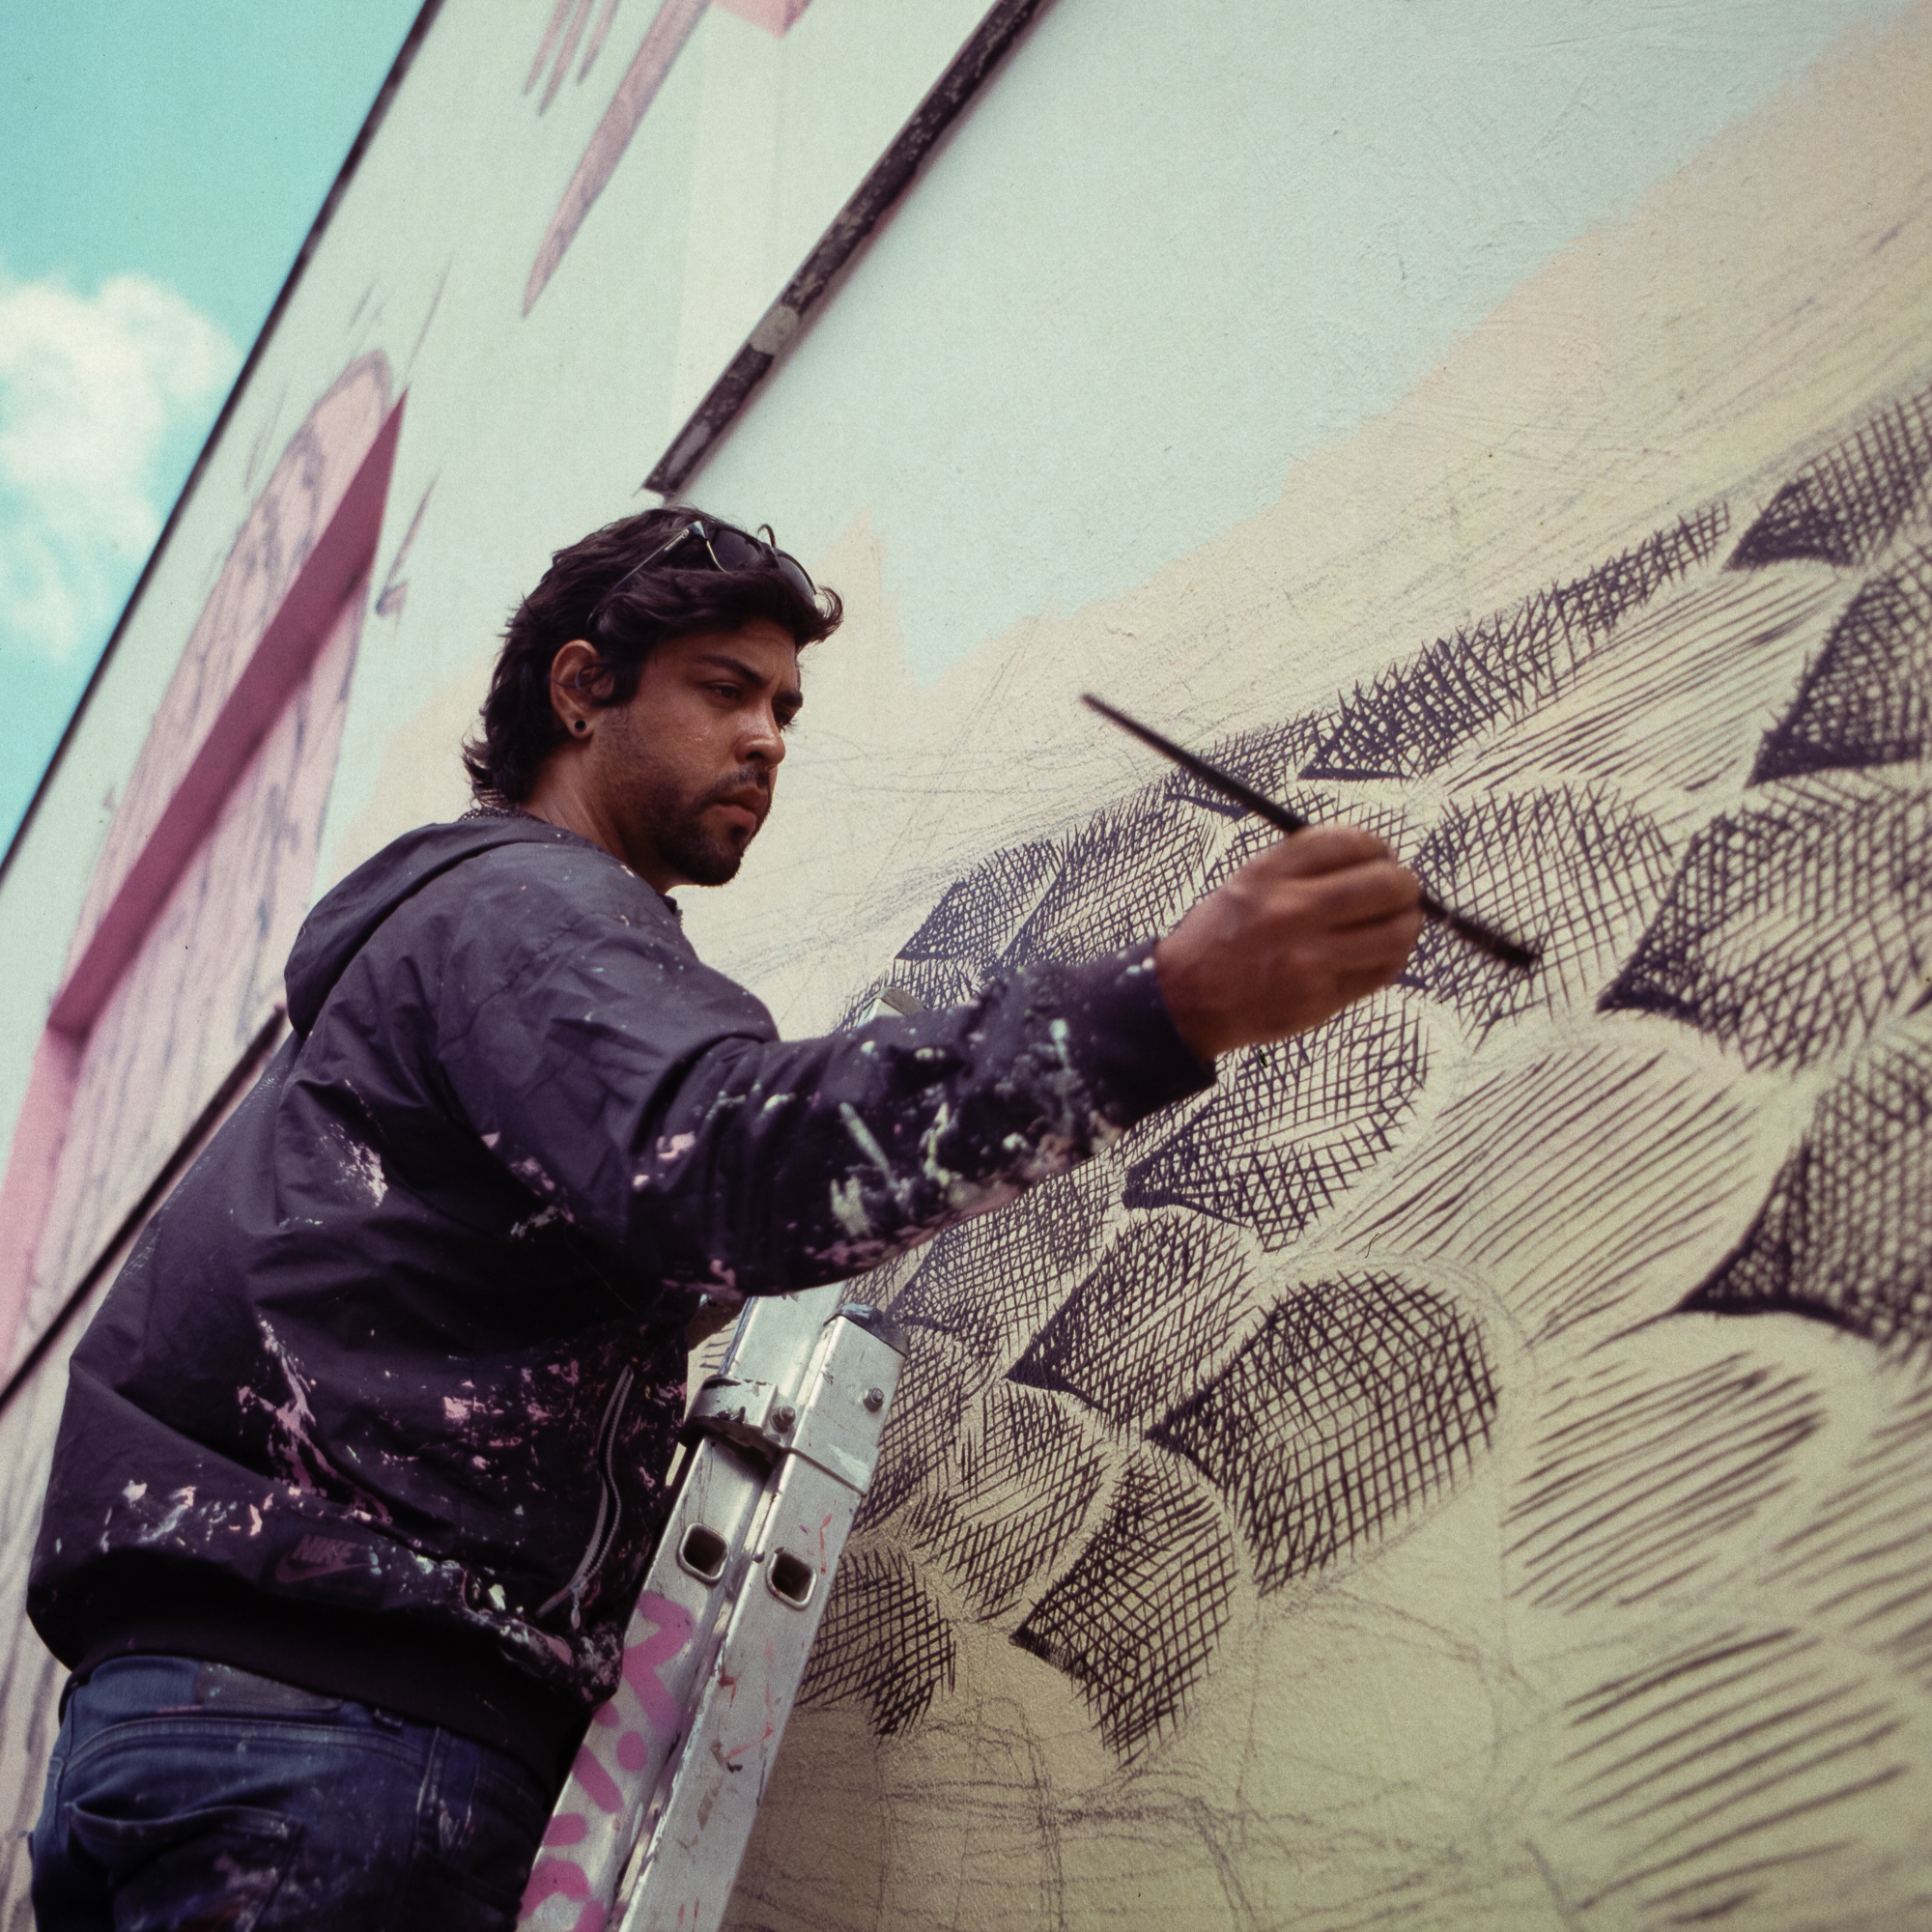
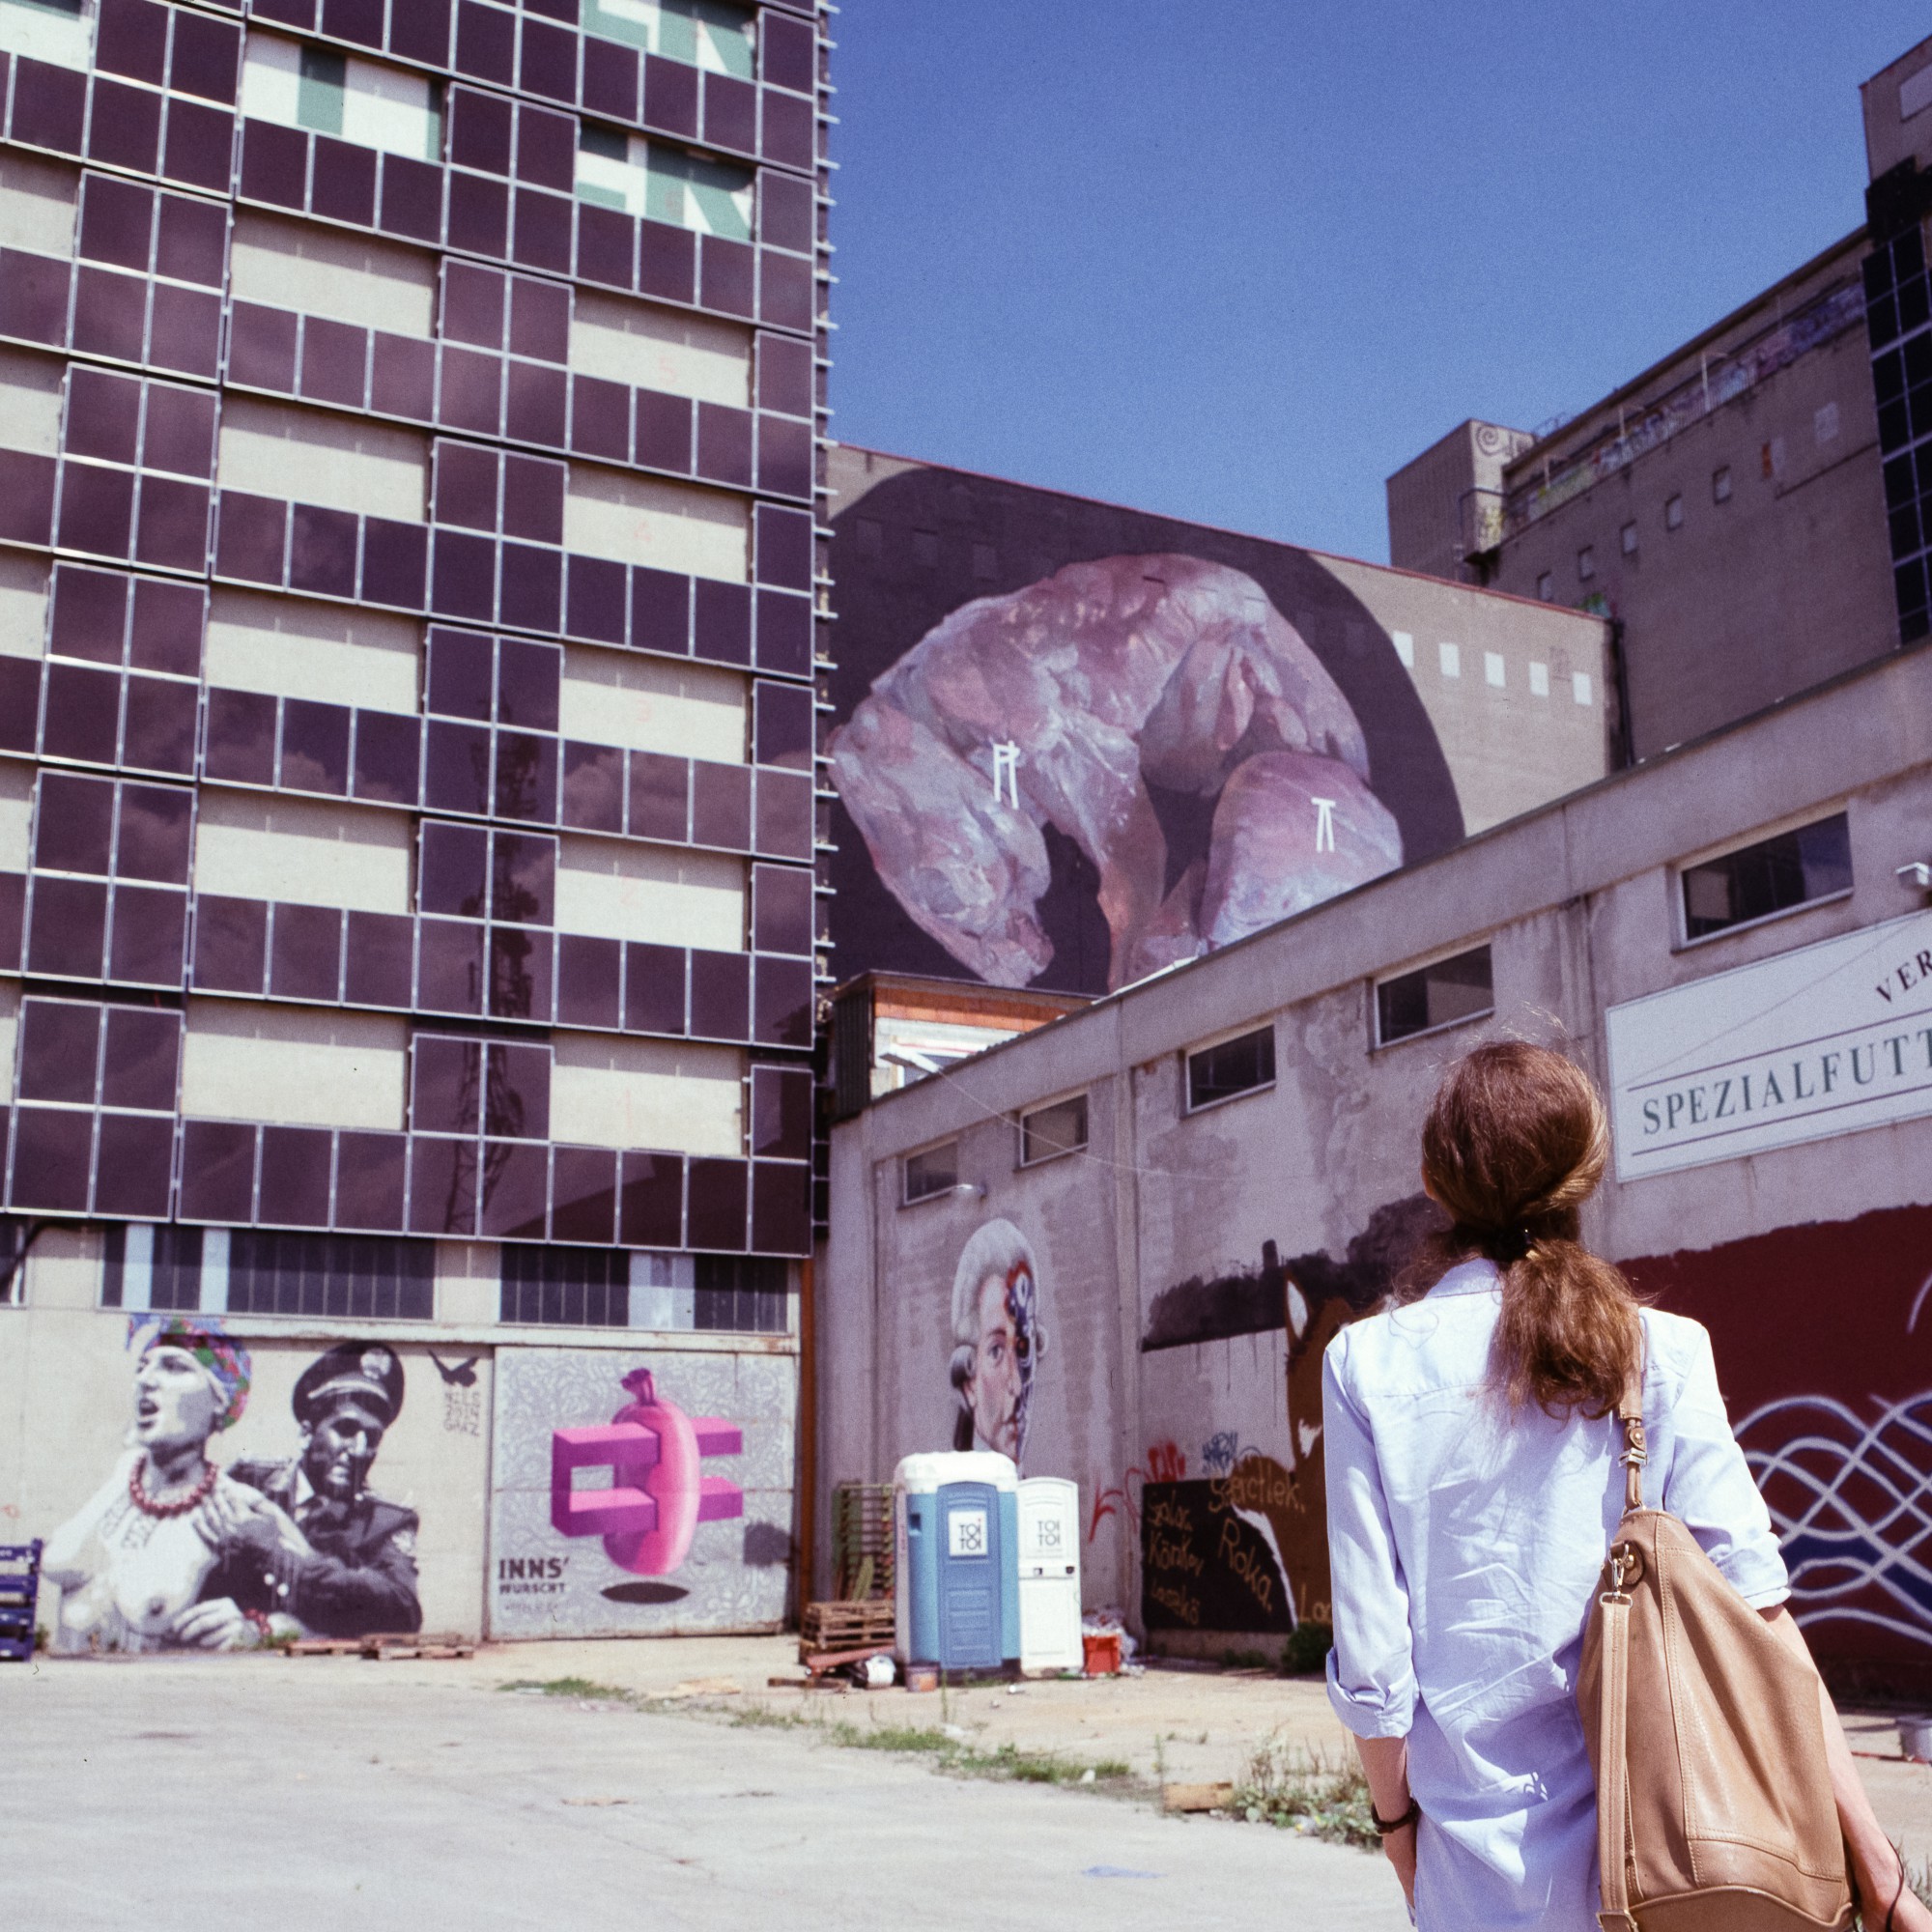
But what if you’ve found some really awesome walls filled with stunning graffiti masterpieces varying in size up to 30 meters (my approximation) and the whole place is a partly abandoned industrial complex.
Well, I couldn’t resist and loaded my Pentacon Six with a roll of expired (in 2004) Kodak Ektachrome 64 and headed to this place with my wife to take pictures of walls. In fact, she took way better photos than me, so maybe I will post those in the future as well.
I usually have no problems with expired film stocks, but this roll of Ektachrome gave me a very interesting result. When it came back from development it was possibly the flattest looking positive I have ever seen. I thought that I majorly overexposed all the frames equally. Surprisingly after scanning, I had to realize that almost no highlights were blown away and I could recover many details and color information during post-processing. I have the impression that the last 10 years after the end of the expiry date of the film was not spent in a refrigerator. I still have 4 rolls of the same batch of film, I need to think it over if I want to give them a second try.
The place we found hosted the Livin’ Streets 2014 festival for urban art, graffiti & street art between 07.06-18.07 2014. Their facebook page is here. Although we were too late to see the actual event, we could still meet with one of the artists who stayed to finish his work and also we could see all the paintings in the finished form. It was a great experience and we had a lot of fun, so yes it is totally fine to shoot some walls from time to time.
The photos were taken by my Pentacon Six Tl using a Carl Zeiss Jena Flektagon 50mm and in some cases a Biometar 80mm. The film was developed by a local shop and scanned by me with a CanoScan 9900F.
Finally, the Sun has returned to us and days are once again long enough for me to have a chance to enjoy the light even after working hours.
To celebrate this blessing I have finished shooting the roll of Velvia which I have started last October and now sharing with you. A mixture of my two favorite seasons, autumn and spring on the same roll in vivid colors. Isn’t it wonderful? I am truly being energized by the spring, and I hope you too. Go grab a camera and have at least as much fun taking photos as I do right now.
Hilmteich See ( Graz, Marc 2014), Pentacon Six TL, CZJ Biometar 80mm f/2.8, Fuji VelviaEszter & Anna (Hilmteich, Graz, Marc 2014), Pentacon Six TL, CZJ Biometar 80mm f/2.8, Fuji VelviaAnna (Graz, Marc 2014), Pentacon Six TL, CZJ Biometar 80mm f/2.8, Fuji VelviaEszter (Mariatrost , Graz, Oct 2013 ), Graz, Pentacon Six TL, CZJ Biometar 80mm f/2.8, Fuji VelviaEszter (Mariatrost, Graz, Oct 2013 ), Graz, Pentacon Six TL, CZJ Biometar 80mm f/2.8, Fuji Velvia(Hilmteich , Graz, Marc 2014), Pentacon Six TL, CZJ Biometar 80mm f/2.8, Fuji Velvia
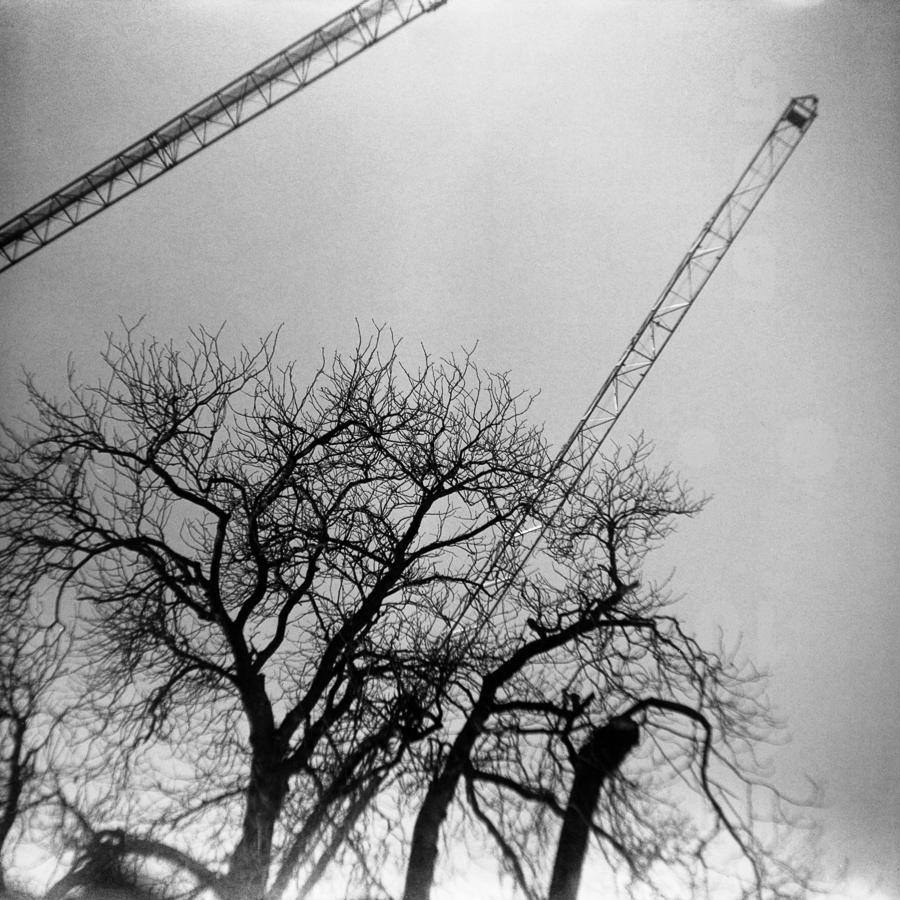
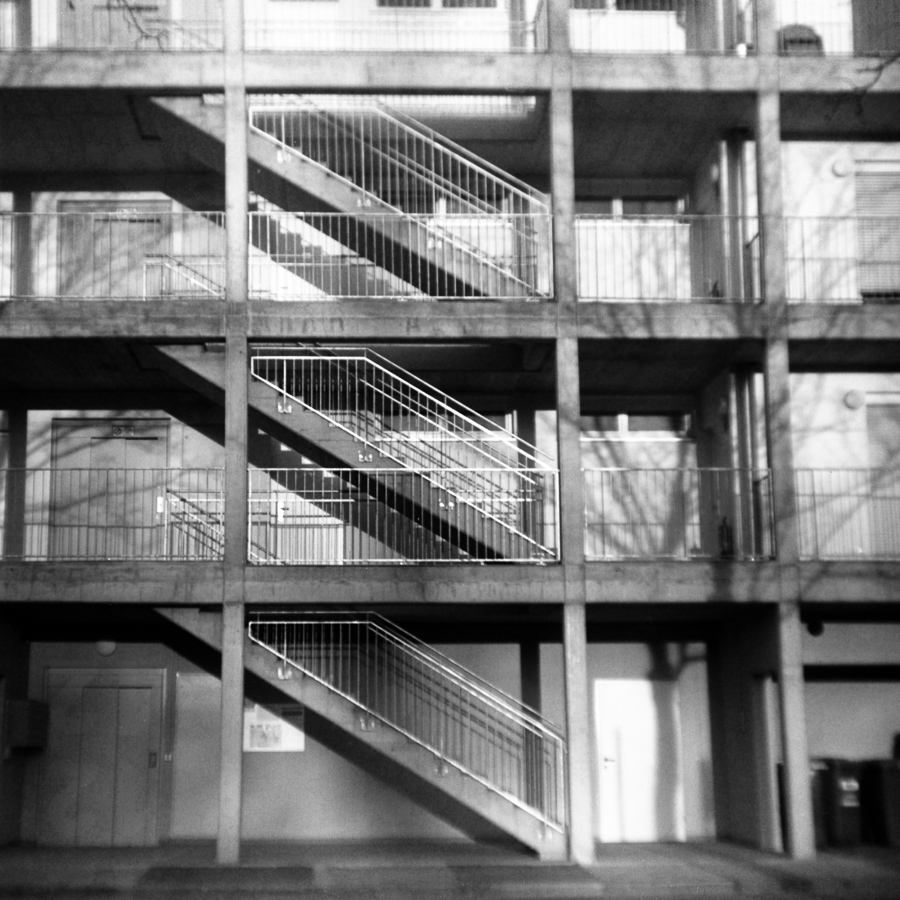
Yet another quick post with little-written content but with a bunch of random snapshot images. This is what I end up with when I carry the same roll of film over weeks and only occasionally have a chance to shoot. I am basically on pilot light mode right now and really hope that the next year I can do something a bit more organized work. What I can book as an achievement though is that I could gather some courage and I asked a stranger for a portrait on a street again. It was a really nice experience and I am happy with the result, but you can judge yourself if you scroll down to the second photo.
This time I had my Olympus OM4 Ti in my bag in the last few weeks loaded with the same Ilford HP5 I used in the Kiev before. As usual, the film was developed and scanned by me.
If you followed the Camerajunky Facebook page you may have already read about my planned reunion with my beloved Kiev 4 camera after a long period in which it was hidden in a box. I really felt that I needed to use it again, and my recent discovery about the beauty of Ilford HP5 film gave me the final push to do so.
I don’t know why, but from time to time, I feel serious urge to go back to the basics and pick up a fully mechanical camera such as the Kiev and leave the sophisticated OM4 on the shelf. In addition, I really do like the character of the little Jupiter 8 lens. Especially the quality of the background blur it produces is really appealing to me. I know that many find it not so pleasing, but hey great things are usually dividing after all. It is not the sharpest nor the fastest lens I have ever touched, but an unmistakable character for sure. I also learned that the grain structure and tonality of the Ilford HP5 ISO 400 film is also very unique and close to me, so I thought, I should combine the unique lens with the unique film. I usually use lower sensitivity film so it could be that other medium speed films have similar characters as well. I guess I will need to try more. Until that, I leave you with some random but to me very catchy shots.
A photographer is never really putting down his camera, no matter what crazy thing she or he is doing for a living or filling the days with. Since we are not living in an ideal world, most of us have to face the limitation of time and availability of light in our everyday life.
But limitations are not necessarily bad things! They teach us to utilize our possibilities more creatively by forcing us to see and think in ways we would normally not choose to. This, of course, influences our work as well as ourselves and vice-versa. Eventually this feedback loop can contribute our personal and photographic development similarly to the way the ever-changing environment influences life forms and pushing them towards evolution.
Currently, my job is to sit in an office and convince computers to obey to the needs of their human masters. Making their lives easier by sending them nice, well formed and most importantly correct invoices. As interesting as it sounds, but it is somewhat fulfilling to my geek side which likes to brain wrestler with abstract problems.
But it makes my photographer side starve because the current situation has a very little room for photography. Especially now when the winter is coming. Days are shorter and shorter, so more and more frequently I end up to spend most of the hours filled with natural light in between walls in my natural working environment.
To overcome this obvious contradiction, I decided to make occasionally a “bring your giant medium format camera to work day“. I started to bug my colleges and taking portraits of them during lunch brakes or when I need to wait for my computer to finish a long-lasting blocking task.
The point is, you don’t need to stop being a photographer, just because the conditions are not ideal for the kind of photography you are normally up to. Try to get out the most of the situation and who knows this might drive you to completely unforeseen paths and discoveries.
Jogi, Pentacon Six TL, Carl Zeiss Jena Biometar 80mm, Fuji Across 100, Kodak D76, Canoscan 9900F
Jogi is a musician besides being a software engineer and in my opinion, they are making pretty cool music. Their website http://www.theflamingdugongs.at/ is not complete yet, but worth to have a look at.
Barbara, Pentacon Six TL, Carl Zeiss Jena Biometar 80mm, Fuji Across 100, Kodak D76, Canoscan 9900FJanez, Pentacon Six TL, Carl Zeiss Jena Biometar 120mm, Fuji Across 100, Kodak D76, Canoscan 9900FKyrylo, Pentacon Six TL, Carl Zeiss Jena Biometar 120mm, Fuji Across 100, Kodak D76, Canoscan 9900F
Kyrylo was so pleased with his portrait that he visited me at my desk (2 floors below his place) to shake my hands right after I sent it to him.
Hannes, Pentacon Six TL, Carl Zeiss Jena Biometar 80mm, Fuji Across 100, Kodak D76, Canoscan 9900FMarco, Pentacon Six TL, Carl Zeiss Jena Biometar 80mm, Ilford HP5, Kodak D76, Canoscan 9900F
Naturally, it is not my top priority to photograph at work, and I always make sure that this does not have any effect on my everyday responsibilities. It took me quite a while (about 2 months) to get these images. Though they are not perfect, I enjoyed taking them they are part of my journey.
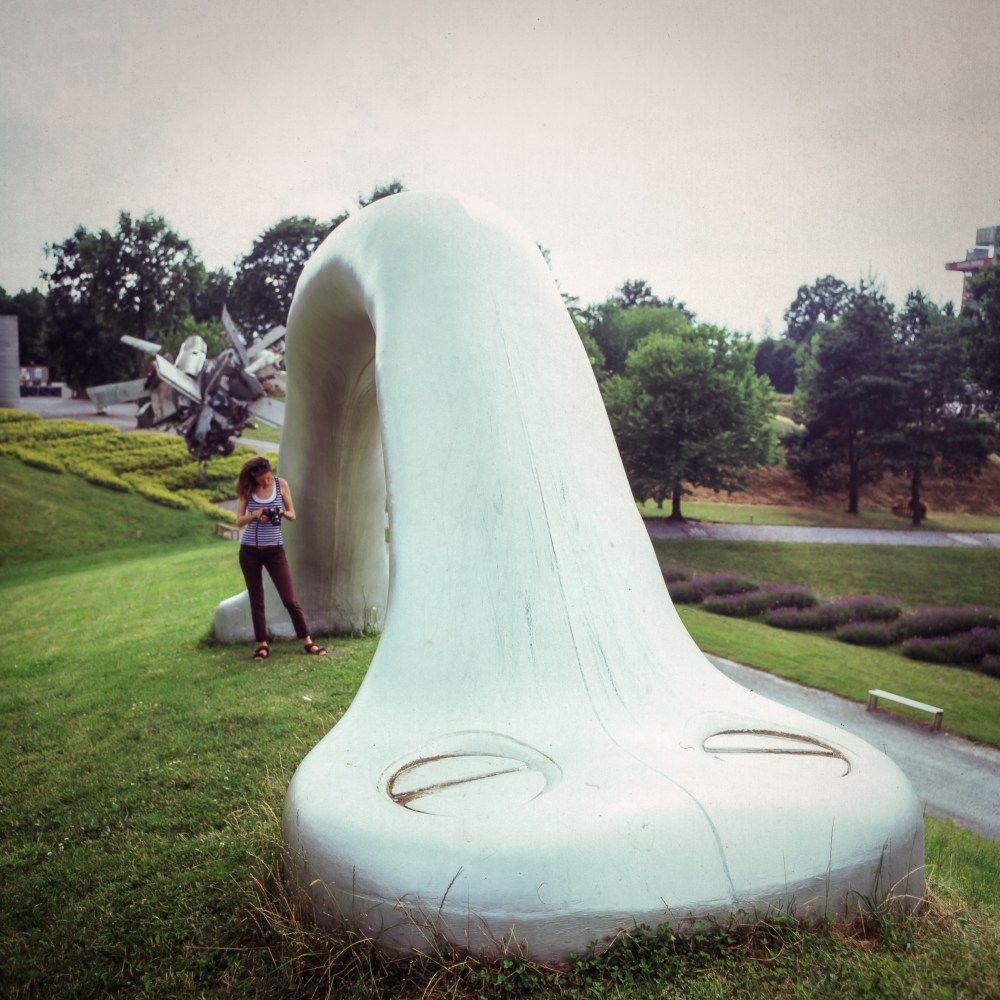
Airplane Parts & Hills by Nancy RubinsAirplane Parts & Hills by Nancy Rubins
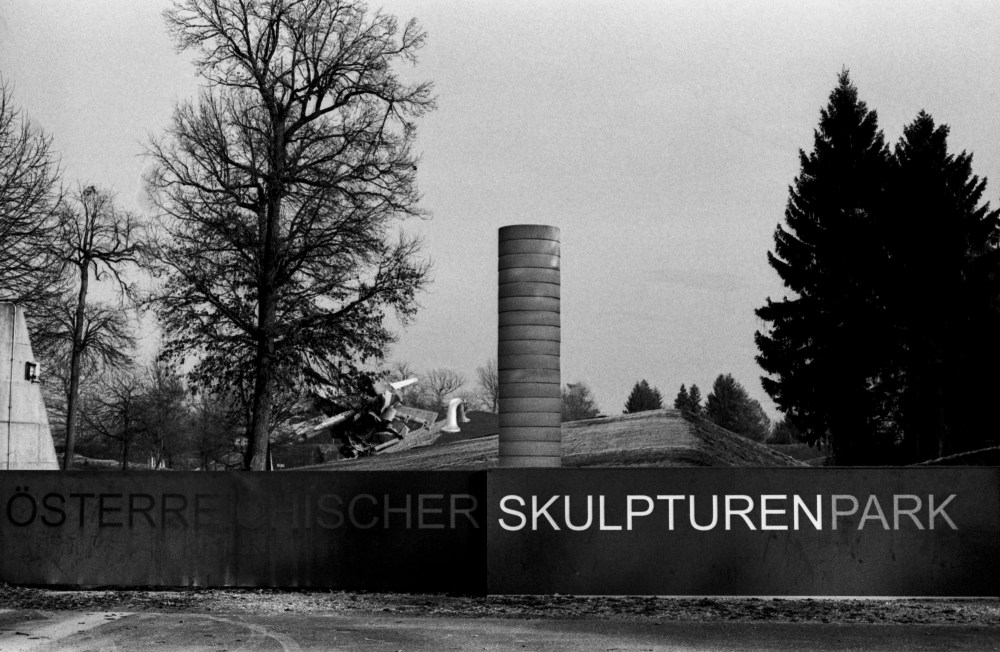
Sometimes the most amazing places are literally just a few steps from your backyard. Yet it is so easy to overlook or ignore them, just because you don’t expect anything extraordinary close to your regular living space. Or you miss to visit them because you think that since you live nearby, you could do it any time which moment never come. In the end, I tend to know the interesting places around other cities better than my own. But I fight, so last weekend, we visited an amazing sculpture park right next to the place I work. I passed by almost every single workday since last September because my bus stop is about 20 meters from the entrance. Despite the free entrance, I have never managed to take a look, until now. To make the occasion special, I brought my old trusted Pentacon Six Tl loaded with some expired Velvia and my wide angle 50mm Flektagon and the standard 80mm Biometar. Apart from the last picture, all posted photos were taken with the Flektagon. I scanned the film with my CanoScan 9900F.
Sole d’acciaio by Ilija ŠoškićBetonboot by Michael Schuster
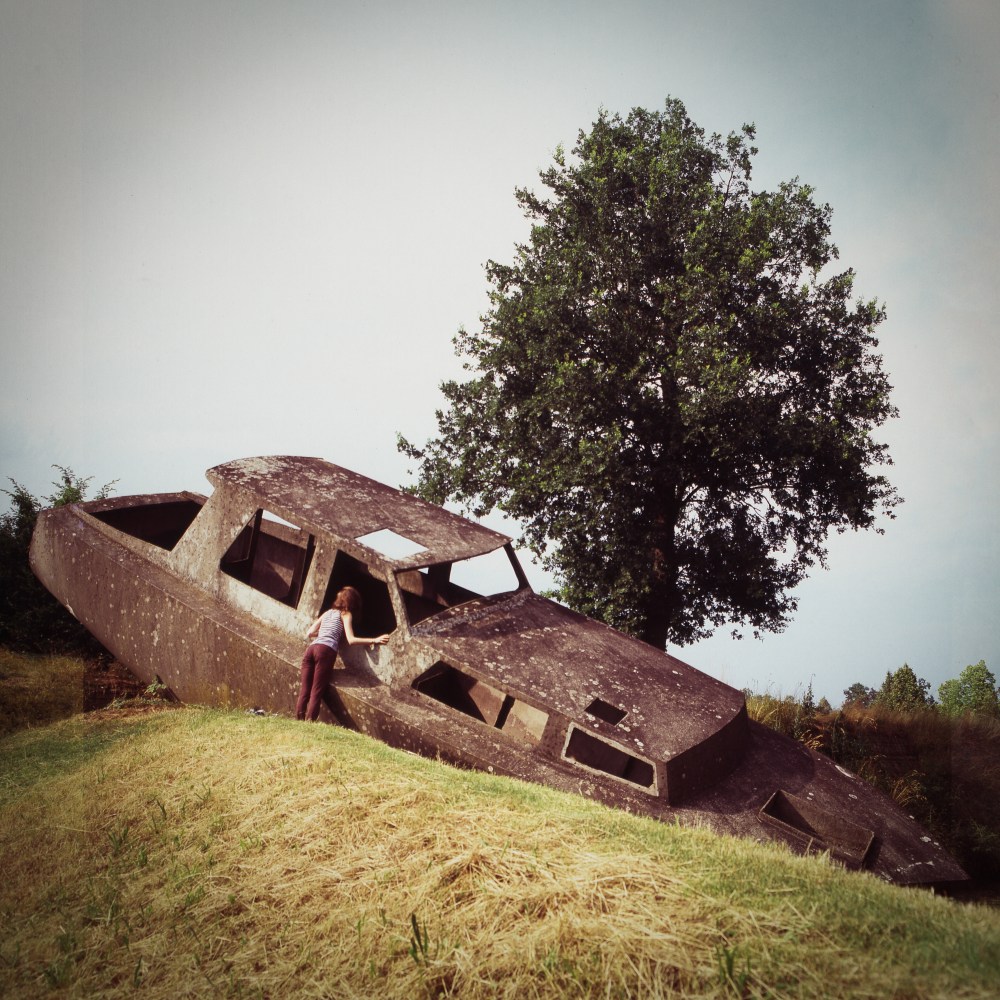
This piece of land-art (Die Erdkugel als Koffer) is one of our favorites because it integrates so well into its environment and due to the size of it, it is hard to figure out what it supposed to be. Once you get closer and maybe read the attached documentation which is, by the way, the part of the sculpture, you can have a nice AHA experience. It interprets the planet Earth as a suitcase and the statue is the handle.
Die Erdkugel als Koffer by Peter Weibel
I have never had any seriously overlapping frames issue with the P6, but this time. Hopefully, it only happened only because of my mistake during film loading.
o.T by Bruno Gironcoli
My advice is to go out and explore your surroundings and don’t forget to take a camera with you.
If you were around Graz and had some spare time, this park is really worth to visit. Here are the layout and the list of all the sculptures.
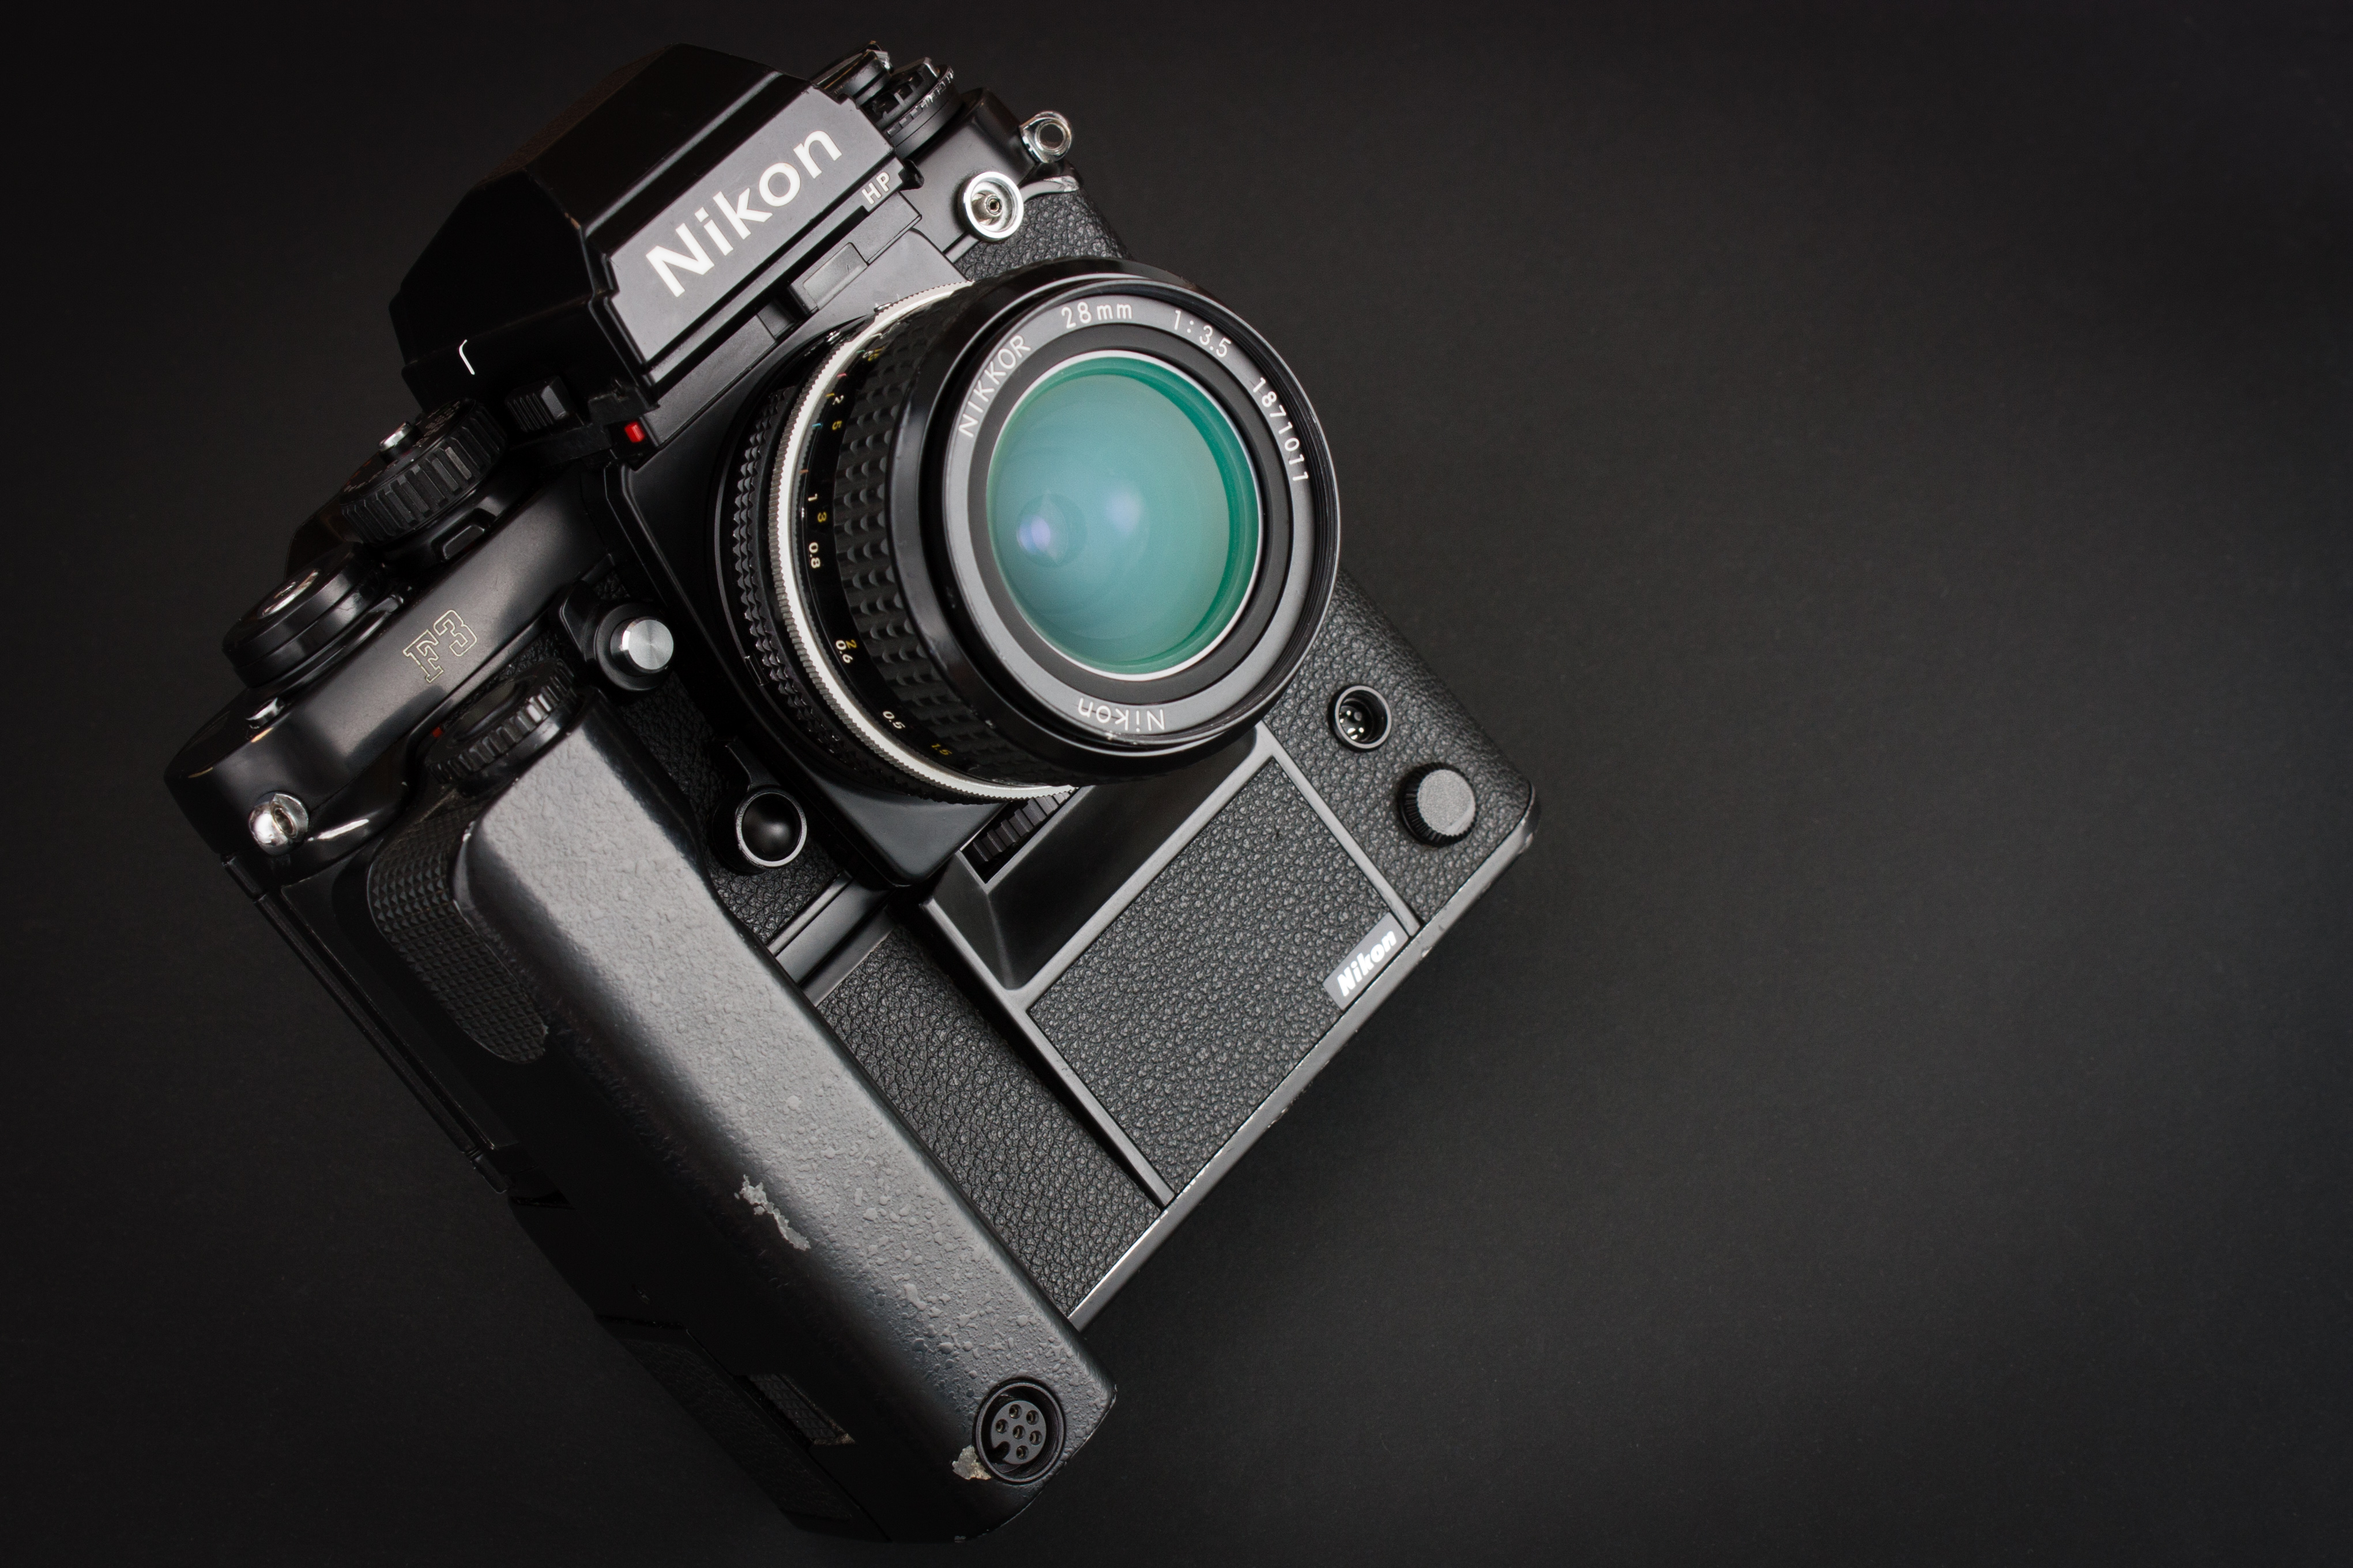
This classic camera was undoubtedly one of the biggest and most dividing celebrity of the 80’s. At least among professional 35mm SLR cameras of course. It created quite significant waves in the world of professional photography because with it Nikon finally put the vote on automation and electronics as the new lead design principles.
Nikon and me
I am not dedicated to any brands, so there is no particular reason why I haven’t wrote about any Nikons until now. In fact my very first camera was a digital Nikon Coolpix 3500. It was hideous to use and broke horribly, but still it was my very first camera.Not much later I owned for a short time a Nikon F75 which was the first and until now the only camera which I’ve ever sold. It was a great tool, but it had a monstrous hunger for not so cheap CR2 batteries and it was way too modern for me anyway. The little Coolpix is still lying around somewhere in a box with serious electronic injuries. Who knows just like any other (now classic) camera, maybe one day it will get repaired too.
By the time it was very hard to accept these changes by the majority of professionals who simply did not trust anything which was depending on batteries more than a powering of a light-meter. It is a bit hard to imagine today but at that time it had a perfect sense. But the change was already on the doorstep and it was inevitable. The previous F models were already masterpieces mechanically anyway, there was very little room for possible improvements in the purely mechanical realm.
The F3 was their first electronically controlled single digits F camera and despite of the early resistance by the community, it found the way to tremendous success and changed the face of the camera market once and for all.
In fact what Nikon did with this camera was nothing really revolutionary or unexpected as all the technology was already existed and tested by lower-end models of theirs or by the competitors. They simply selected the best components available and remixed them in a very attractive package.
I could write a lot more about the exciting history of this camera, but there are other more competent people who just did it very well before of me. So instead of a week attempt of a complete and deep introduction of this camera, I simply try to give an overview filtered through my own experience.
I can faithfully recommend this site for the historical overview and for all possible technical details.
Nikon F3 HP official structural illustration
How did I get this camera
Nowadays my collector nature is being held a back because of the lack of time and dozens of higher priority projects. This is not necessarily a bad thing, sooner or later I need to settle and start to master the gear I already have. The negative side-effect is that I am running out of (new) old cameras to review. But fortunately it turned out that I can try out and write about a camera without actually owning it. I have a good friend who has a grandfather with a really good taste and since he moved to digital he gave his old Nikon gear to his grandchild. At first I just spot a box of T-max on the shelf at the place of Andrea’s and I asked her in which camera she intend to use it. Eventually she showed me a really nice bag full with vintage gear including the F3 with motor drive, many great lenses, matching flash unit and many more gems. Few weeks later (when I have recovered the shock, found my jaw and gathered enough courage) I asked her if I could try out the gear. She said yes, so the post you are reading now couldn’t be written without her kindness.
Data sheet
Type TTL auto-exposure 35 mm. Single Lens Reflex Camera.
Produced 1980-2001
Film type 24mm x 36mm
Weight 780g (body without lens, but with HP prism, batteries and film loaded)
Dimensions (HP version) 148.5 x mm height, 101.5 mm width, 69 mm depth
Shutter speeds 8s-1/2000s, B, Aperture priority, 1/60s can be used mechanically without batteries
Sync speed 1/80s
Viewfinder various interchangeable finders
Exposure meter full-aperture TTL centre-weighted exposure measurement at (80/20)
Batteries Two 1.5V silver-oxide batteries SR44 (Eveready EPX-76) or alkaline manganese batteries LR44
Self-timer 10s delay electronic self-timer
Hot shoe special accessory shoe on the rewind knob supporting TTL flash units; PC synchro socket.
Motor drive optional MD4 motor drive up to 5.5 frames per second with mirror lock-up
Mirror lock-up
Depth of field preview
AE-lock
Multiple exposure lever
Exposure compensation
First and second impressions
When I first had a closer look, I was not exactly impressed. The camera was bit dusty and showed marks of very extensive use. Nothing serious, but I really had the impression that the camera may had some mechanical issues. Nevertheless I took my time, and cleaned the dust and smudges carefully. During the process I had to realize two very important things. First of all never give up on an F3, these cameras are very hard to kill, no matter how they look like there probably nothing wrong inside. Second of all it has many buttons and switches which I had no idea what are they good for. I have seen many unusual designs like left handed Exactas and other marvels, but the F3 control layout gave us some rounds with Google and the user manual.
Nikon F3 with MD-4 motor drive, Nikkor 28mm f/3,5 and HP prism.
I also cleaned the lenses belonging to the F3 and since they were protected with filters all of them were in an excellent condition. They feel a bit dry to me in terms of lubrication, but otherwise focusing very smoothly and precisely. Maybe they act completely normally, only I am not so familiar with Nikon AIS lenses.
After I finished the cleaning of the gear and finally powered up the camera, the moments I spent with trying out every part of it lead me to the conclusion. You can trust this camera. The more I use it, the more I trust. The sound of the shutter, the feel of the advance lever, the snappiness of the motor drive all ensure this feeling. After all this image what a professional camera should show about itself.
Things I love about the F3
As I said the Internet is loaded with much more established articles about the Nikon F3, therefore the very best I can do is to share my personal opinion about it. Let’s start with the things I most appreciate in this camera.
Look and feel
Nikon F3 in leather half case with Nikkor 105mm f/2.5 and HP prism.
The F3 is an important milestone in the history of Nikon, but not only because of the technological aspects. This was the first Nikon which appearance was designed by the Italian designer Giorgetto Giugiaro. He introduced the red mark on the grip, which is an unmistakable characteristics of every Nikon SLRs since then. Indeed, this camera looks different from every previous models and can be distinguished with ease from the competitors as well.
Personally, I like the previous F shapes better, but I have to admit that the F3 looks all right and it also handles great at the same time. The small grip contributes to the secure holding, and I find it very clever how it fits together with the motor-drive.
Butter smooth operation (excellent mechanics)
Every part of the camera carries the marks of mechanical excellence. Even the smallest moving piece is doing its job with minimal resistance and completely free from any inappropriate noise.
There is virtually no difference in the operation of the film advance lever with and without film loaded into the camera. It is really that smooth that you can have a hard time to say that the camera loaded.
The mirror flips up quietly and gently as well, it produces very little camera shake compare to my other SLR cameras.
Viewfinder experience
For me one of the most important aspect in a camera is the viewfinder experience, and this is where the Nikon F3 really shines.
First and foremost this camera features a modular design, which allows you to choose from a huge variety of focusing screens and finders. This particular kit came with a HP prism and with my all times favorite waist level finder.
Nikon F3 in leather half case with Nikkor 50mm f/1,4 and HP prism. Waist level finder next to it.
The HP abbreviation stands for High eye Point which provides a proper picture in the finder from the viewing distance up to 2,5 cm. This is especially beneficial for those who wear glasses, having larger than average nose or don’t want to squeeze their eyeball into the finder window. Although I don’t wear glasses, I still find convenient to use this finder too. The downside is that the image is slightly smaller than the one found in the usual prism. The finder window is round shaped, which looks very nice and professional in my opinion . The prism also features a window-blind to prevent light entering and thus altering metering results when shooting on a tripod.
I mentioned that waist level finders are very close to me, I have got used to the work with them with my Pentacon Six. Due to the lack of any additional optical elements (prism, mirrors), this finder gives the brightest and crispest image possible which indeed looks marvelous when using the F3.
Viewfinder mock
But the best part of this camera is the way it indicates shooting parameters in within the finder.
A small LCD display shows the shutter speed settings, while the actual aperture marking (from the lens itself) is projected into the finder. In other words, you really see your lens marking in the viewfinder. I simply cannot imagine any cooler solution for this problem.
These information windows are built into the body, therefore all compatible finders benefit from them. The same information can be read in the HP prism and in the waist level finder.
Light metering
But how is the light metering done? Traditionally the metering cell/s are located in the prism. Obviously it cannot be the case with the waist level finder, besides all readings are passed from the body to the finders.
In case of the of the Nikon F3, the metering cell is located in the body to support the interchangeable viewfinder design. The cell is located at the bottom of the mirror box facing backwards to the direction of the film. There is a small secondary mirror underneath the main mirror in order to transfer the light for metering. The main mirror is semi transparent at the middle thus the secondary mirror can reflect part of the light to the metering cell. The secondary mirror moves synchronously with the main mirror.
This layout has another benefit of being capable to measure the light reflected back from the very surface of the film being exposed. This way real time exposure control is possible which is essential with TTL flash photography.
1/80s before the first frame
Have you ever tried to load a semi automatic camera with the lens cap on? I committed this mistake quite a few times with my Olymous OM 4. Normally, because the lens cap is on, the camera calculates a very long exposure time so you need to wait a lot before you could get to the next frame. This could be really annoying especially when you are in hurry. Of course, if you set your camera to manual mode during loading, this is not an issue at all, but somehow I walk into this trap quite often.
It seems that the engineers of Nikon knew my kind and built in a mechanism which sets the shutter speed to 1/80s until the frame counter reaches the 0 marking. This prevents me to fire a 30s exposure during film loading.
This can be a disadvantage to those who tries to get the maximum amount of frames out of every roll, but personally I think it is a really nice and clever feature.
Small touches everywhere
The Devil is in the details. If you take a closer look on this camera, you can notice a numerous fine details which aren’t that necessary to operate the camera, but contribute to the overall feeling. They make you feel confident that the camera you are holding is a very special and fine tool.
Some of the little details are not unique to this particular model, but characteristics of the Nikons at this era. For example I like the screw cap of the battery compartment. It has a small plastic holder, which positions the batteries and it has a clear graphical indication, how the batteries should be placed.
There is a lock on literally everything which can be accidentally moved such as shutter speed dial, film rewind, exposure compensation and mechanical shutter release. There is no way, you accidently change a setting or open the camera.
Ever-ready case is the best I have seen apart from 3rd party manufacturers. It can be used as a half case, it lets you see the film notes at the back and it is very stylish.
The window blind on the prism, the mechanical shutter release, the way they implemented multiple exposure control are all very fine details.
Things I don’t like so much
Actually it is very hard to find anything to not to like on this camera, but I have managed to put together a short list.
Weird switches
Nikon F3 weird switches (Can you spot the self-timer? it is actually around the shutter speed dial)
Probably because the F3 is a completely new breed of industrial design among Nikon cameras, they had to make compromises here and there. Some switches such as self-timer and the on-off switch are a bit small and less intuitive to use. It took me some time to figure out what is the self-timer switch is doing. But the weirdest button of all is the little red rectangle just below the finder. This is used to illuminate the shutter speed information screen in the finder. It is hard to find and even harder to press during composing a frame. You need to use one of your fingernails to be able to push it.
Hot shoe
Because of the interchangeable viewfinder design, the hot-shoe could not be placed at the top of the prism, therefore and alternative solution was needed. The Nikon F3 has a very interesting non standard flash shoe combined with the film-rewind lever. This part of the camera gives home to the film speed settings and exposure compensation. To use flash, you need a special flash or an adapter.
Test shoots and answer to the scanner crisis
I have asked specifically the guys at my favorite camera shop and photo lab to scan my negatives without over-compressing the resulting jpg files. But they managed to give me once again 50% compressed garbage, therefore I officially gave up on them and decided to give another shoot to my old scanner. This time however, I tried out SilverFast (again) instead of the factory software I used and finally I have found the common understanding with this software. It really gave a new life to the old scanner of mine. I love the possibility to reduce noise by multiple scanning. I still think that this is not the final solution for my scanning crisis, but for the time being it is an acceptable compromise.
Click on the photos for full resolution versions so you can really see the quality of the scans! If you feel like, I would be happy to read your opinion in the comments section about the quality of these shoots and of course about the photos themself.
I know that this is not a fair comparison since the OM4 was released a few years later, yet both cameras represents the top of the manual focus models in their respective brands. Both of them shares the formula of manual focus, electronically controlled horizontally travelling shutter with mechanical back-up, aperture priority auto exposure, somewhat similar light metering system with TTL flash control and separate motor drive. It would be better to compare the titanium versions, but at the moment I have my hands only on the normal F3.
Obviously the OM4 Ti feels more solid despite its lighter weight. It is smaller and you really can feel that this is a weather sealed titanium body. The F3 feels also solid in my hands, but not the same. I prefer my OM 4 Ti when it comes to build quality. Again the F3 titanium would probably compare differently.
The multi-spot light metering system of the OM 4 is also superior to the F3, although I had no issues so far with the Nikon even when using flash. On paper though the Olympus offers more in this aspect. It has to be said that the OM 4 is a newer camera, therefore this comparison is not entirely fair neither.
Olympus OM 4 Ti vs Nikon F3
The viewfinder experience is better on the Nikon due to the fact that not only the shutter speed, but the aperture values are shown in the finder. However the OM4 warns you right in the in the viewfinder when exposure compensation is active while the Nikon shows nothing. Both cameras can benefit from a wide variety of focusing screens, but of course the Nikon has the possibility to change the whole finder.
In terms of electronics, I feel more confident with the Nikon, somehow it feels as a more bulletproof system to me. The clever solution of fix 1/80s for the first shoots before the 0 frame and the very long battery life all gives me a good feeling. The Olympus has a very mature system, but I had some troubles with week batteries and the battery life is also less.
At the end both cameras are excellent choices and I think both can do the job equally well. The F3 offers more features such as mirror lock-up, multiple exposure, interchangeable finders, high eye-point prism, but the OM 4 is smaller, features a very unique and excellent light metering and flash system and has a rather classical look.
But no camera worth anything without compatible lenses. I think that the OM lineup is strong enough, but Nikon is definitely has a serious advantage here. So if you are about to choose between these 2 cameras or similar models, consider your lens needs first.
I own the OM4 and I will need to give back the F3 soon, and while I really enjoyed the time with the Nikon, I still appreciate the Olympus look so my camera-bag remains intact.
Conclusion and recommendation
If you would like modern, but manual focus camera which you can trust with no compromise in features and don’t mind the size, than this is the camera for you. I think the F3 is affordable today and you can use a really impressive set of affordable quality lenses as well. The motor drive is not my thing, but indeed it can make this camera a speed daemon (~5 fps) as long as you can handle the focus. TTL flash photography is also among the features, but keep in mind that you need a special adapter or a compatible unit.
I really like this camera, it is a pleasure to use, it does look stylish and it has the coolest aperture indication in viewfinder ever. So if you like it, grab one in good conditions and you will not need another camera for a long time because this oe will never let you down.
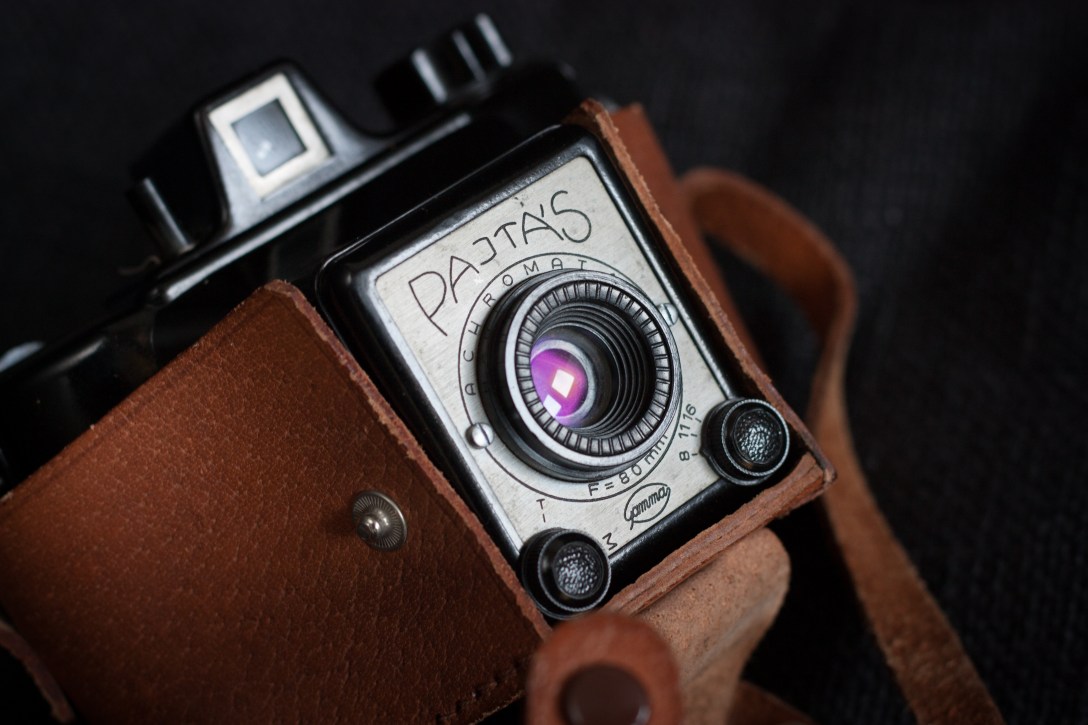
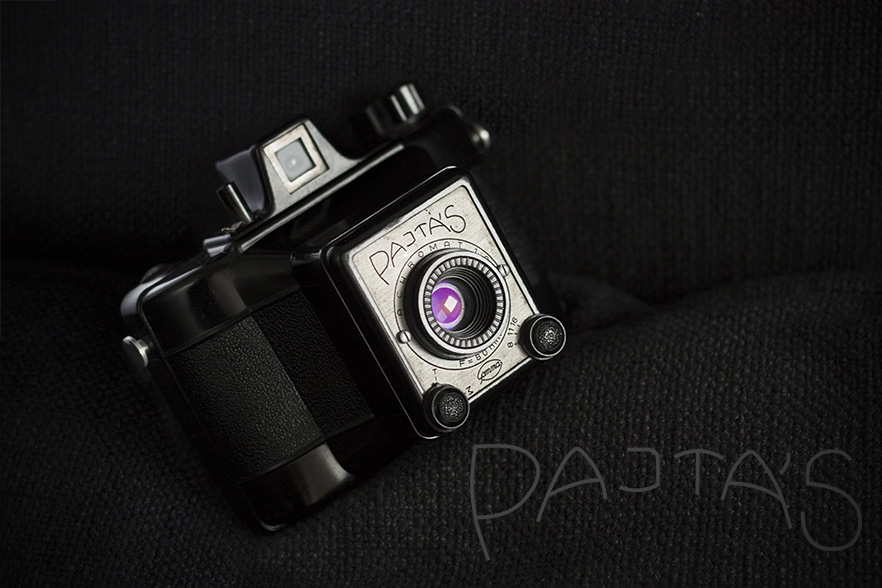
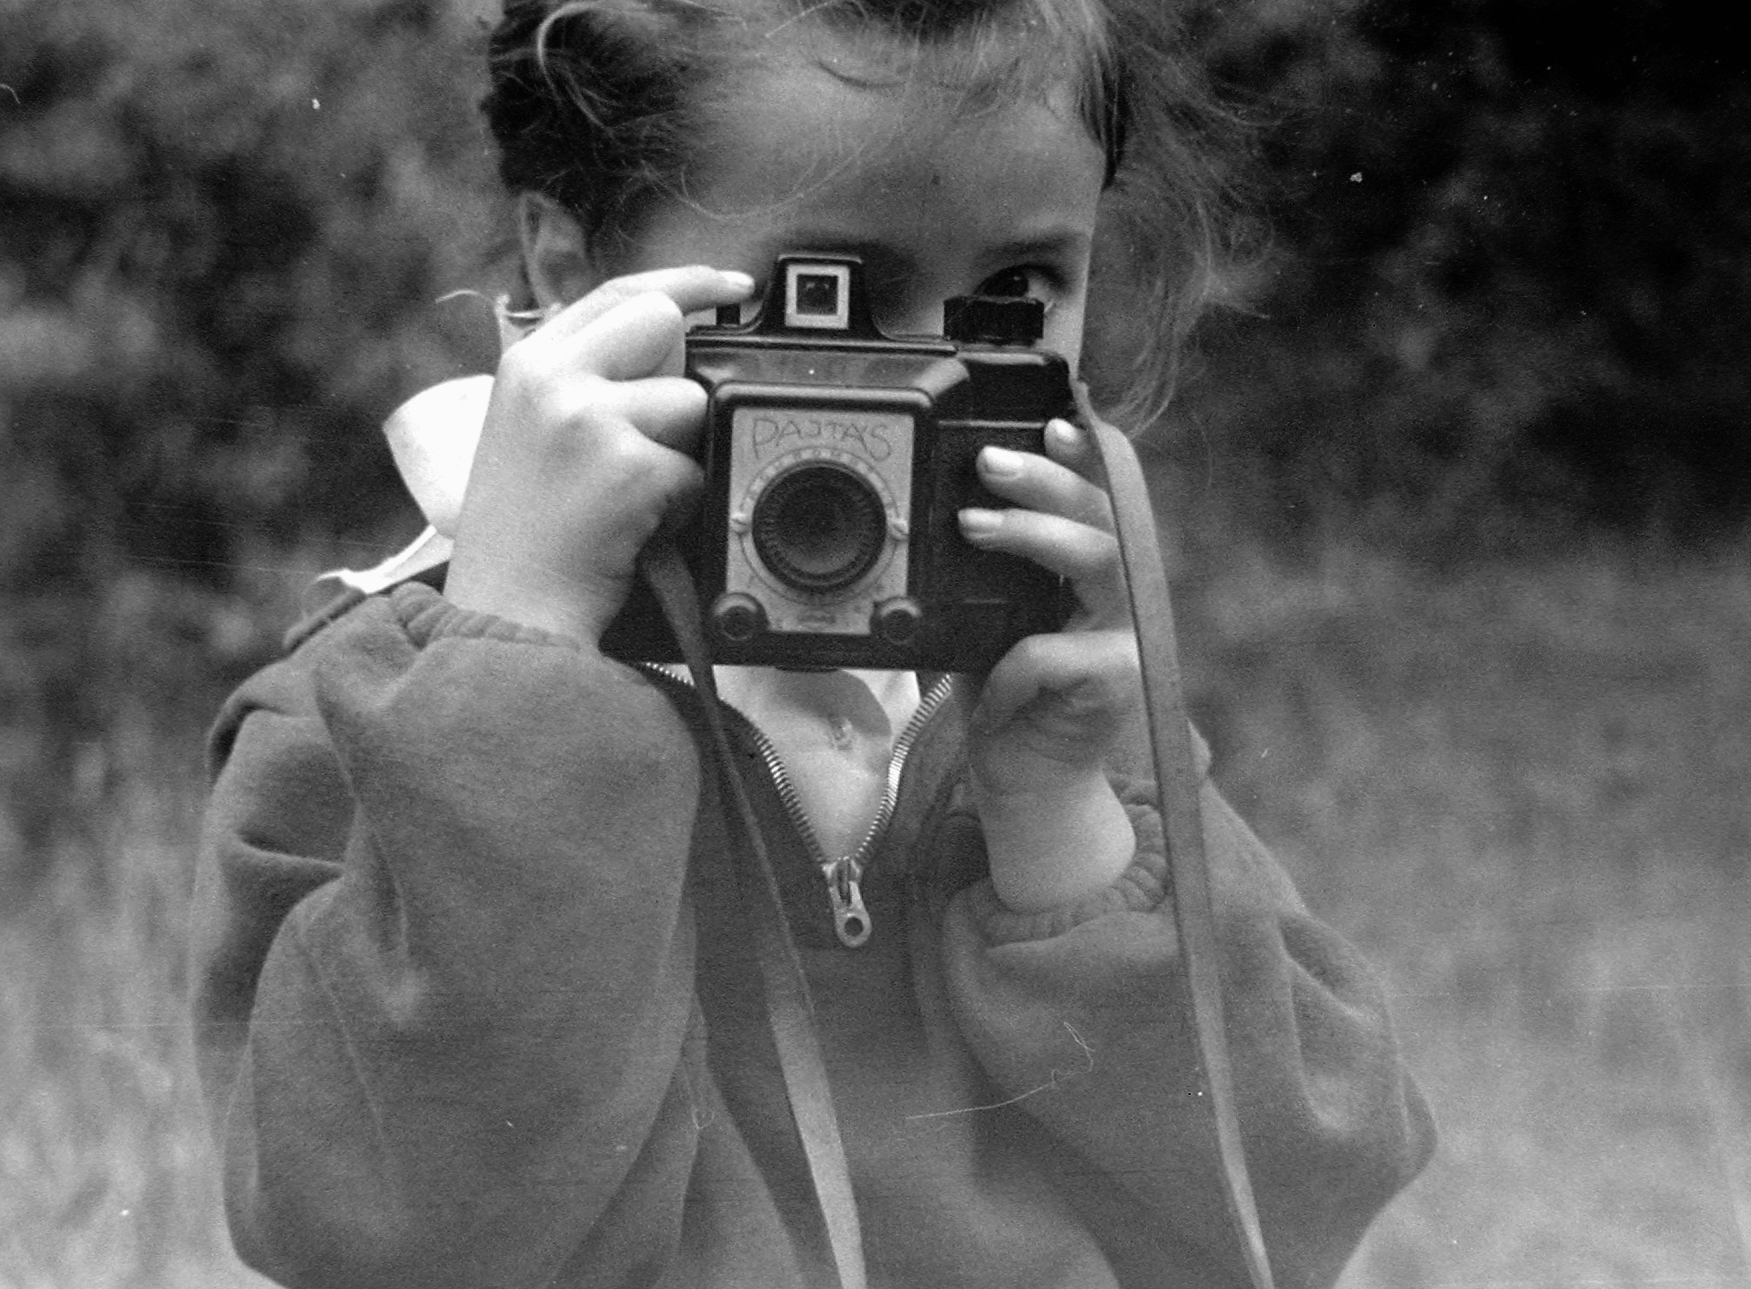
Pajtás is a simple box camera made in Hungary in the 50’s/60’s and as you would suggest this was not a high-end piece of technology even at those times.
Normally I seek for perfection in photography and related equipment and I try to write about cameras here which are capable to produce respectable results or at least represent fine craftsmanship. The Pajtás is far from perfect in any of the aspects of build and image quality, therefore it was not particularly exciting for me until now. So why do I yet write about this camera and most importantly why should you read this review, knowing that I will probably conclude that this camera is crappy but lovely at the same time?
My first and probably strongest reason is that this camera is one of the not too many which were made in my homeland and therefore holds a significant value for me. It also means that this camera is not as well known outside of my region so unless you live in Hungary or nearby, there is a pretty good chance that you have never heard of it.
On the other hand, the Pajtás could be interesting for those who like the history of photography or history in general because of several reasons. First of all this camera features an Achromat lens which can give us an insight into the dawn of photography as the very first daguerreotype cameras had lenses with similar construction. In other words, the images taken through the lens of this box machine can show us a little bit of the taste of the character of the photographs that were taken centuries ago.
In addition, this camera is an iconic relic of industrial design from a not too distant, yet completely different era where the market was driven by strange forces. These were among the toughest years of socialism in Hungary. Production was planned in 5 years cycles and there was literally nothing that was impossible to sell. In these times this camera was the affordable and available option for almost a generation.
Through these glasses, we might see this camera a little different and at least for me, it is special to hold and even better shoot with it.
All in all, if you are interested in history, strange unique cameras, or even Lomography than this article is for you.
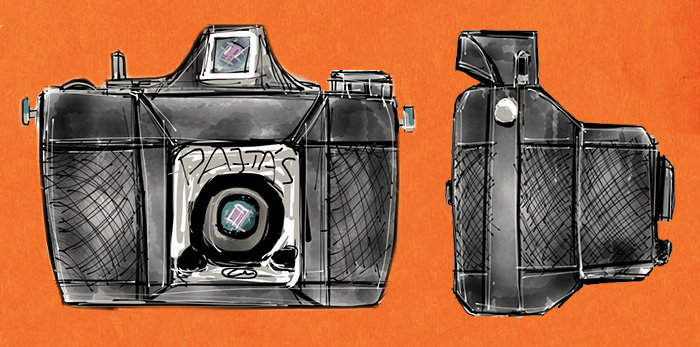
Pajtás drawing
The story
As always I try to collect as accurate information about the history of a camera as possible, but it is possible that I state something wrong. If I did, please send me an e-mail or leave a comment. Corrections are always welcome.
Around 1960, This photo is part of the Fortepan collection of 19041 amateur photos. It is licensed under CC share alike Hungary.
The members of the young pioneer organization were called Pajtás in socialist Hungary. It was the equivalent of the word comrade for young people. Oddly I had no idea about this meaning of this word until I started to read about this camera. But it has to be said that I was born in the 80’s when socialism was already quite melded in Hungary.
As the name suggests, the camera was intended for a young audience and it was extremely successful. It was affordable, reliable and most importantly available, so many had received a Pajtás as a present for various occasions such as graduation.
The camera was made between 1955-1966 by Gamma although the emblem has changed to FFV from 1960. FFV stands for Fővárosi Finommechanikai Vállalat (Metropolitan Works for Precision). Interestingly Gamma is still an existing company, even though they don’t manufacture cameras anymore.
The designer was János Barabás (1900-1973) who was mainly responsible for lens design at Gamma and we can thank him for the many great lenses used by Hungarian cameras.
The price of the camera in 1964 was 160 HUF and it was possible to buy a leather case for an additional 45 HUF. [1]
The camera is almost as simple as possible. It is made of Bakelite which allowed mass produce it on a low price.
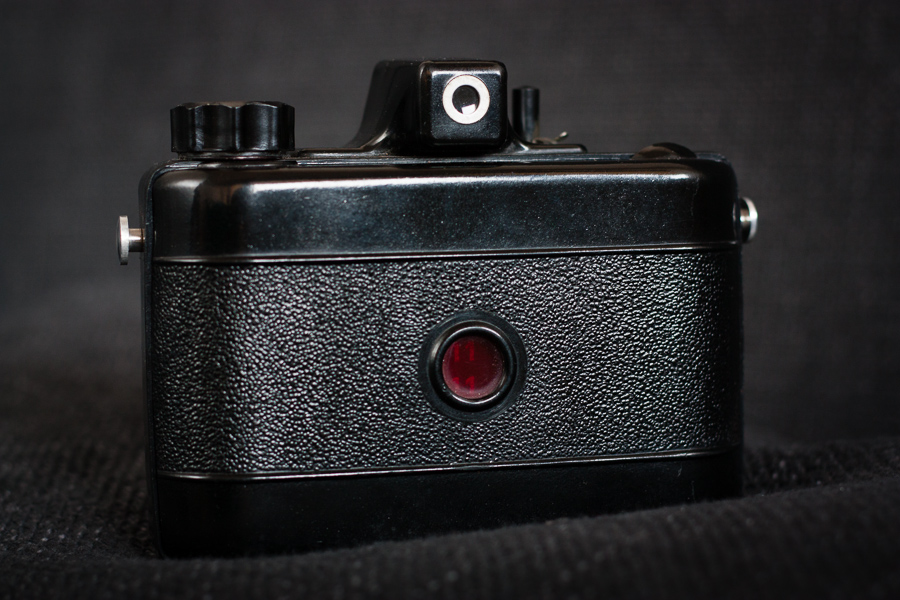
The back has another nice feature, a little red window which keeps us informed about the number of the actual frame. Basically, the back of the film (in fact the covering paper) is visible through this window so you can see the printed numbers on the paper. While this is a robust solution, it is advisable to cover this window most of the time, especially if you use higher sensitivity film.
The film can be advanced by a knob at the top of the camera while you have to keep an eye on the frame counter window. There is no other way to determine how much you need to advance the film but to look at the window. This mechanism also makes it easy to take multiple exposure or overlapping shoots.
Pajtás film advance knob
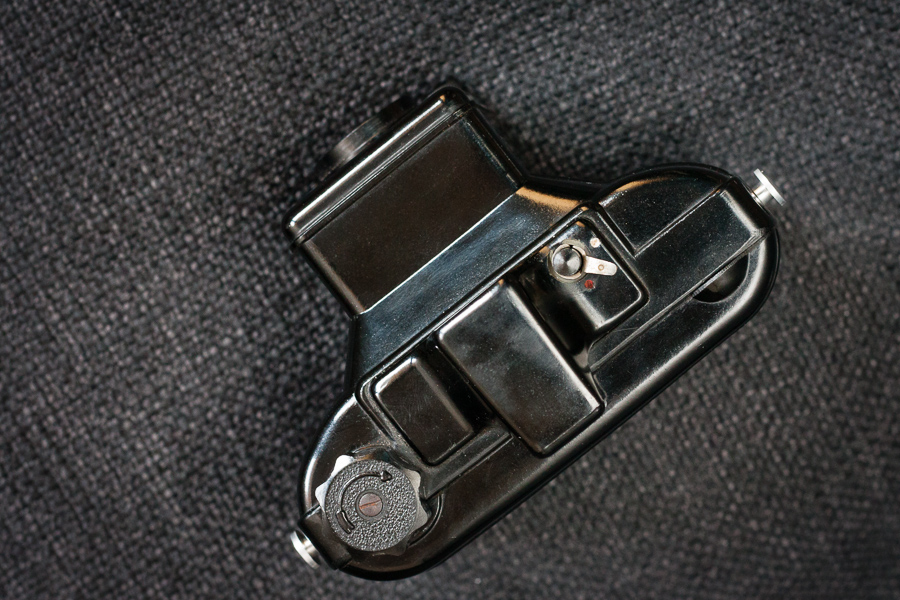
Pajtás shutter release
The shutter release is a simple column and a rotating switch around it with two positions. The red dot means locked and obviously, the white mark indicates that the shutter is free to press.
Viewfinder
Since it is not possible to focus with this camera, the viewfinder is rather simple. It contains a lens for correct framing, but this is not a great pleasure to use. It is bright enough but considerably blurry to my eyes. To be fair, this viewfinder does the job just well enough. It gives you some approximation about what will be on your photograph and if your subject is not too close the parallax error is not significant.
Pajtás top
To be fair, this viewfinder does the job just well enough. It gives you some approximation about what will be on your photograph and if your subject is not too close the parallax error is not significant.
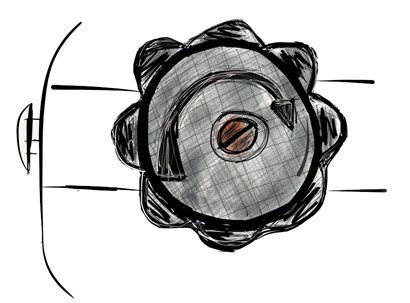
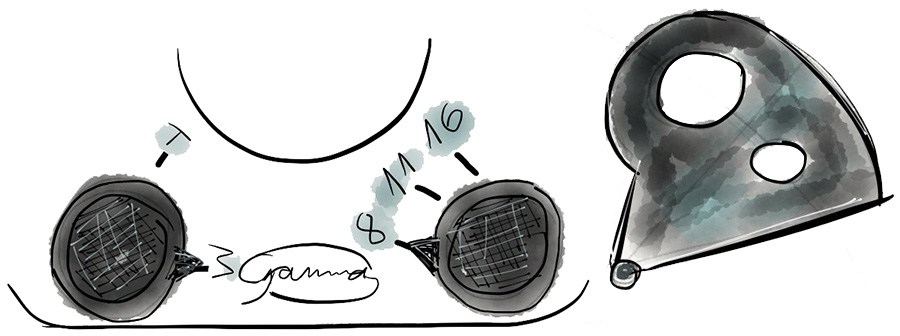
(Left) shutter-speed and aperture settings, (right) aperture mechanism concept
There are only 2 shutter speeds available M (Moment)1/30 sec and T (Time) which stands for bulb. There is a better offering in aperture settings though you can select f/8, f/11, and f/16 options. Both the shutter speed and the aperture settings can be selected with dedicated dials on the front plane of the camera right below the lens.
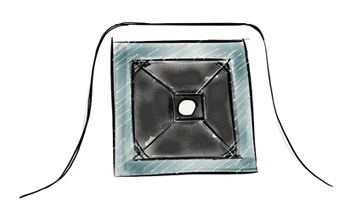
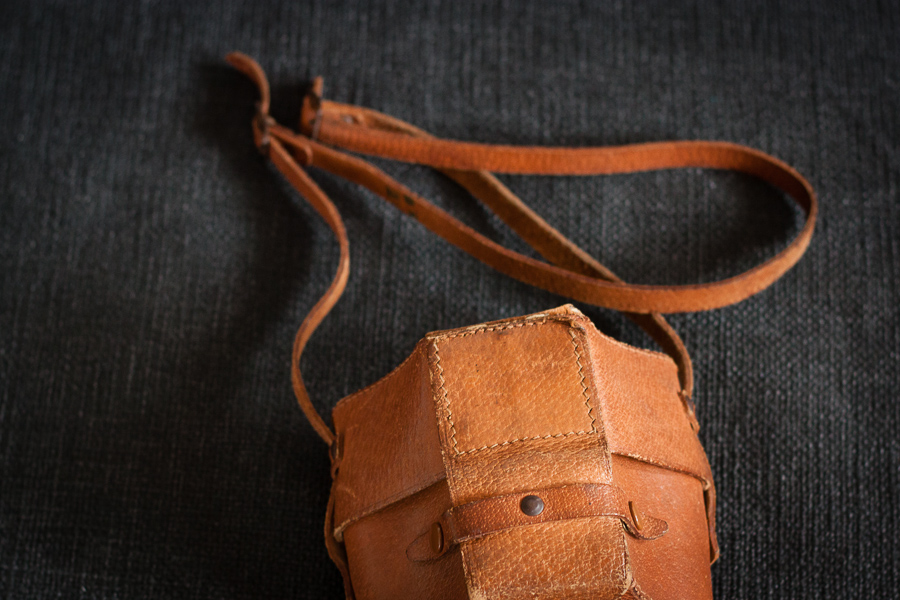
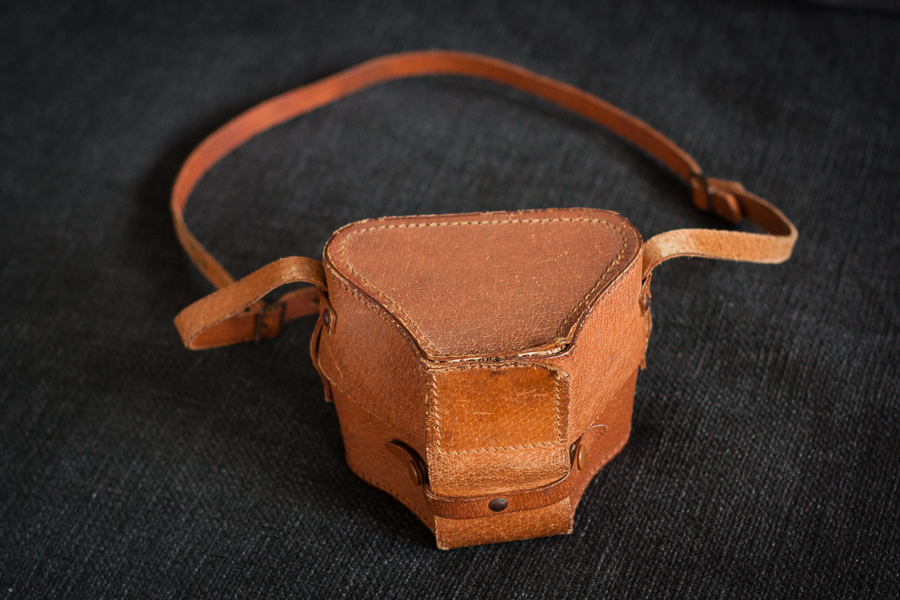
Pajtás in leather case
All apertures are completely rounded and as far as I can see (without disassembling the camera) it is done by a metal plate with 2 holes on it. When the maximum f/8 aperture is selected, the plate is completely off the way, but as you turn the switch for selecting smaller apertures the appropriate hole slides into place behind the lens.
Pajtás in leather case
The leather case is pretty nice, it protects the camera very well. In the meantime, it has a hole in the back to read the frame-counter without dismounting the camera. My only concern is that you cannot separate the front part of the case (covering the lens) so you cannot use it as a half case.
The lens
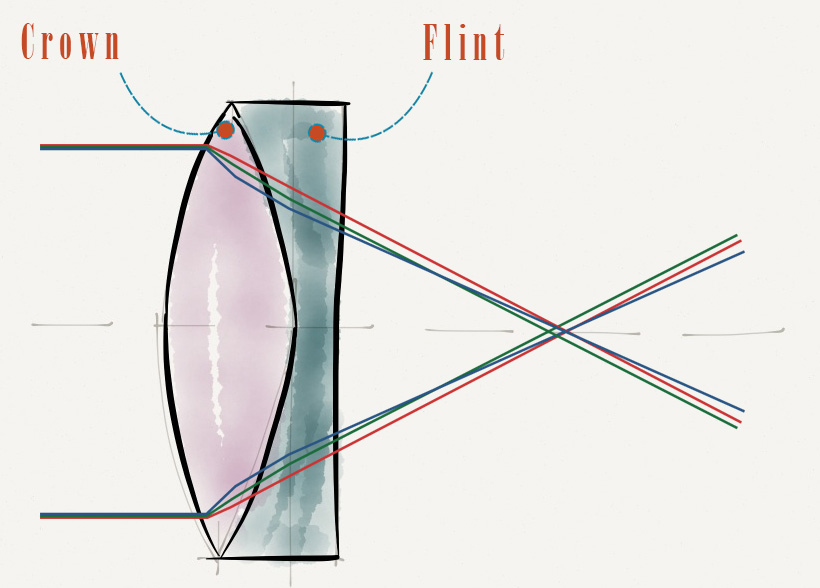
The lens is an 80mm f/8 Achromat manufactured by MOM (Hungarian Optical Works). It is a classical landscape lens consisting of 2 elements: a positive crown and a negative flint element.
The lens which was designed and manufactured by Charles Chevalier for Daguerre was an achromatic landscape lens in the 1830s. Although that lens was different from the one that can be found in the Pajtás, the basic concept is the same. The achromatic lens was a huge step because for the first time it corrected some of the main aberrations which can be found in an optical system.
Achromatic doublet
An achromatic lens or achromat is a lens that is designed to limit the effects of chromatic and spherical aberration. Achromatic lenses are corrected to bring two wavelengths (typically red and blue) into focus in the same plane.
These lenses are typically featuring low apertures because the rays entering the lens far from it’s axis need to be cut off by the stop in order to maintain image quality.
The lens used in the Pajtás camera gives no big surprises. It is focused to the hyperfocal distance so everything on the photo from some near distance will be sharp. It is also supported by the relatively small aperture, that is why depth of field is quite big.
The lens looks coated as I can see some purple cast on it when the light is appropriate. In general, it is not too prone to flare. Of course, there are not many elements in the lens so there are not many surfaces to bounce and reflect on. On the other hand, the interior of the camera is highly reflective so flocking could probably improve image quality and contrast.
Image quality and sample shoots
As you would expect, the image quality is not at all amazing. It is decent from a camera like this and I have to admit there is some charm of the strong character. Sure, most of the effects produced by the lens can be mocked by clever applications on any smartphone, but that is not the same. You must know that you work with a high random factor when you shoot with this camera.
So far I shot only 1 roll of Lomo Lady Gray 400 film with this camera as the first trial. In general, an ISO 400 film is probably too fast for this low shutter speed, but since winter is coming and we are having many dark days it was a good choice. I have some Hungarian Forte Supercolor 100 film in my refrigerator (expired in 1995) which could be a stylish combination with this camera.
Distortion test (Graz, Austria), Pajtás, Lomo Lady Gray 400, Kodak D76, Canoscan 9900F
The lens is sharpish in the center but blurs everything off around the edges. It sometimes even creates the impression of shallow depth of field, but this is not the case.
Distortion is apparent, but I couldn’t hold the camera perfectly perpendicular against the staircase and my scanner is also not the best in keeping the film flat. Anyhow, I think that the geometrical distortion is not the biggest issue compromising image quality here.
The numbers and circle signs on this shot (almost all shots have some) belong to the back of the covering paper of the film. I am not sure how they managed to get to the photos, but they did. If anyone has any idea, I would be happy to read it in the comments.
Also, there are signs of light leaks on almost all of my shots. This most likely happened, because the camera does not seal light perfectly. I am seriously considering to use some black tape next time I put the film into my Pajtás.
There is no flash connection on this camera, so in theory, you cannot use flash with it. On the other hand, the 1/30 of a second is slow enough to fire flash manually at the right time. But probably the best strategy is to shoot in bulb mode in very low light or in complete darkness and fire the flash while you keep the shutter release pressed. I have done some successful experiment with the latter technique so I can recommend giving it a try.
Conclusion and recommendations
The Pajtás is not a rare camera, it is extremely cheap and just as light to carry. It is extremely easy to use as well. I believe it is even able to produce nice images in good hands.
Because of the simple construction there is literally nothing which could break in it. It is relatively safe to pick one with good cosmetics as it is almost certain that it will work properly. Eventually, this is not the camera we would expect completely accurate shutter speed from.
My only concern is the back which is a bit flimsy to me, but it can be secured by some black tape. And of course the Bakelite body is very rigid and therefore fragile, so it is advisable not to drop it.
If you like box cameras and the imperfection of the images they produce, or you are a fan of the retro design, then this camera could be a good choice for you.
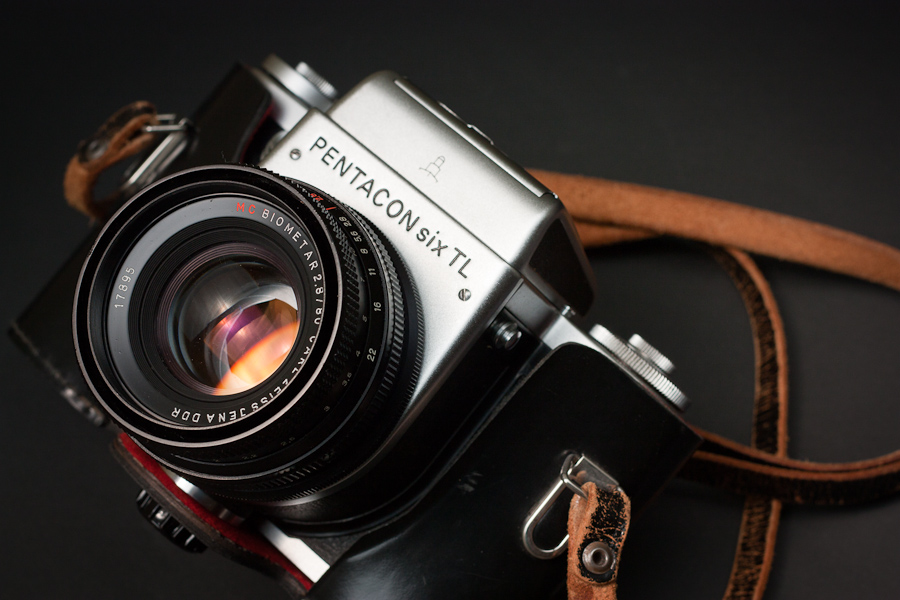
I have a very special relationship with my Pentacon Six TL camera since it is my only working medium format camera. I was always heavily attracted by medium format photography, but I couldn’t afford for a while to get into it. Eventually, the P6 was the camera which allowed me to shoot 6×6 frames and since then I have not to regret my decision nor had a single thought to change to another system. In this post, I tell my story with this camera and try to show both the bad and the good things about it while hoping that some of you can find this information useful. It will be more like a subtract of my personal user experience and all the important bits I learned during my research.
My Pentacon Six story
I was a student at the university sometime around my second year when I first heard about this camera. I have just started up an experimenting film with an old Zenit-E when my buddy and roommate showed me a website with lots of photos and a description of the P6. Both of us got pretty excited when we realized that there is a world beyond the 35mm film, so we started to google and find more information about this beast. Unfortunately, I had no money at this time to simply buy one on eBay, therefore, I almost abandoned the idea until I found a Pentacon in a repair-shop next to my sister’s old apartment where I helped her to move in. The camera was broken, not complete and had no lens. It was literally a looted old donor of a camera. Despite the conditions of this camera-corpse, I was amazed by the size of the thing. It was huge, much bigger than I have expected after all the photos I have seen on the Internet, especially the lens mount was extraordinary sizeable compare to anything I have seen before. I could only wonder what a hell of a lens could possibly fill this gigantic hole on the front of the camera. From this moment, there was no return. I knew I had to get one of these monsters, but I still had to find the right one, which turned out not to be that difficult at all. A few weeks later I found a little shop in a small village next to my hometown by accident. I had spotted an ancient Russian enlarging machine in the shop-window so I stopped by and found a great repairman and a huge cabinet of precious vintage cameras and other relics. As you have already figured out, he had a nice Pentacon Six TL in the shape I was looking for. The camera was there for cleaning, but the owner hasn’t fetched it for many years. It was not an easy deal because the guy was not really keen to sell anything from his collection, but eventually, I got my Pentacon Six with the standard 80mm f/2.8 Biometar lens made by Carl Zeiss Jena and with a waist level finder. Both the camera and the lens were beautiful, nice, clean and fully operational. In fact, it was not really heavily used and in addition, the repairman was kind enough to check the shutter speeds before he handed the camera over them to me. Since then I have added many additional accessories and lenses to my Pentacon kit so today my collection consists of:
Pentacon Six TL drawing by Eszter
2 Pentacon six bodies
2 Waist level finders
TTL pentaprism
2 Carl Zeiss Jena (CZJ) 80mm f/2.8 Biometar
1 CZJ 50mm f/4 Flektagon
1 CZJ 120mm f/2.8 MC Biometar
1 CZJ 180mm f/2.8 MC Sonar (This lens belongs to a friend I just use it)
1 CZJ 500mm f/5.6 MC Pentacon
Extension tube set
Split image focusing screen
Ever ready cases
The way it looks
Bad reputation
Unfortunately, there are not only great things about this camera even if most of the bad rumors are only partially true. So let’s start with the not so nice before we focus on the good things. Many people think that the quality insurance was not the best during the manufacturing of these cameras, therefore, it is a real gamble to buy one as you may get a pretty bad and unreliable one. It is true that it is hard to find a Pentacon Six in a good working condition with perfectly accurate shutter speeds, but it has nothing to do with the quality of the cameras. The fact is that these cameras are pretty old and most of them were used for professional purposes where most likely a tremendous amount of film was burned through of them. You should think of them like you would think about an old car, for instance, a VW Beetle. It is a nice car with very few flaws, but since it is old and was driven around the Equator like 30 times you need to pay attention to maintenance to keep it running. You wouldn’t drive a 40-year-old Beetle found in someone’s backyard without checking the oil level, would you? Of course not, so why would you treat a camera differently? An old mechanical camera is just like an old car. It needs some maintenance and care. Of course, if you were a Hasselblad user, you might disagree, but the category and price tag of these brands are completely different, however, the produced images could be very similar.
Typical issues and solutions
I am lucky because I have personally met with only very few issues you can read on the Internet according to the P6. Most problems are easy to fix during a general overhaul which involves cleaning, lubrication, and adjustments of strings etc.
Slow and inaccurate shutter speeds
The Pentacon Six TL uses a huge canvas focal plane shutter which has 3 implications.
Lenses are cheaper because there is no shutter in the lens
Flash photography is limited to the sync speed which is 1/30s.
The huge canvas needs big and strong strings which can lose their adjustment as time goes by.
Usually, the speed 1/125s is the most accurate, anything faster could be slower than intended if the camera was not used in a long time. The slow times also could be problematic because the mechanical clock could pick up some dust. The solution is an overhaul by someone who knows what he is doing. The camera must be disassembled, cleaned and adjusted. There are no big worries here if you casually use your camera this does not have to be done too often, maybe once in every 10 years.
Overlapping frames
This problem is much more apparent than the previous one though. Many people have this problem of “kissing” or worse, overlapping frames. I think in most cases this happens because of the improper loose loading of the film. Have a look at this video from PentaconSixExpert on Youtube. I am not saying that this is the only problem because my rolls have uneven spacings between frames too (but no kissing or overlapping so far), but many times it is only because of the way you load the film.
Frame counter
I had no problems with this feature either, but this is definitely one of the weak spots of the camera. I have seen some Pentacons where the back of the camera was modified by adding a little window covered with red plastic to be able to see the numbering at the back of the film. This is certainly a solution, but a very harsh one. You could get the counter fixed by a professional or you could live without it, eventually, you can shoot even if it is broken.
The bright side
Now that we finished off the not so nice things it is time to celebrate and inspect why this system is so great. If I had to be short I would say we need to have a look at the following aspects to justify:
Lenses and image quality
Size
Flexibility
Value/price ratio
Lens choices
The lens selection for this system is just fantastic in my opinion. You can find excellent optics for literally no money (compared to modern lenses) for every focal length from a wide variety of manufacturers most notably Carl Zeiss Jena (CZJ). The lenses I use most of the time, are generally very fast, sharp and joy to shoot with.
It has to be said that even the multi-coated (MC) versions are more prone to flare than modern lenses with similar optical formula, therefore the use of a lens hood is always a good idea. If you want to read more about compatible lenses, visit the truly great site pentaconsix.com.
Jupiter 8 lenses vs CZJ Sonnar 180mm f/2.8
A friend of mine gave me a 180mm f/28 Sonnar to use. While this is one of the best and most iconic Pentacon mount lenses, I rarely use it, because it is so much bigger and heavier than the not much shorter 120mm Biometar.
Size and weight
The Pentacon Six looks like a 35mm SLR except this is much bigger, therefore, many people call them beefed up SLR or SLR on steroids. While it is true that they are significantly bigger and heavier than their 35mm counterparts, in fact, the P6 is a rather compact medium format camera which shoots 6x6cm frames. Yes, there are smaller ones, but those usually do not have the capability to switch lenses or having similar dimensions but with more weight. If you, like me love to travel with the biggest “sensor” possible then this size/weight aspect could be really important for you.
It has to be said, that this kit could be still awfully heavy especially if you pack more than one lens and a tripod too.
Value for the money
I think the Pentacon Six system comes with a very appealing price nowadays. You can get your body with an excellent standard lens around 100€ and even if you add the extra for cleaning and adjustments it is still far cheaper than most other interchangeable lens medium format system.
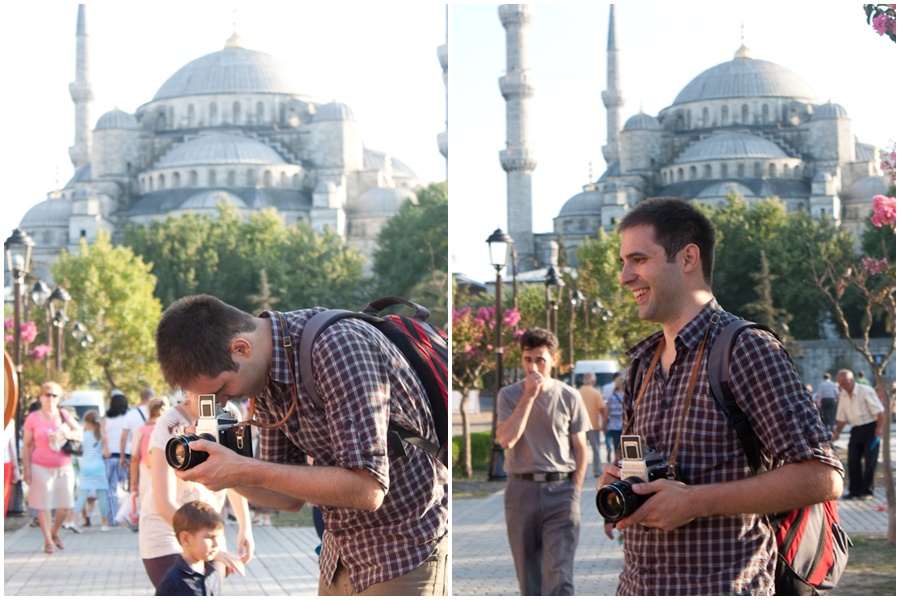
The fun I have
Eszter documented how I took a portrait of a painter in Istanbul. I think it reflects my emotions during the usage of this camera.
Shooting with a Pentacon Six TL, Istanbul (Turkey)Artist (Istanbul, Turkey) Pentacon Six TL, Carl Zeiss Jena Biometar 120mm f/2.8, Fujicolor Pro 160NS, Canoscan 9900F
Personal experience
During the years I used my Pentacon Six, I have gained a lot of experience with it. So I would like to share some random thoughts I think could be useful for you.
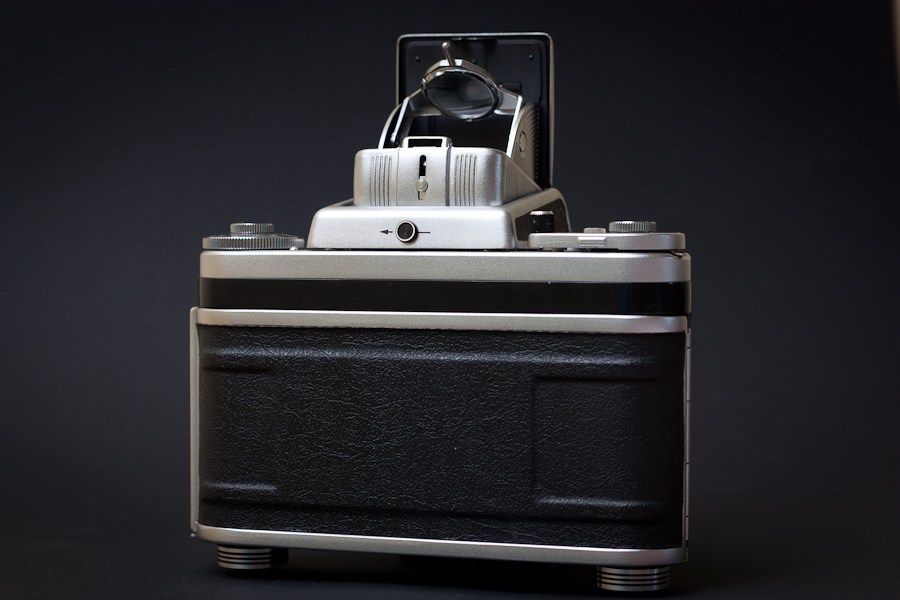
Pentaprism vs Waist level finder
I do have a TTL prism, which provides a correct image in the finder (no switched sides) and can be used for through the lens light readings.
On the other hand, the prism is very dark and the light metering is not very easy to use. It is great to have in some cases, but generally, I prefer an external light meter. There are different brighter prisms available for example the older non-metering version. If I am not wrong the even brighter prism of the Kiev 60 is also compatible and can be attached.
In contrast, the waist level finder is definitely the brightest solution, therefore I use it the most. But it switches the sides of the images in the viewfinder, and you can hold the camera lower than usual to be able to see through the finder. For me, it is much easier to focus with, especially with the little magnifying glass built in.
Despite all of the inconveniences of the waist level finder, the image in it is something really special. I know it is an oxymoron, but it looks even better than reality. It is huge, bright and vivid, no viewfinder of any 35mm camera can come even close to it.
Focusing
Focusing as always is a critical thing to do when talking about any photography. I had to learn that the depth of field is just way more shallow when you shoot medium format, thus even a slight movement of the camera could cause your subject to fall out of the sharp region.
When I shoot handheld with the 80mm/120mm lenses I try to not going wider than f/4 or even f/5.6 because it still provides nice bokeh, but has some safety in terms of the size of the sharp areas. Naturally, I often find myself shooting wide open (f/2.8) on a street, but it’s always risky to do.
Repairs
Luckily I haven’t had many problems with my cameras, but during the last 6 years, I had some cases where I had to ask someone to help.
I had “the old” (my original) P6 cleaned, lubricated and adjusted one time after I heard some unusual noises from the shutter. Since then it works perfectly. No exposure problems even when shooting Velvia.
My 120mm lens had a stuck iris once which required the disassembly and general cleaning of the lens. This is, unfortunately, a common problem with old lenses. Conclusion and recommendation
Needless to say, this camera is not for everyone. As long as you can accept that your camera needs some care in a form of regular maintenance, you could be very happy with it. So keep in mind that the final price could be higher than the purchase itself as basic repairs might be needed.
Nowadays it is not always easy to find someone who is qualified to repair old mechanical cameras. Therefore it is best to buy from a trusted source with grantee that you get a working camera. I think it worth the extra money to get an overhauled camera in the first place.
I think this is a great camera, and could be a good choice for anyone who wants to try medium format photography and needs an interchangeable lens solution. If you don’t have the budget for more expensive systems like Hasselblad or Mamiya, or simply want to find the most compact option this could be the solution for you.
So far my Pentacon Six never let me down, the images are just amazing and for me, it is great fun to shoot with.
More samples
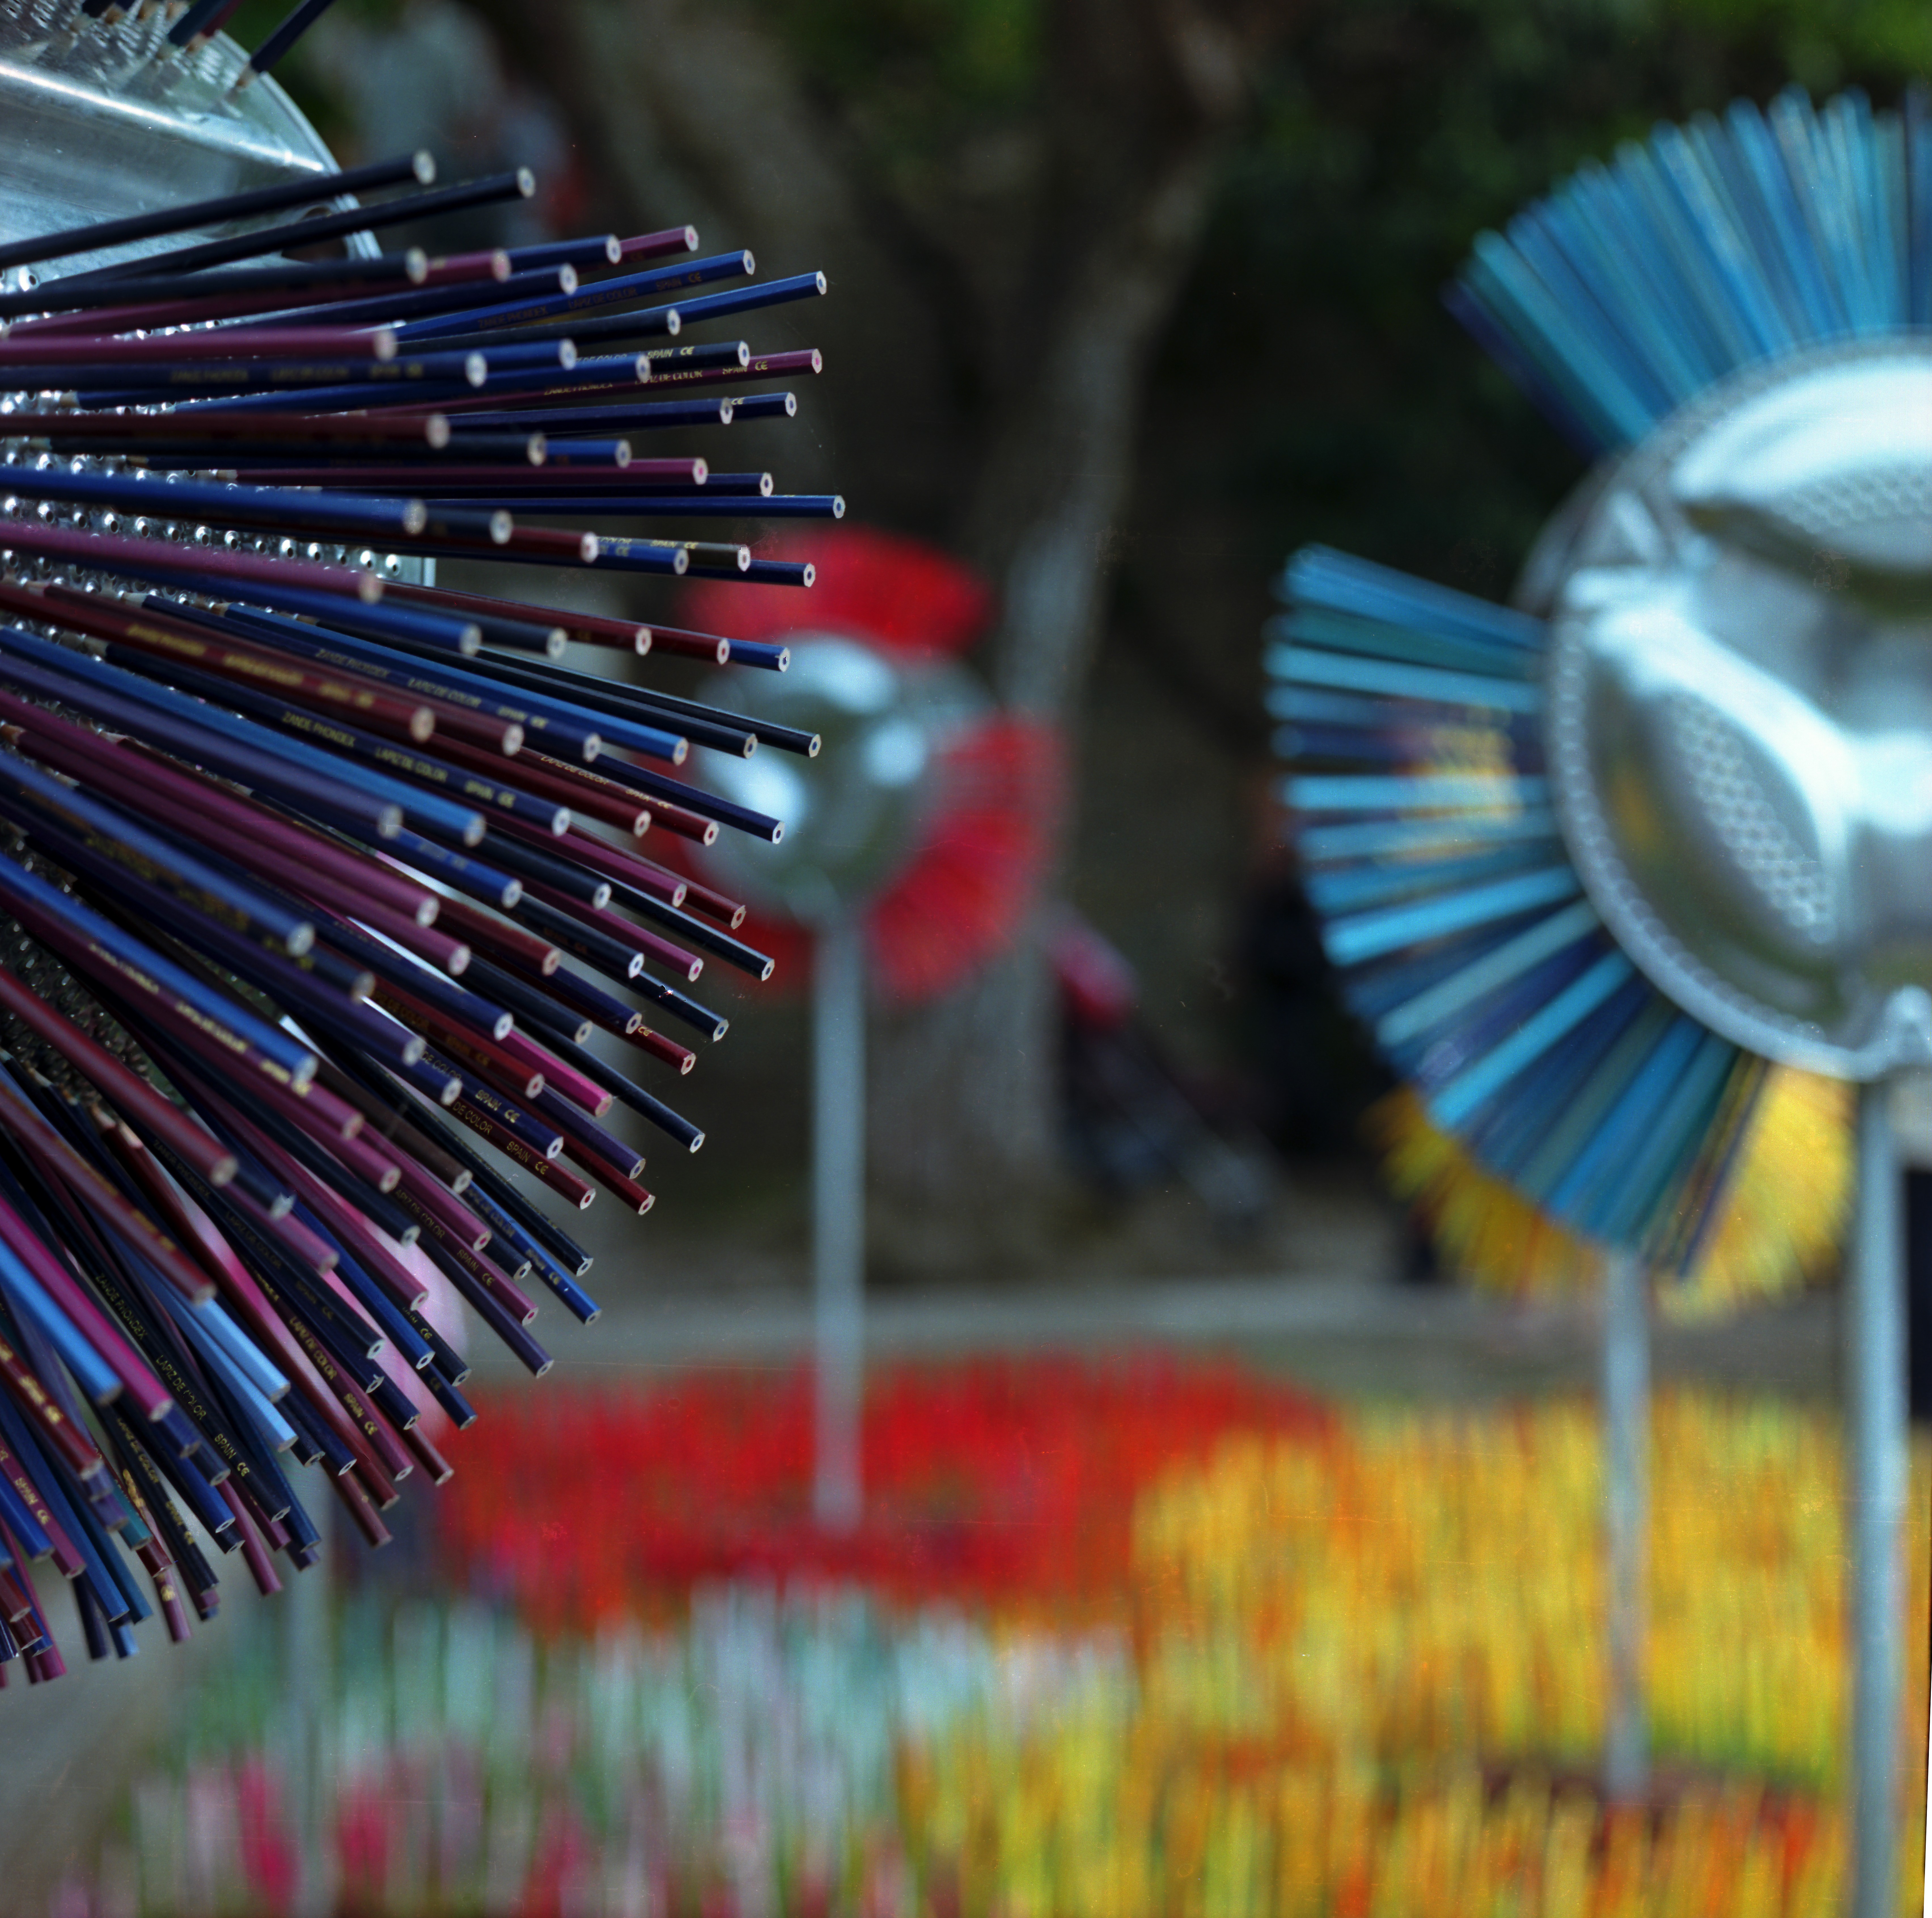
Temps de Flors 2009 (Girona, Catalonia), Pentacon Six TL, CZJ Biometar 120mm f/2.8, Kodak Portra 160NC, Canoscan 9900FTemps de Flors 2009 (Girona, Catalonia), Pentacon Six TL, CZJ Biometar 120mm f/2.8, Kodak Portra 160NC, Canoscan 9900FCustom bike (Gyöngyös, Hungary) 2009, Pentacon Six TL, CZJ Biometar 80mm, Kodak Portra 160NC, Canoscan 9900F
Links
The Pentacon Six System Far the best and most comprehensive informational site about the topic. Highly recommended.