If you followed the Camerajunky Facebook page you may have already read about my planned reunion with my beloved Kiev 4 camera after a long period in which it was hidden in a box. I really felt that I needed to use it again, and my recent discovery about the beauty of Ilford HP5 film gave me the final push to do so.
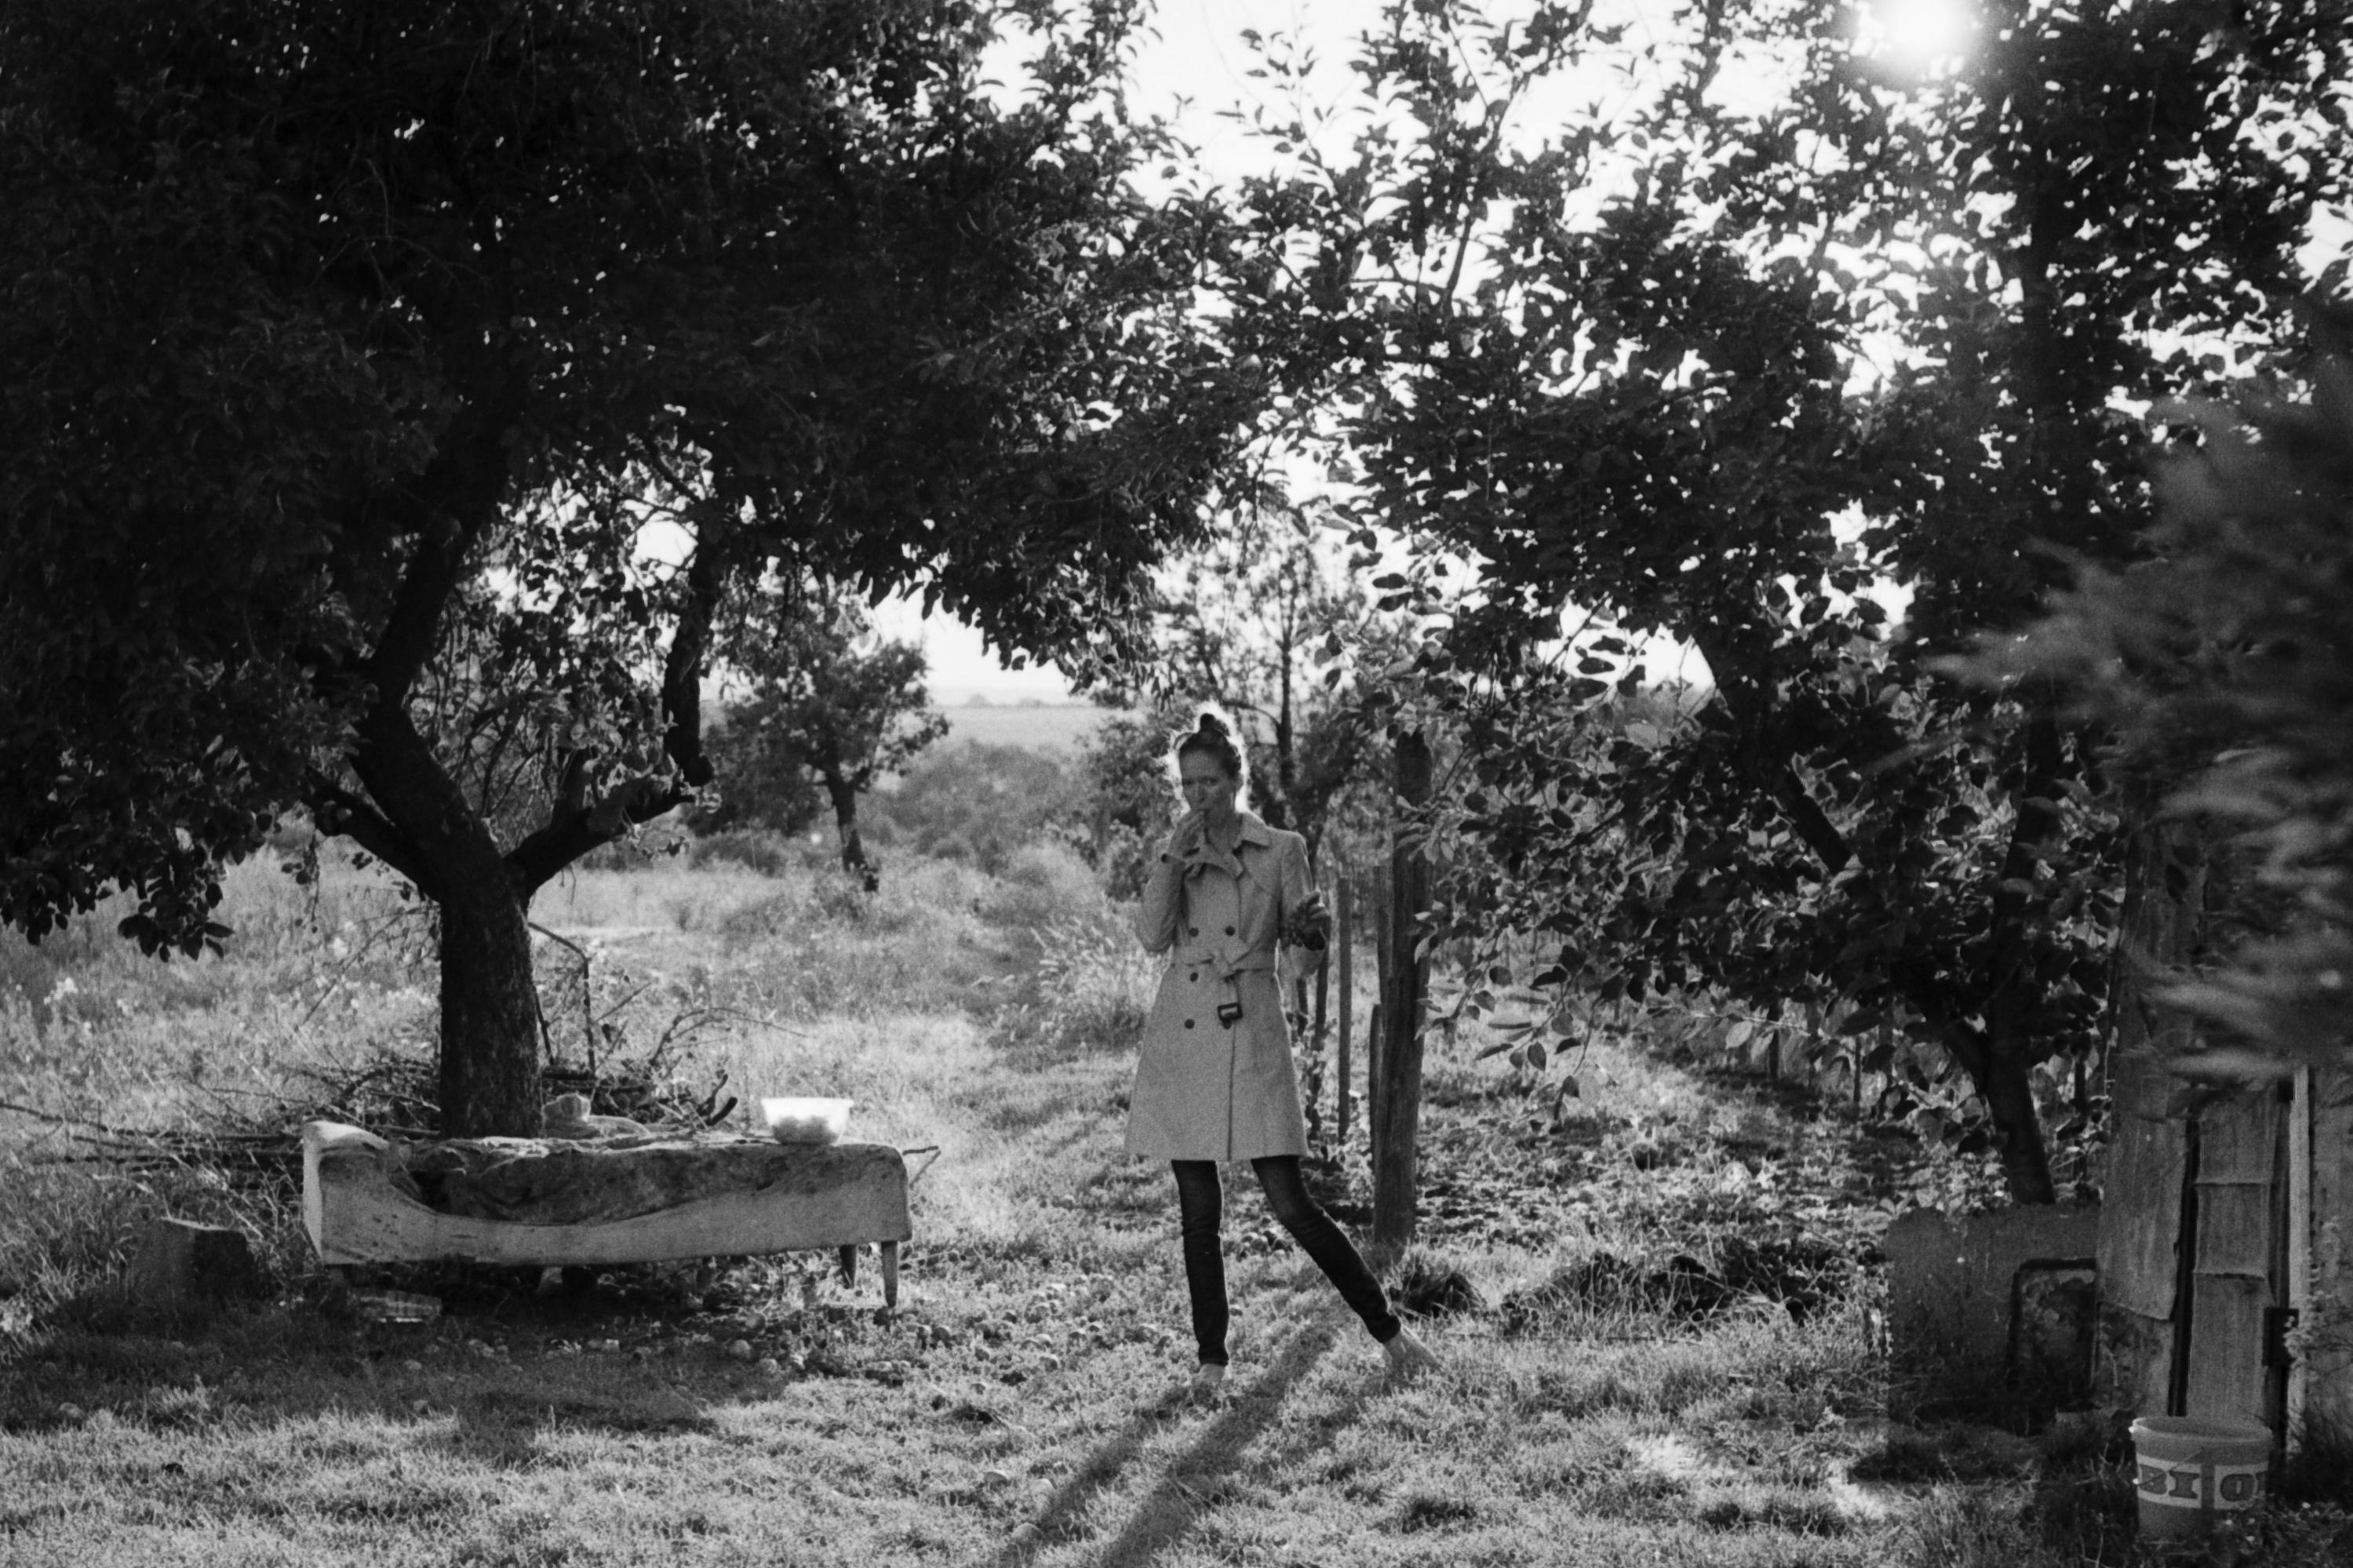
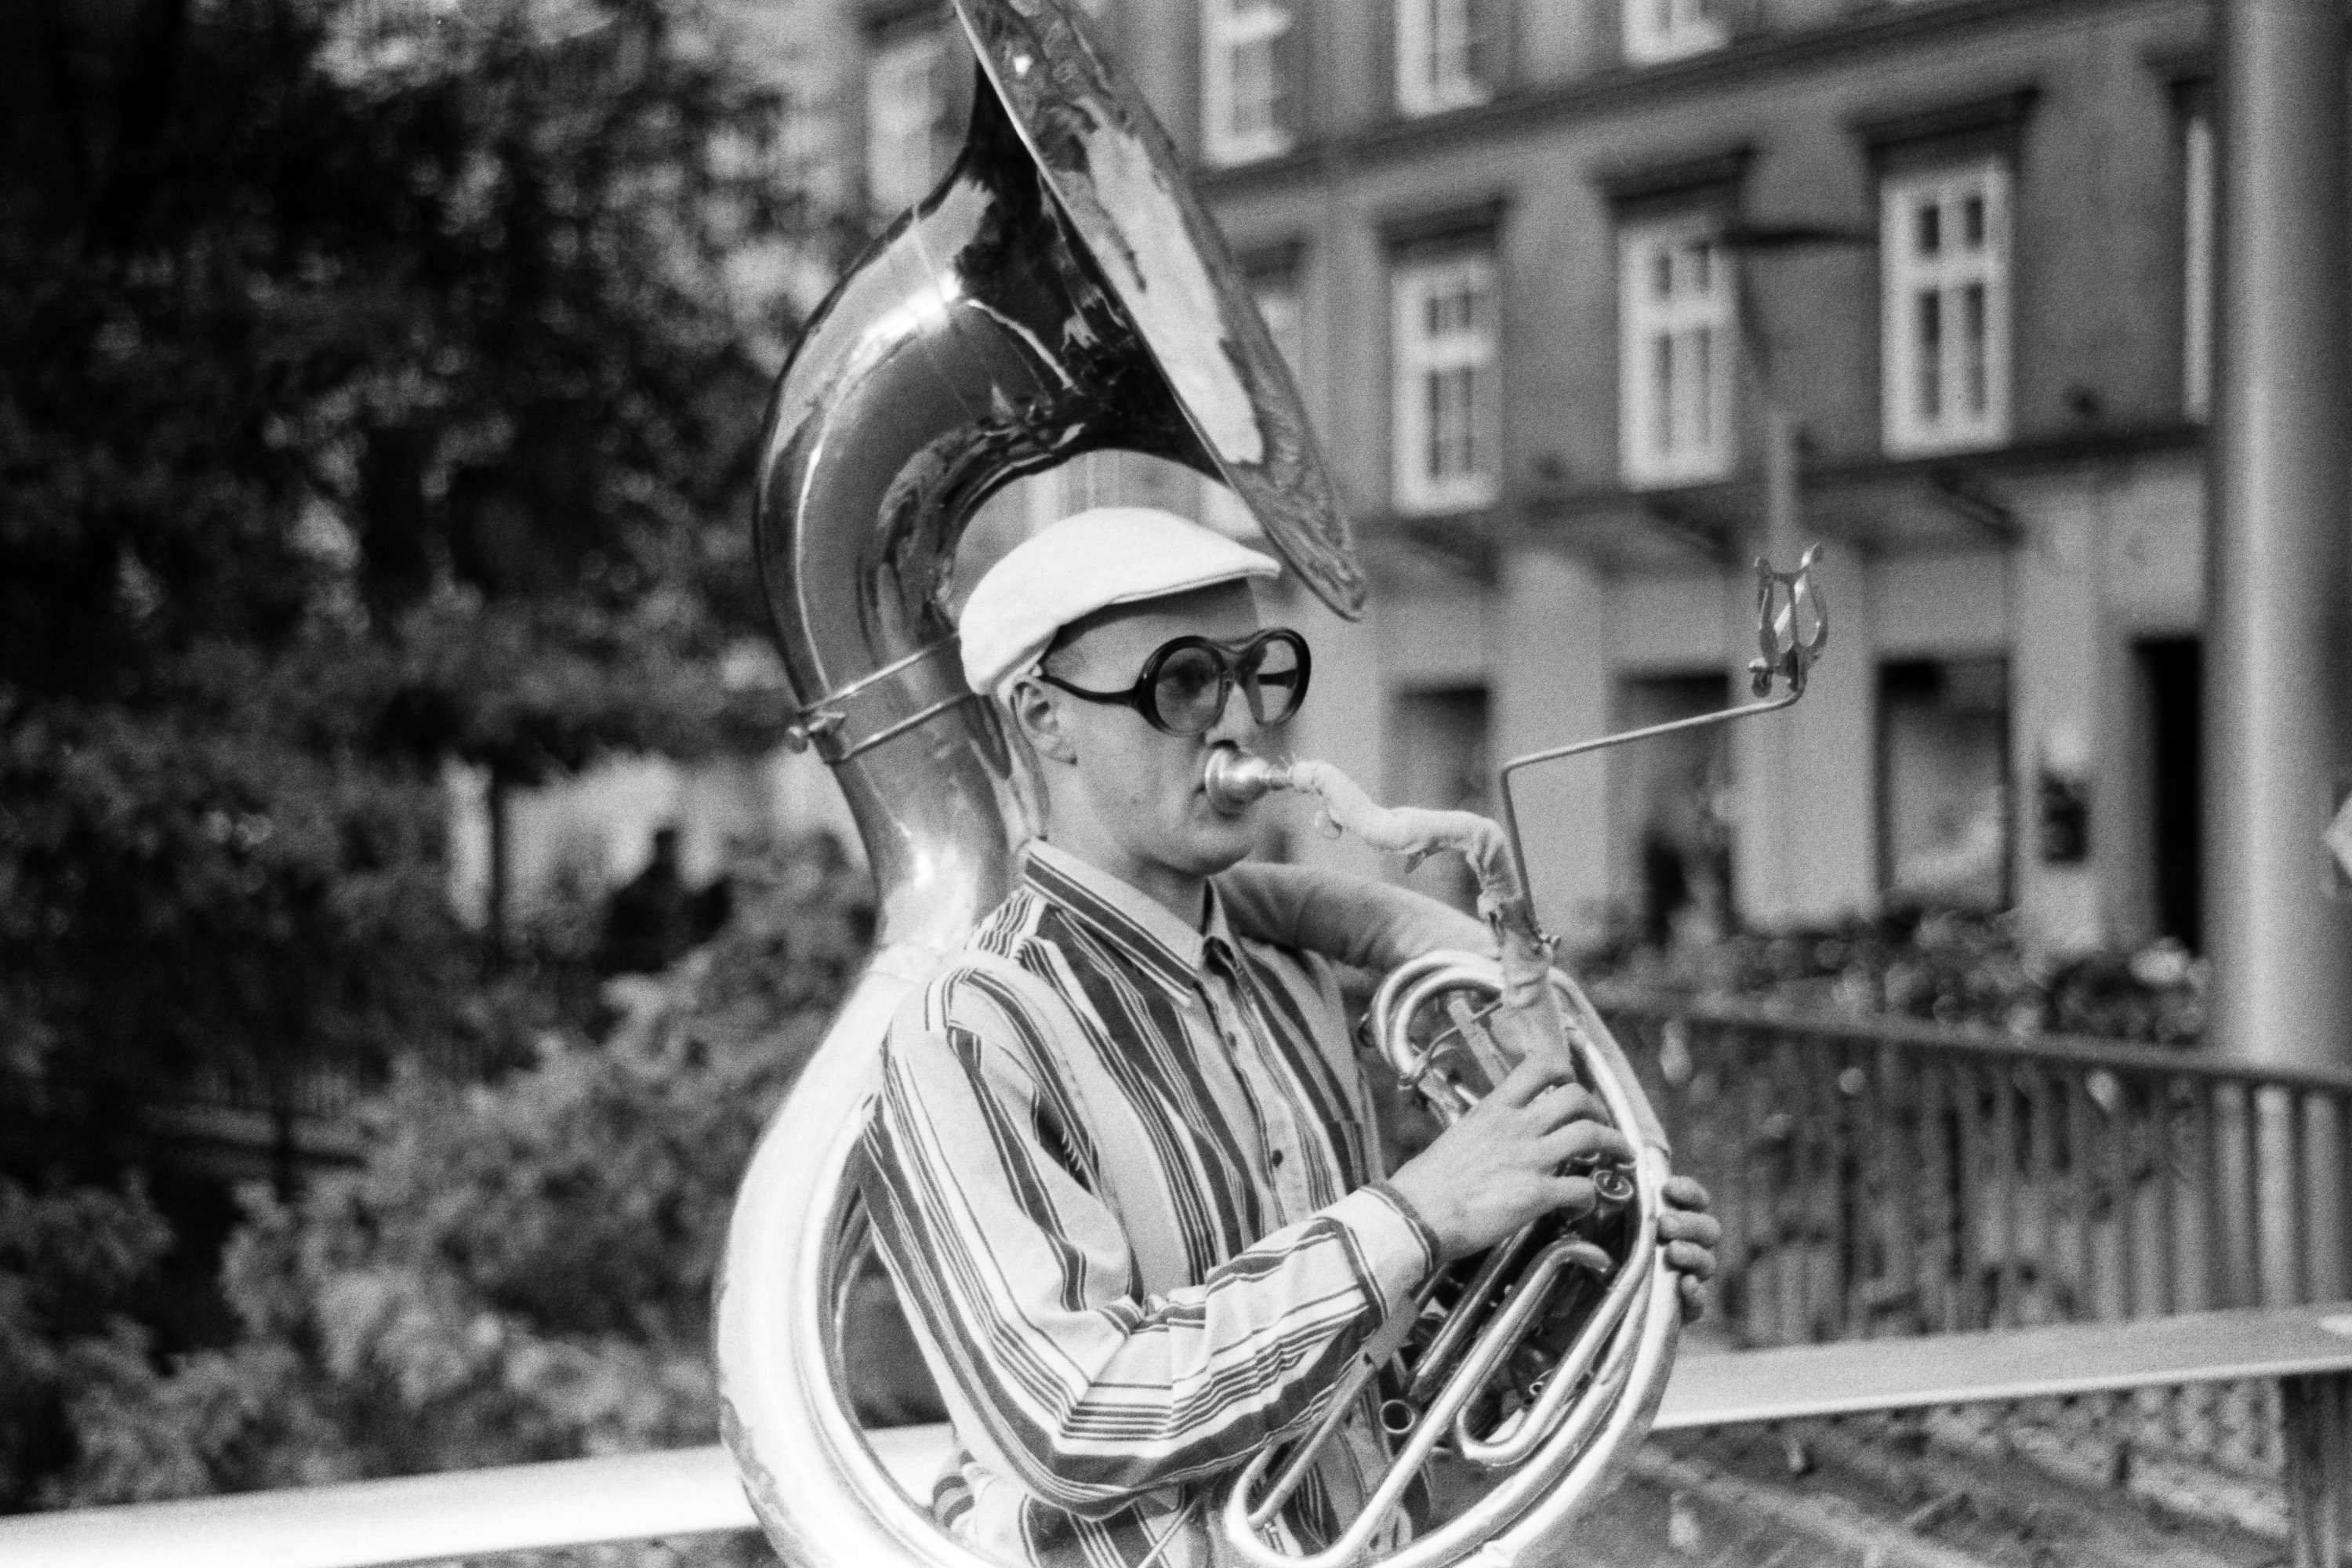
I don’t know why, but from time to time, I feel serious urge to go back to the basics and pick up a fully mechanical camera such as the Kiev and leave the sophisticated OM4 on the shelf. In addition, I really do like the character of the little Jupiter 8 lens. Especially the quality of the background blur it produces is really appealing to me. I know that many find it not so pleasing, but hey great things are usually dividing after all. It is not the sharpest nor the fastest lens I have ever touched, but an unmistakable character for sure. I also learned that the grain structure and tonality of the Ilford HP5 ISO 400 film is also very unique and close to me, so I thought, I should combine the unique lens with the unique film. I usually use lower sensitivity film so it could be that other medium speed films have similar characters as well. I guess I will need to try more. Until that, I leave you with some random but to me very catchy shots.
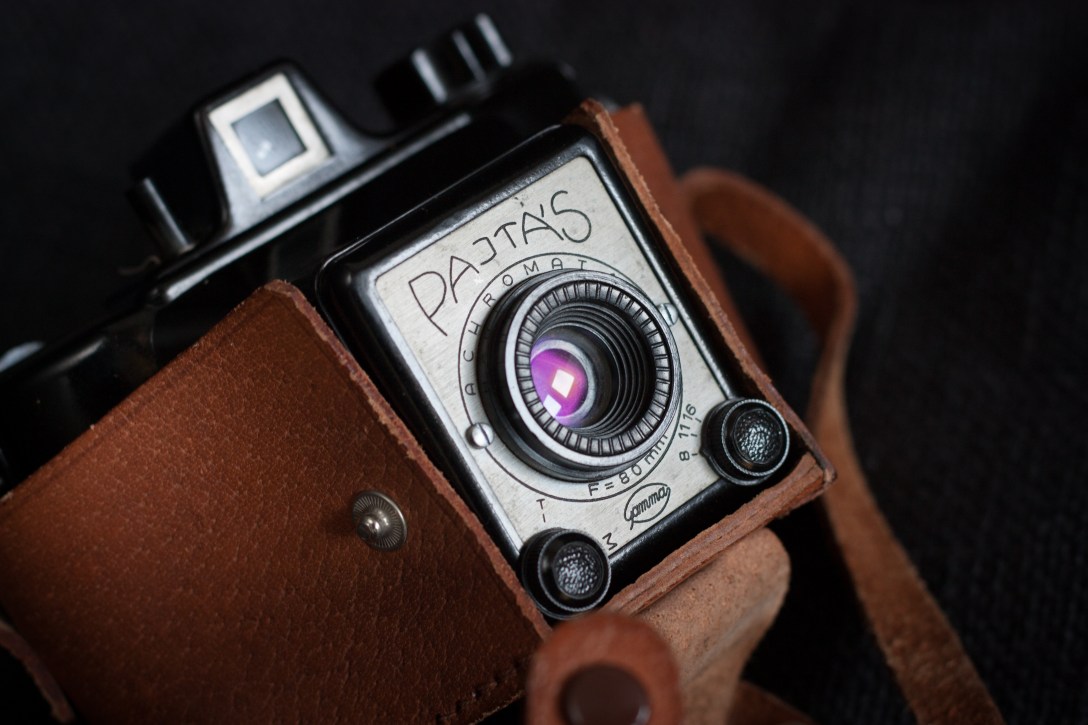
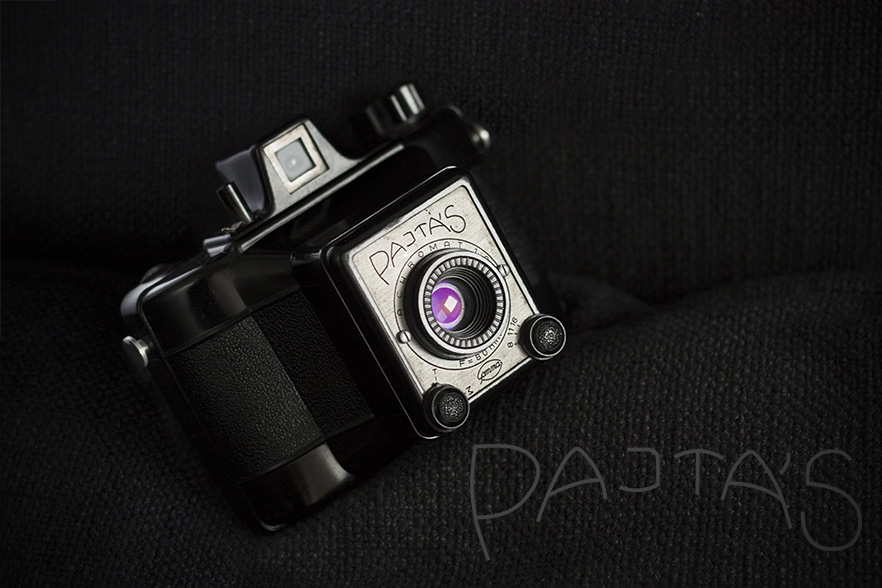
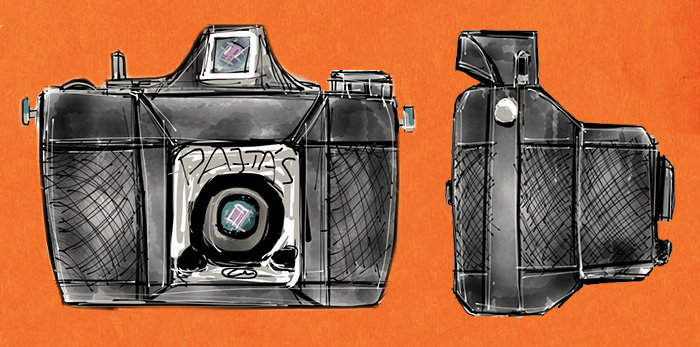
Pajtás is a simple box camera made in Hungary in the 50’s/60’s and as you would suggest this was not a high-end piece of technology even at those times.
Normally I seek for perfection in photography and related equipment and I try to write about cameras here which are capable to produce respectable results or at least represent fine craftsmanship. The Pajtás is far from perfect in any of the aspects of build and image quality, therefore it was not particularly exciting for me until now. So why do I yet write about this camera and most importantly why should you read this review, knowing that I will probably conclude that this camera is crappy but lovely at the same time?
My first and probably strongest reason is that this camera is one of the not too many which were made in my homeland and therefore holds a significant value for me. It also means that this camera is not as well known outside of my region so unless you live in Hungary or nearby, there is a pretty good chance that you have never heard of it.
On the other hand, the Pajtás could be interesting for those who like the history of photography or history in general because of several reasons. First of all this camera features an Achromat lens which can give us an insight into the dawn of photography as the very first daguerreotype cameras had lenses with similar construction. In other words, the images taken through the lens of this box machine can show us a little bit of the taste of the character of the photographs that were taken centuries ago.
In addition, this camera is an iconic relic of industrial design from a not too distant, yet completely different era where the market was driven by strange forces. These were among the toughest years of socialism in Hungary. Production was planned in 5 years cycles and there was literally nothing that was impossible to sell. In these times this camera was the affordable and available option for almost a generation.
Through these glasses, we might see this camera a little different and at least for me, it is special to hold and even better shoot with it.
All in all, if you are interested in history, strange unique cameras, or even Lomography than this article is for you.
Pajtás drawing
The story
As always I try to collect as accurate information about the history of a camera as possible, but it is possible that I state something wrong. If I did, please send me an e-mail or leave a comment. Corrections are always welcome.
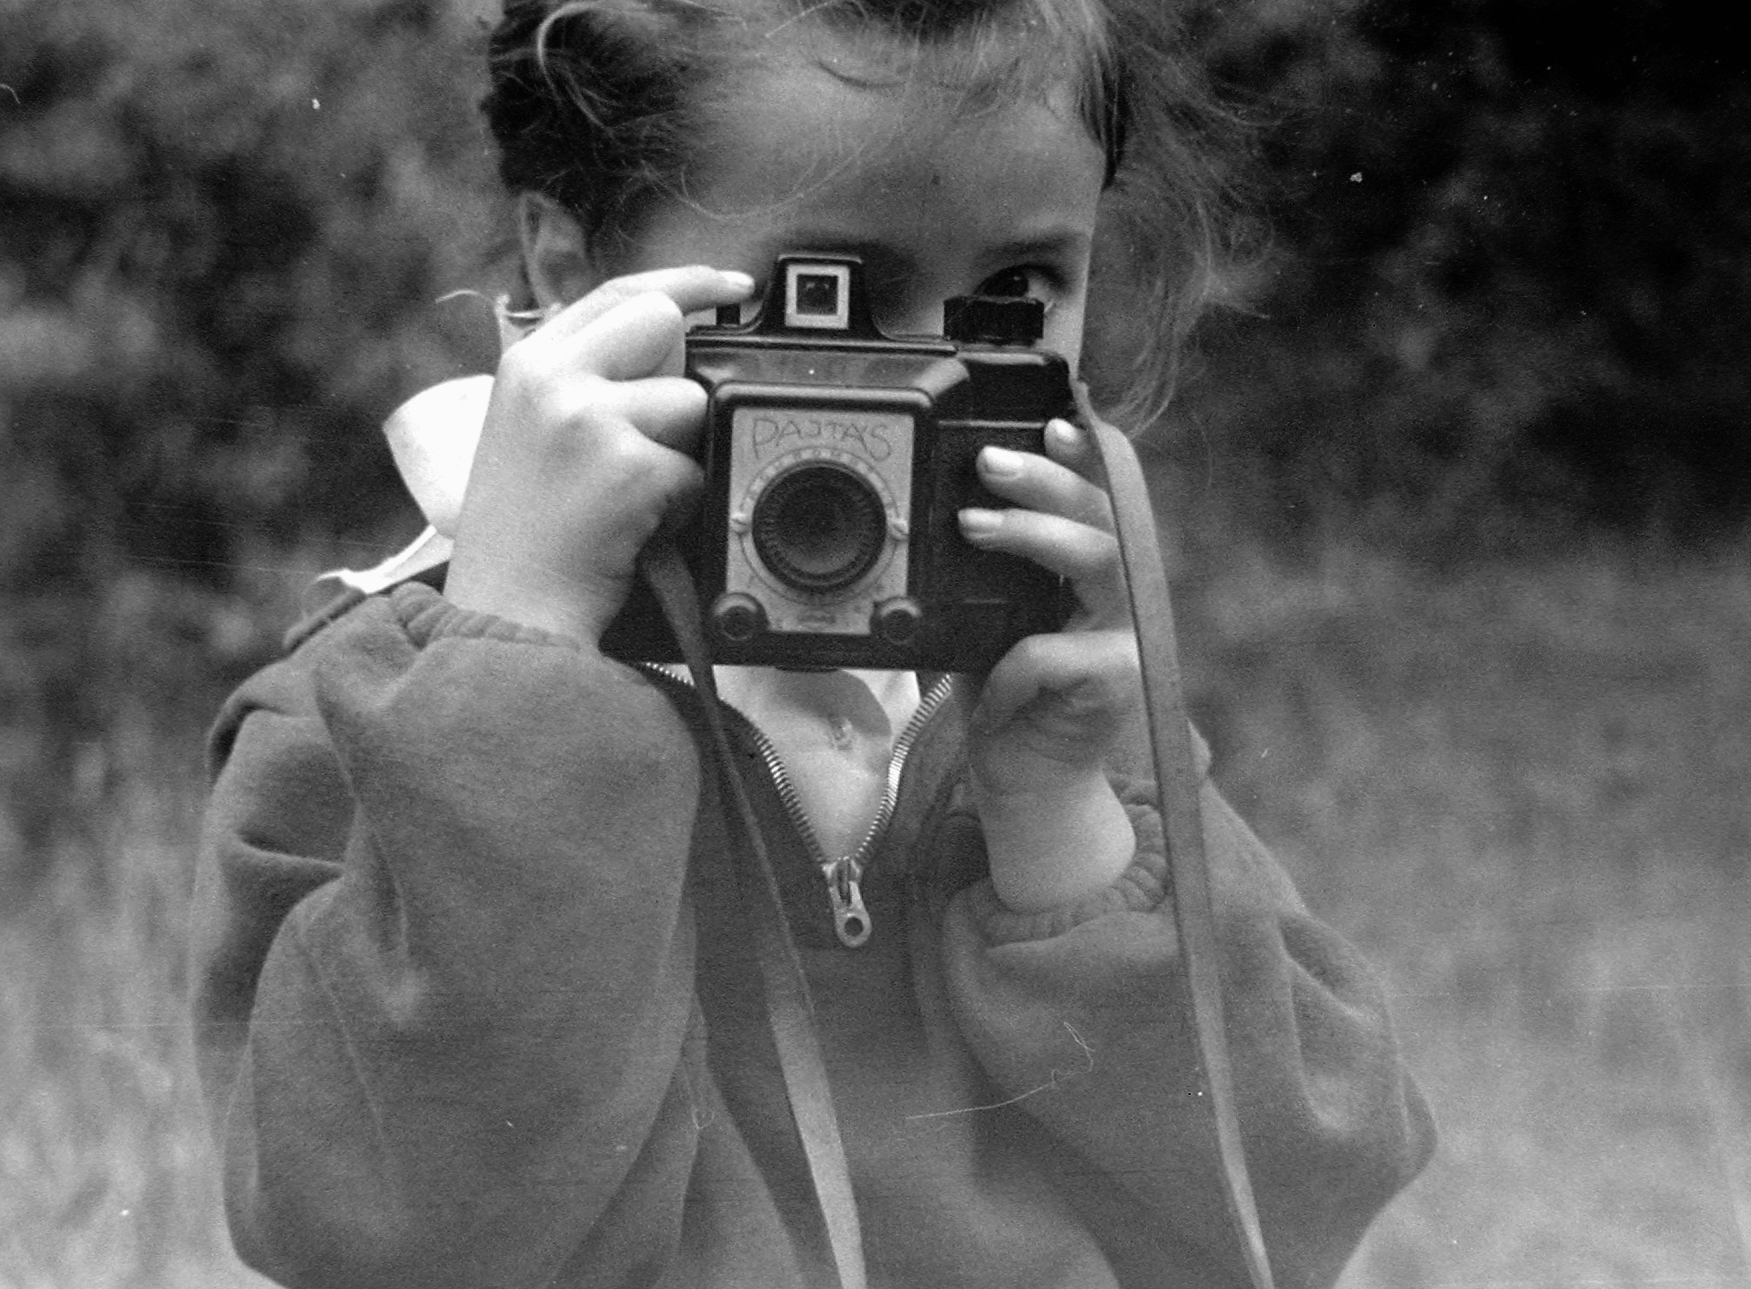
Around 1960, This photo is part of the Fortepan collection of 19041 amateur photos. It is licensed under CC share alike Hungary.
The members of the young pioneer organization were called Pajtás in socialist Hungary. It was the equivalent of the word comrade for young people. Oddly I had no idea about this meaning of this word until I started to read about this camera. But it has to be said that I was born in the 80’s when socialism was already quite melded in Hungary.
As the name suggests, the camera was intended for a young audience and it was extremely successful. It was affordable, reliable and most importantly available, so many had received a Pajtás as a present for various occasions such as graduation.
The camera was made between 1955-1966 by Gamma although the emblem has changed to FFV from 1960. FFV stands for Fővárosi Finommechanikai Vállalat (Metropolitan Works for Precision). Interestingly Gamma is still an existing company, even though they don’t manufacture cameras anymore.
The designer was János Barabás (1900-1973) who was mainly responsible for lens design at Gamma and we can thank him for the many great lenses used by Hungarian cameras.
The price of the camera in 1964 was 160 HUF and it was possible to buy a leather case for an additional 45 HUF. [1]
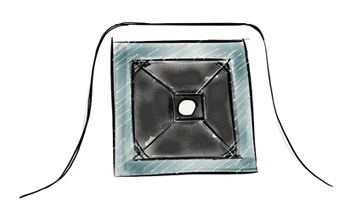
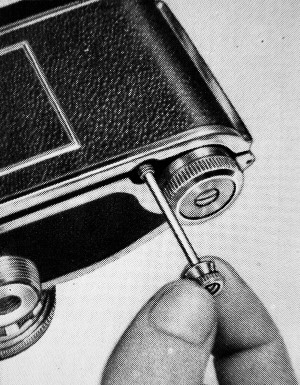
The camera is almost as simple as possible. It is made of Bakelite which allowed mass produce it on a low price.
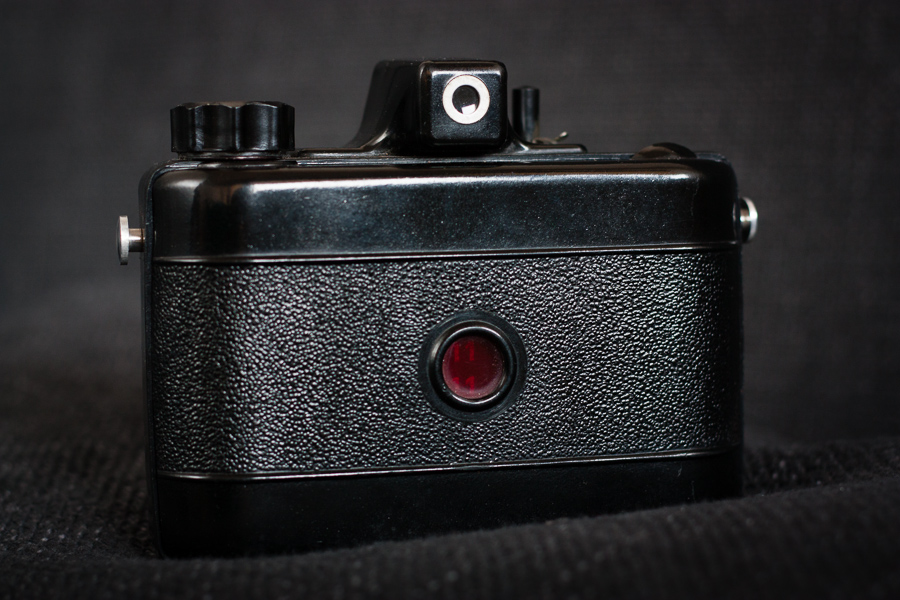
The back has another nice feature, a little red window which keeps us informed about the number of the actual frame. Basically, the back of the film (in fact the covering paper) is visible through this window so you can see the printed numbers on the paper. While this is a robust solution, it is advisable to cover this window most of the time, especially if you use higher sensitivity film.
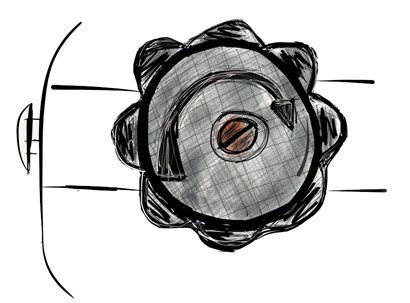
The film can be advanced by a knob at the top of the camera while you have to keep an eye on the frame counter window. There is no other way to determine how much you need to advance the film but to look at the window. This mechanism also makes it easy to take multiple exposure or overlapping shoots.
Pajtás film advance knob
Pajtás shutter release
The shutter release is a simple column and a rotating switch around it with two positions. The red dot means locked and obviously, the white mark indicates that the shutter is free to press.
Viewfinder
Since it is not possible to focus with this camera, the viewfinder is rather simple. It contains a lens for correct framing, but this is not a great pleasure to use. It is bright enough but considerably blurry to my eyes. To be fair, this viewfinder does the job just well enough. It gives you some approximation about what will be on your photograph and if your subject is not too close the parallax error is not significant.
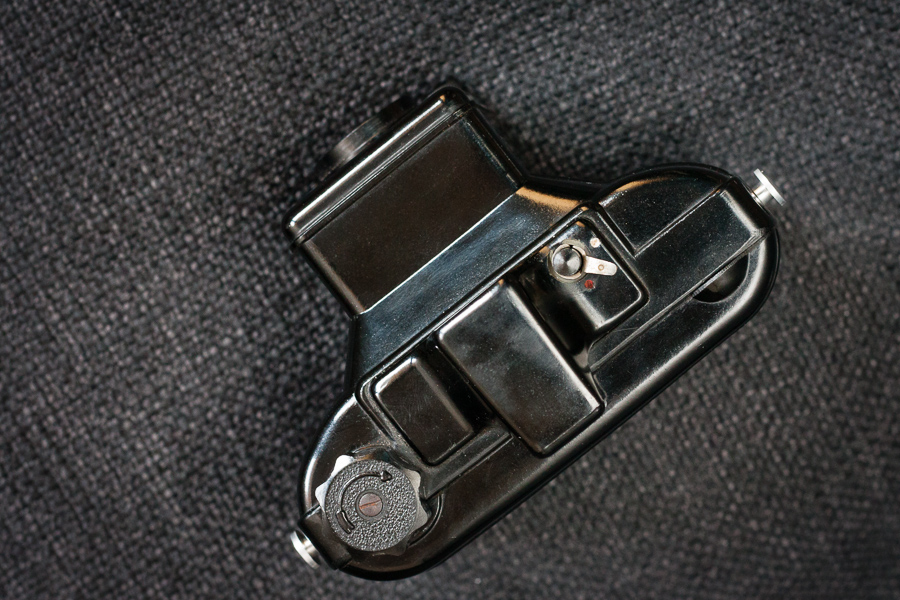
Pajtás top
To be fair, this viewfinder does the job just well enough. It gives you some approximation about what will be on your photograph and if your subject is not too close the parallax error is not significant.
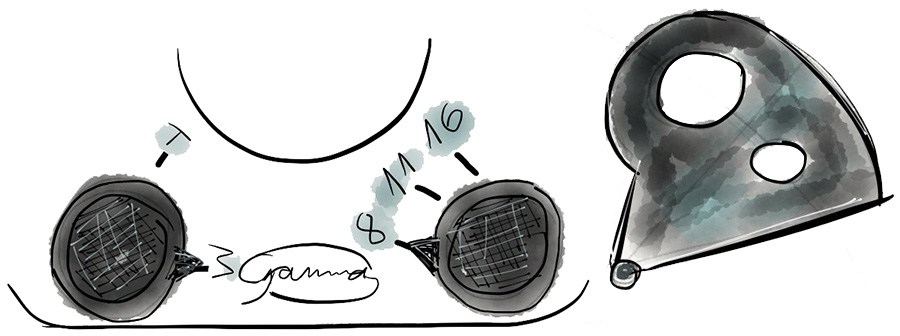
(Left) shutter-speed and aperture settings, (right) aperture mechanism concept
There are only 2 shutter speeds available M (Moment)1/30 sec and T (Time) which stands for bulb. There is a better offering in aperture settings though you can select f/8, f/11, and f/16 options. Both the shutter speed and the aperture settings can be selected with dedicated dials on the front plane of the camera right below the lens.
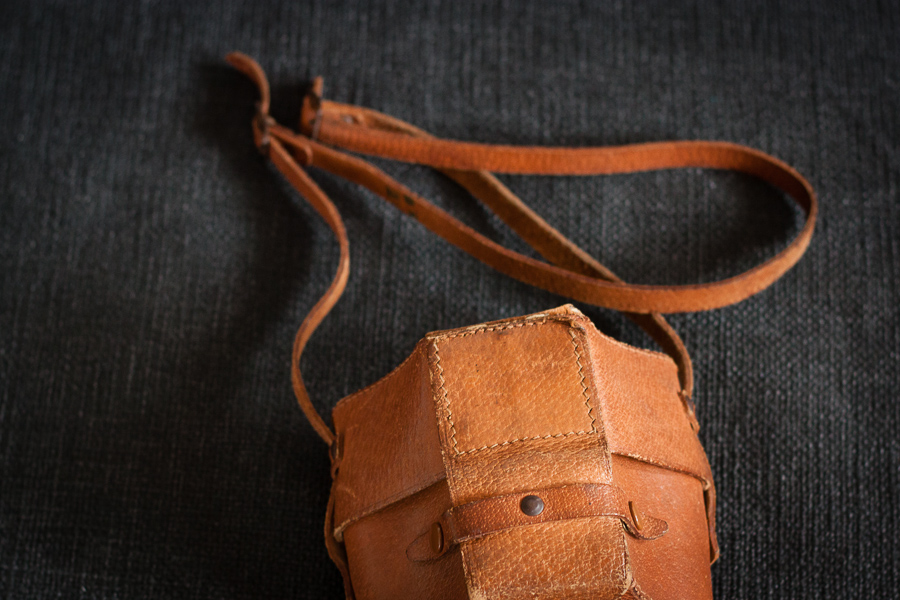
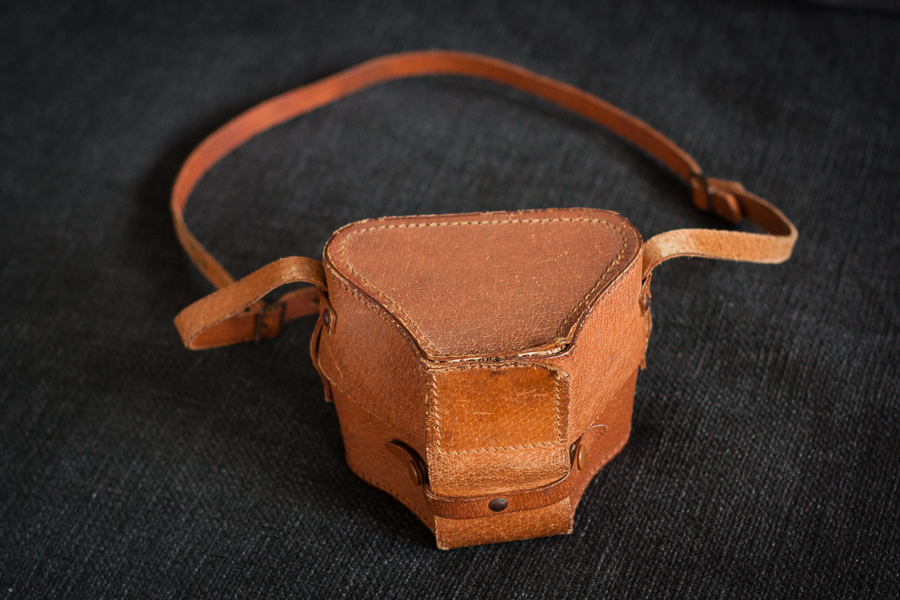
Pajtás in leather case
All apertures are completely rounded and as far as I can see (without disassembling the camera) it is done by a metal plate with 2 holes on it. When the maximum f/8 aperture is selected, the plate is completely off the way, but as you turn the switch for selecting smaller apertures the appropriate hole slides into place behind the lens.
Pajtás in leather case
The leather case is pretty nice, it protects the camera very well. In the meantime, it has a hole in the back to read the frame-counter without dismounting the camera. My only concern is that you cannot separate the front part of the case (covering the lens) so you cannot use it as a half case.
The lens
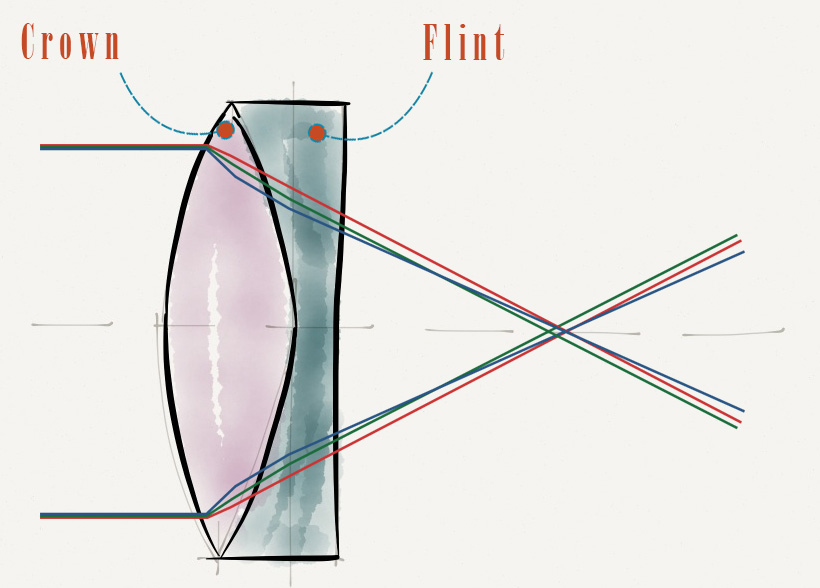
The lens is an 80mm f/8 Achromat manufactured by MOM (Hungarian Optical Works). It is a classical landscape lens consisting of 2 elements: a positive crown and a negative flint element.
The lens which was designed and manufactured by Charles Chevalier for Daguerre was an achromatic landscape lens in the 1830s. Although that lens was different from the one that can be found in the Pajtás, the basic concept is the same. The achromatic lens was a huge step because for the first time it corrected some of the main aberrations which can be found in an optical system.
Achromatic doublet
An achromatic lens or achromat is a lens that is designed to limit the effects of chromatic and spherical aberration. Achromatic lenses are corrected to bring two wavelengths (typically red and blue) into focus in the same plane.
These lenses are typically featuring low apertures because the rays entering the lens far from it’s axis need to be cut off by the stop in order to maintain image quality.
The lens used in the Pajtás camera gives no big surprises. It is focused to the hyperfocal distance so everything on the photo from some near distance will be sharp. It is also supported by the relatively small aperture, that is why depth of field is quite big.
The lens looks coated as I can see some purple cast on it when the light is appropriate. In general, it is not too prone to flare. Of course, there are not many elements in the lens so there are not many surfaces to bounce and reflect on. On the other hand, the interior of the camera is highly reflective so flocking could probably improve image quality and contrast.
Image quality and sample shoots
As you would expect, the image quality is not at all amazing. It is decent from a camera like this and I have to admit there is some charm of the strong character. Sure, most of the effects produced by the lens can be mocked by clever applications on any smartphone, but that is not the same. You must know that you work with a high random factor when you shoot with this camera.
So far I shot only 1 roll of Lomo Lady Gray 400 film with this camera as the first trial. In general, an ISO 400 film is probably too fast for this low shutter speed, but since winter is coming and we are having many dark days it was a good choice. I have some Hungarian Forte Supercolor 100 film in my refrigerator (expired in 1995) which could be a stylish combination with this camera.
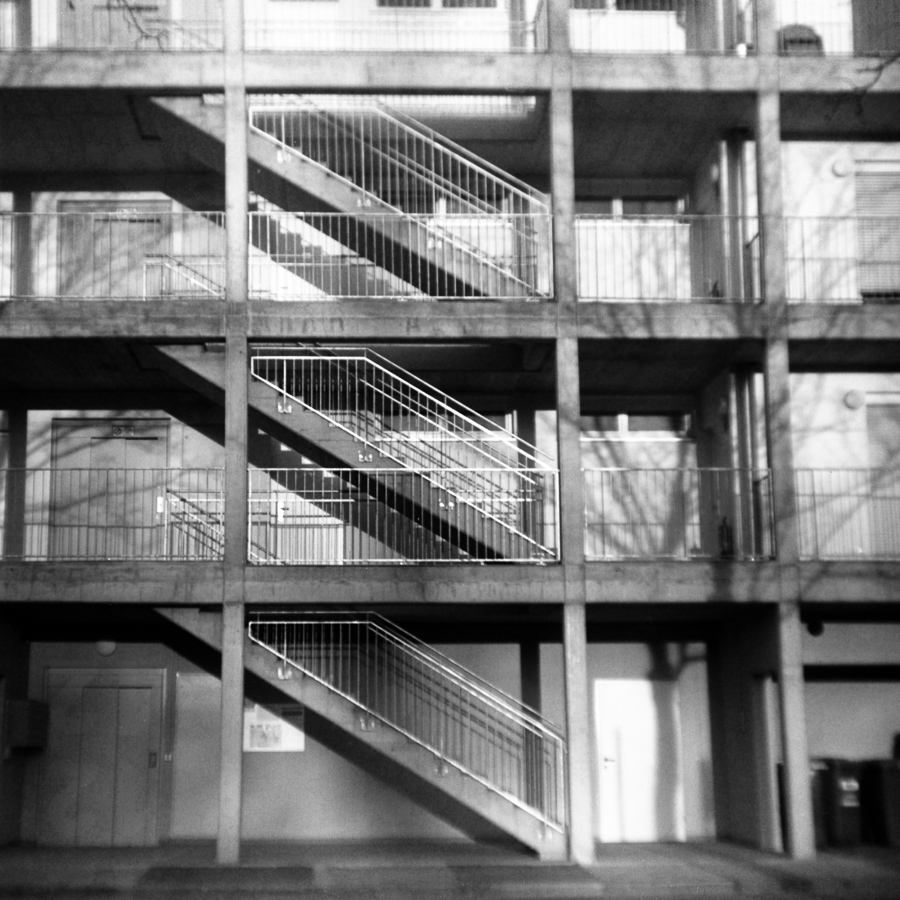
Distortion test (Graz, Austria), Pajtás, Lomo Lady Gray 400, Kodak D76, Canoscan 9900F
The lens is sharpish in the center but blurs everything off around the edges. It sometimes even creates the impression of shallow depth of field, but this is not the case.
Distortion is apparent, but I couldn’t hold the camera perfectly perpendicular against the staircase and my scanner is also not the best in keeping the film flat. Anyhow, I think that the geometrical distortion is not the biggest issue compromising image quality here.
The numbers and circle signs on this shot (almost all shots have some) belong to the back of the covering paper of the film. I am not sure how they managed to get to the photos, but they did. If anyone has any idea, I would be happy to read it in the comments.
Also, there are signs of light leaks on almost all of my shots. This most likely happened, because the camera does not seal light perfectly. I am seriously considering to use some black tape next time I put the film into my Pajtás.
There is no flash connection on this camera, so in theory, you cannot use flash with it. On the other hand, the 1/30 of a second is slow enough to fire flash manually at the right time. But probably the best strategy is to shoot in bulb mode in very low light or in complete darkness and fire the flash while you keep the shutter release pressed. I have done some successful experiment with the latter technique so I can recommend giving it a try.
Conclusion and recommendations
The Pajtás is not a rare camera, it is extremely cheap and just as light to carry. It is extremely easy to use as well. I believe it is even able to produce nice images in good hands.
Because of the simple construction there is literally nothing which could break in it. It is relatively safe to pick one with good cosmetics as it is almost certain that it will work properly. Eventually, this is not the camera we would expect completely accurate shutter speed from.
My only concern is the back which is a bit flimsy to me, but it can be secured by some black tape. And of course the Bakelite body is very rigid and therefore fragile, so it is advisable not to drop it.
If you like box cameras and the imperfection of the images they produce, or you are a fan of the retro design, then this camera could be a good choice for you.
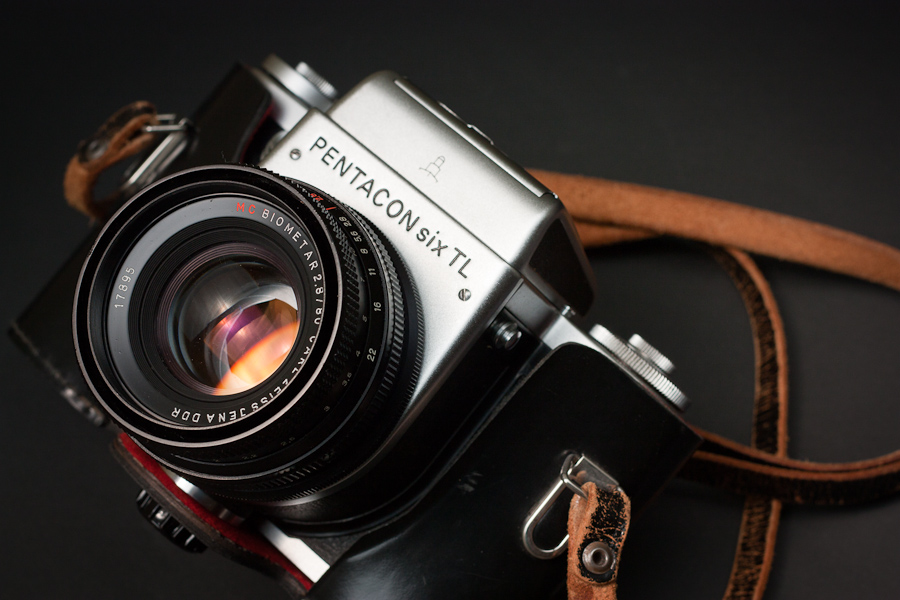
I have a very special relationship with my Pentacon Six TL camera since it is my only working medium format camera. I was always heavily attracted by medium format photography, but I couldn’t afford for a while to get into it. Eventually, the P6 was the camera which allowed me to shoot 6×6 frames and since then I have not to regret my decision nor had a single thought to change to another system. In this post, I tell my story with this camera and try to show both the bad and the good things about it while hoping that some of you can find this information useful. It will be more like a subtract of my personal user experience and all the important bits I learned during my research.
My Pentacon Six story
I was a student at the university sometime around my second year when I first heard about this camera. I have just started up an experimenting film with an old Zenit-E when my buddy and roommate showed me a website with lots of photos and a description of the P6. Both of us got pretty excited when we realized that there is a world beyond the 35mm film, so we started to google and find more information about this beast. Unfortunately, I had no money at this time to simply buy one on eBay, therefore, I almost abandoned the idea until I found a Pentacon in a repair-shop next to my sister’s old apartment where I helped her to move in. The camera was broken, not complete and had no lens. It was literally a looted old donor of a camera. Despite the conditions of this camera-corpse, I was amazed by the size of the thing. It was huge, much bigger than I have expected after all the photos I have seen on the Internet, especially the lens mount was extraordinary sizeable compare to anything I have seen before. I could only wonder what a hell of a lens could possibly fill this gigantic hole on the front of the camera. From this moment, there was no return. I knew I had to get one of these monsters, but I still had to find the right one, which turned out not to be that difficult at all. A few weeks later I found a little shop in a small village next to my hometown by accident. I had spotted an ancient Russian enlarging machine in the shop-window so I stopped by and found a great repairman and a huge cabinet of precious vintage cameras and other relics. As you have already figured out, he had a nice Pentacon Six TL in the shape I was looking for. The camera was there for cleaning, but the owner hasn’t fetched it for many years. It was not an easy deal because the guy was not really keen to sell anything from his collection, but eventually, I got my Pentacon Six with the standard 80mm f/2.8 Biometar lens made by Carl Zeiss Jena and with a waist level finder. Both the camera and the lens were beautiful, nice, clean and fully operational. In fact, it was not really heavily used and in addition, the repairman was kind enough to check the shutter speeds before he handed the camera over them to me. Since then I have added many additional accessories and lenses to my Pentacon kit so today my collection consists of:
Pentacon Six TL drawing by Eszter
2 Pentacon six bodies
2 Waist level finders
TTL pentaprism
2 Carl Zeiss Jena (CZJ) 80mm f/2.8 Biometar
1 CZJ 50mm f/4 Flektagon
1 CZJ 120mm f/2.8 MC Biometar
1 CZJ 180mm f/2.8 MC Sonar (This lens belongs to a friend I just use it)
1 CZJ 500mm f/5.6 MC Pentacon
Extension tube set
Split image focusing screen
Ever ready cases
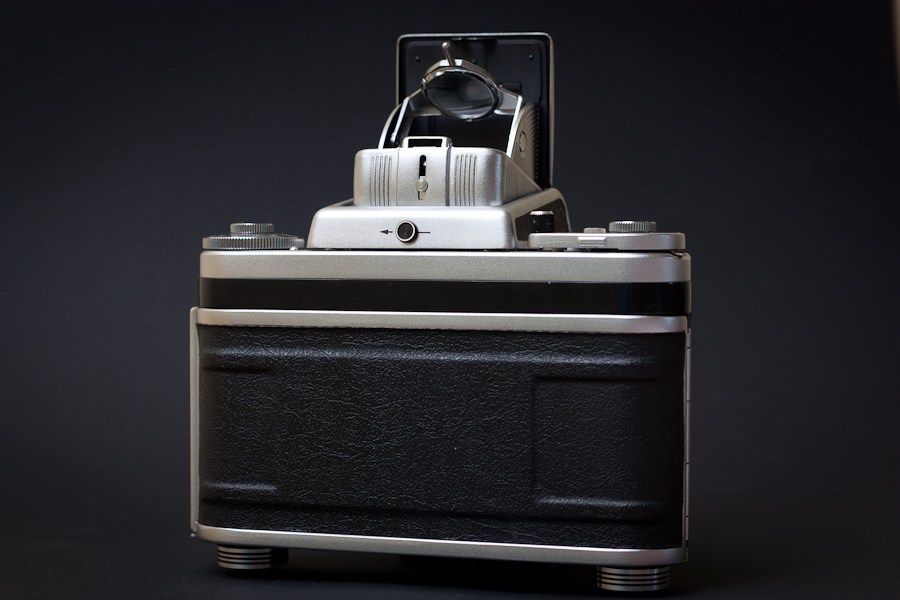
The way it looks
Bad reputation
Unfortunately, there are not only great things about this camera even if most of the bad rumors are only partially true. So let’s start with the not so nice before we focus on the good things. Many people think that the quality insurance was not the best during the manufacturing of these cameras, therefore, it is a real gamble to buy one as you may get a pretty bad and unreliable one. It is true that it is hard to find a Pentacon Six in a good working condition with perfectly accurate shutter speeds, but it has nothing to do with the quality of the cameras. The fact is that these cameras are pretty old and most of them were used for professional purposes where most likely a tremendous amount of film was burned through of them. You should think of them like you would think about an old car, for instance, a VW Beetle. It is a nice car with very few flaws, but since it is old and was driven around the Equator like 30 times you need to pay attention to maintenance to keep it running. You wouldn’t drive a 40-year-old Beetle found in someone’s backyard without checking the oil level, would you? Of course not, so why would you treat a camera differently? An old mechanical camera is just like an old car. It needs some maintenance and care. Of course, if you were a Hasselblad user, you might disagree, but the category and price tag of these brands are completely different, however, the produced images could be very similar.
Typical issues and solutions
I am lucky because I have personally met with only very few issues you can read on the Internet according to the P6. Most problems are easy to fix during a general overhaul which involves cleaning, lubrication, and adjustments of strings etc.
Slow and inaccurate shutter speeds
The Pentacon Six TL uses a huge canvas focal plane shutter which has 3 implications.
Lenses are cheaper because there is no shutter in the lens
Flash photography is limited to the sync speed which is 1/30s.
The huge canvas needs big and strong strings which can lose their adjustment as time goes by.
Usually, the speed 1/125s is the most accurate, anything faster could be slower than intended if the camera was not used in a long time. The slow times also could be problematic because the mechanical clock could pick up some dust. The solution is an overhaul by someone who knows what he is doing. The camera must be disassembled, cleaned and adjusted. There are no big worries here if you casually use your camera this does not have to be done too often, maybe once in every 10 years.
Overlapping frames
This problem is much more apparent than the previous one though. Many people have this problem of “kissing” or worse, overlapping frames. I think in most cases this happens because of the improper loose loading of the film. Have a look at this video from PentaconSixExpert on Youtube. I am not saying that this is the only problem because my rolls have uneven spacings between frames too (but no kissing or overlapping so far), but many times it is only because of the way you load the film.
Frame counter
I had no problems with this feature either, but this is definitely one of the weak spots of the camera. I have seen some Pentacons where the back of the camera was modified by adding a little window covered with red plastic to be able to see the numbering at the back of the film. This is certainly a solution, but a very harsh one. You could get the counter fixed by a professional or you could live without it, eventually, you can shoot even if it is broken.
The bright side
Now that we finished off the not so nice things it is time to celebrate and inspect why this system is so great. If I had to be short I would say we need to have a look at the following aspects to justify:
Lenses and image quality
Size
Flexibility
Value/price ratio
Lens choices
The lens selection for this system is just fantastic in my opinion. You can find excellent optics for literally no money (compared to modern lenses) for every focal length from a wide variety of manufacturers most notably Carl Zeiss Jena (CZJ). The lenses I use most of the time, are generally very fast, sharp and joy to shoot with.
It has to be said that even the multi-coated (MC) versions are more prone to flare than modern lenses with similar optical formula, therefore the use of a lens hood is always a good idea. If you want to read more about compatible lenses, visit the truly great site pentaconsix.com.
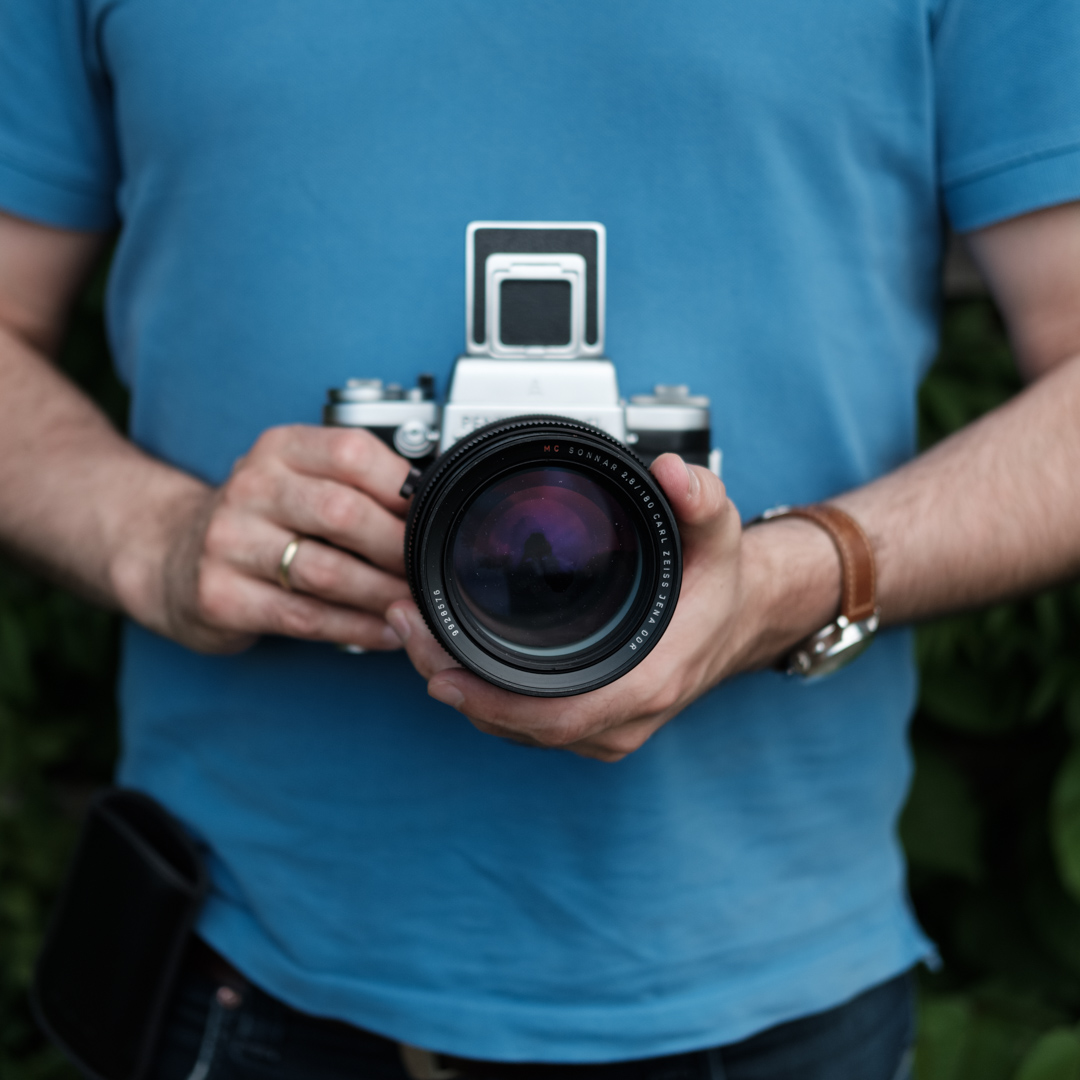
Jupiter 8 lenses vs CZJ Sonnar 180mm f/2.8
A friend of mine gave me a 180mm f/28 Sonnar to use. While this is one of the best and most iconic Pentacon mount lenses, I rarely use it, because it is so much bigger and heavier than the not much shorter 120mm Biometar.
Size and weight
The Pentacon Six looks like a 35mm SLR except this is much bigger, therefore, many people call them beefed up SLR or SLR on steroids. While it is true that they are significantly bigger and heavier than their 35mm counterparts, in fact, the P6 is a rather compact medium format camera which shoots 6x6cm frames. Yes, there are smaller ones, but those usually do not have the capability to switch lenses or having similar dimensions but with more weight. If you, like me love to travel with the biggest “sensor” possible then this size/weight aspect could be really important for you.
It has to be said, that this kit could be still awfully heavy especially if you pack more than one lens and a tripod too.
Value for the money
I think the Pentacon Six system comes with a very appealing price nowadays. You can get your body with an excellent standard lens around 100€ and even if you add the extra for cleaning and adjustments it is still far cheaper than most other interchangeable lens medium format system.
The fun I have
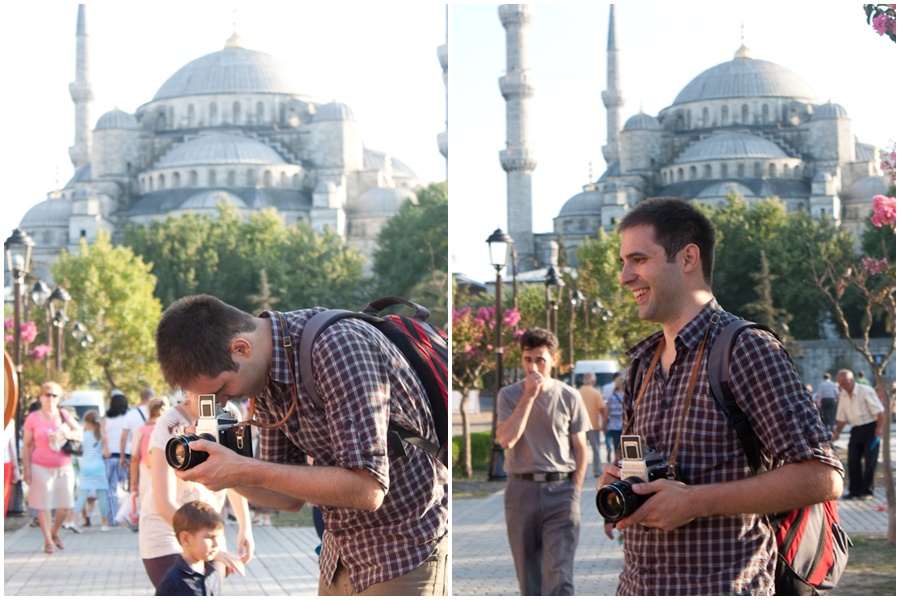
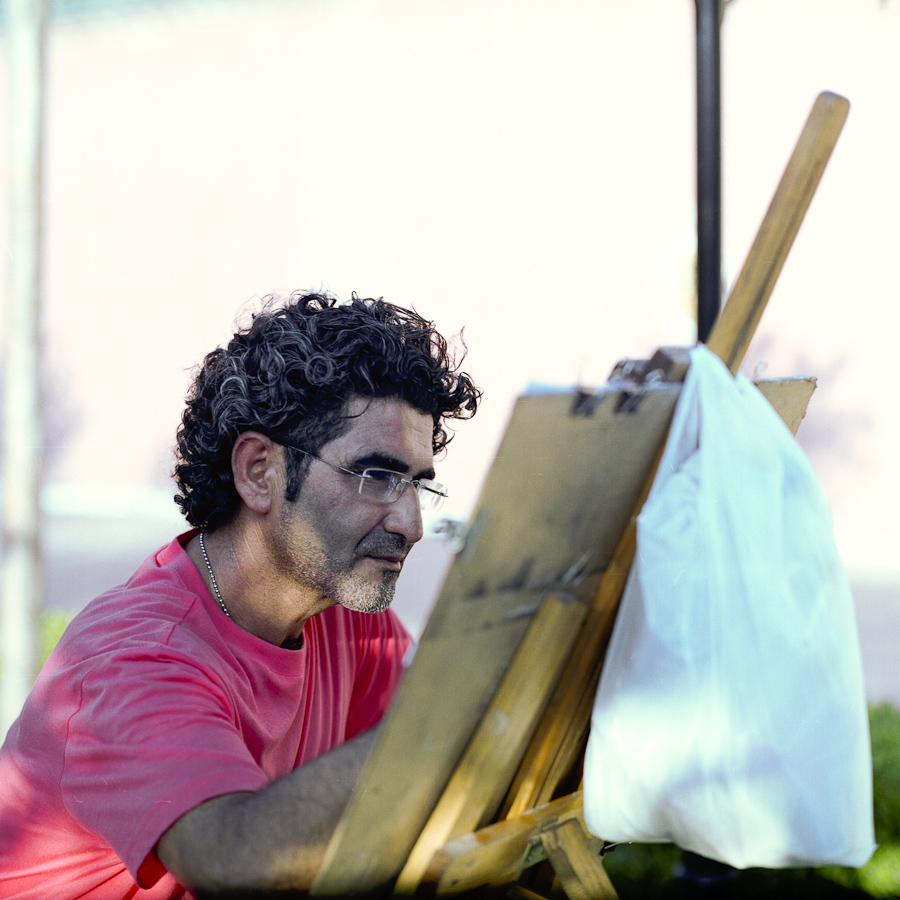
Eszter documented how I took a portrait of a painter in Istanbul. I think it reflects my emotions during the usage of this camera.
Shooting with a Pentacon Six TL, Istanbul (Turkey)Artist (Istanbul, Turkey) Pentacon Six TL, Carl Zeiss Jena Biometar 120mm f/2.8, Fujicolor Pro 160NS, Canoscan 9900F
Personal experience
During the years I used my Pentacon Six, I have gained a lot of experience with it. So I would like to share some random thoughts I think could be useful for you.
Pentaprism vs Waist level finder
I do have a TTL prism, which provides a correct image in the finder (no switched sides) and can be used for through the lens light readings.
On the other hand, the prism is very dark and the light metering is not very easy to use. It is great to have in some cases, but generally, I prefer an external light meter. There are different brighter prisms available for example the older non-metering version. If I am not wrong the even brighter prism of the Kiev 60 is also compatible and can be attached.
In contrast, the waist level finder is definitely the brightest solution, therefore I use it the most. But it switches the sides of the images in the viewfinder, and you can hold the camera lower than usual to be able to see through the finder. For me, it is much easier to focus with, especially with the little magnifying glass built in.
Despite all of the inconveniences of the waist level finder, the image in it is something really special. I know it is an oxymoron, but it looks even better than reality. It is huge, bright and vivid, no viewfinder of any 35mm camera can come even close to it.
Focusing
Focusing as always is a critical thing to do when talking about any photography. I had to learn that the depth of field is just way more shallow when you shoot medium format, thus even a slight movement of the camera could cause your subject to fall out of the sharp region.
When I shoot handheld with the 80mm/120mm lenses I try to not going wider than f/4 or even f/5.6 because it still provides nice bokeh, but has some safety in terms of the size of the sharp areas. Naturally, I often find myself shooting wide open (f/2.8) on a street, but it’s always risky to do.
Repairs
Luckily I haven’t had many problems with my cameras, but during the last 6 years, I had some cases where I had to ask someone to help.
I had “the old” (my original) P6 cleaned, lubricated and adjusted one time after I heard some unusual noises from the shutter. Since then it works perfectly. No exposure problems even when shooting Velvia.
My 120mm lens had a stuck iris once which required the disassembly and general cleaning of the lens. This is, unfortunately, a common problem with old lenses. Conclusion and recommendation
Needless to say, this camera is not for everyone. As long as you can accept that your camera needs some care in a form of regular maintenance, you could be very happy with it. So keep in mind that the final price could be higher than the purchase itself as basic repairs might be needed.
Nowadays it is not always easy to find someone who is qualified to repair old mechanical cameras. Therefore it is best to buy from a trusted source with grantee that you get a working camera. I think it worth the extra money to get an overhauled camera in the first place.
I think this is a great camera, and could be a good choice for anyone who wants to try medium format photography and needs an interchangeable lens solution. If you don’t have the budget for more expensive systems like Hasselblad or Mamiya, or simply want to find the most compact option this could be the solution for you.
So far my Pentacon Six never let me down, the images are just amazing and for me, it is great fun to shoot with.
More samples
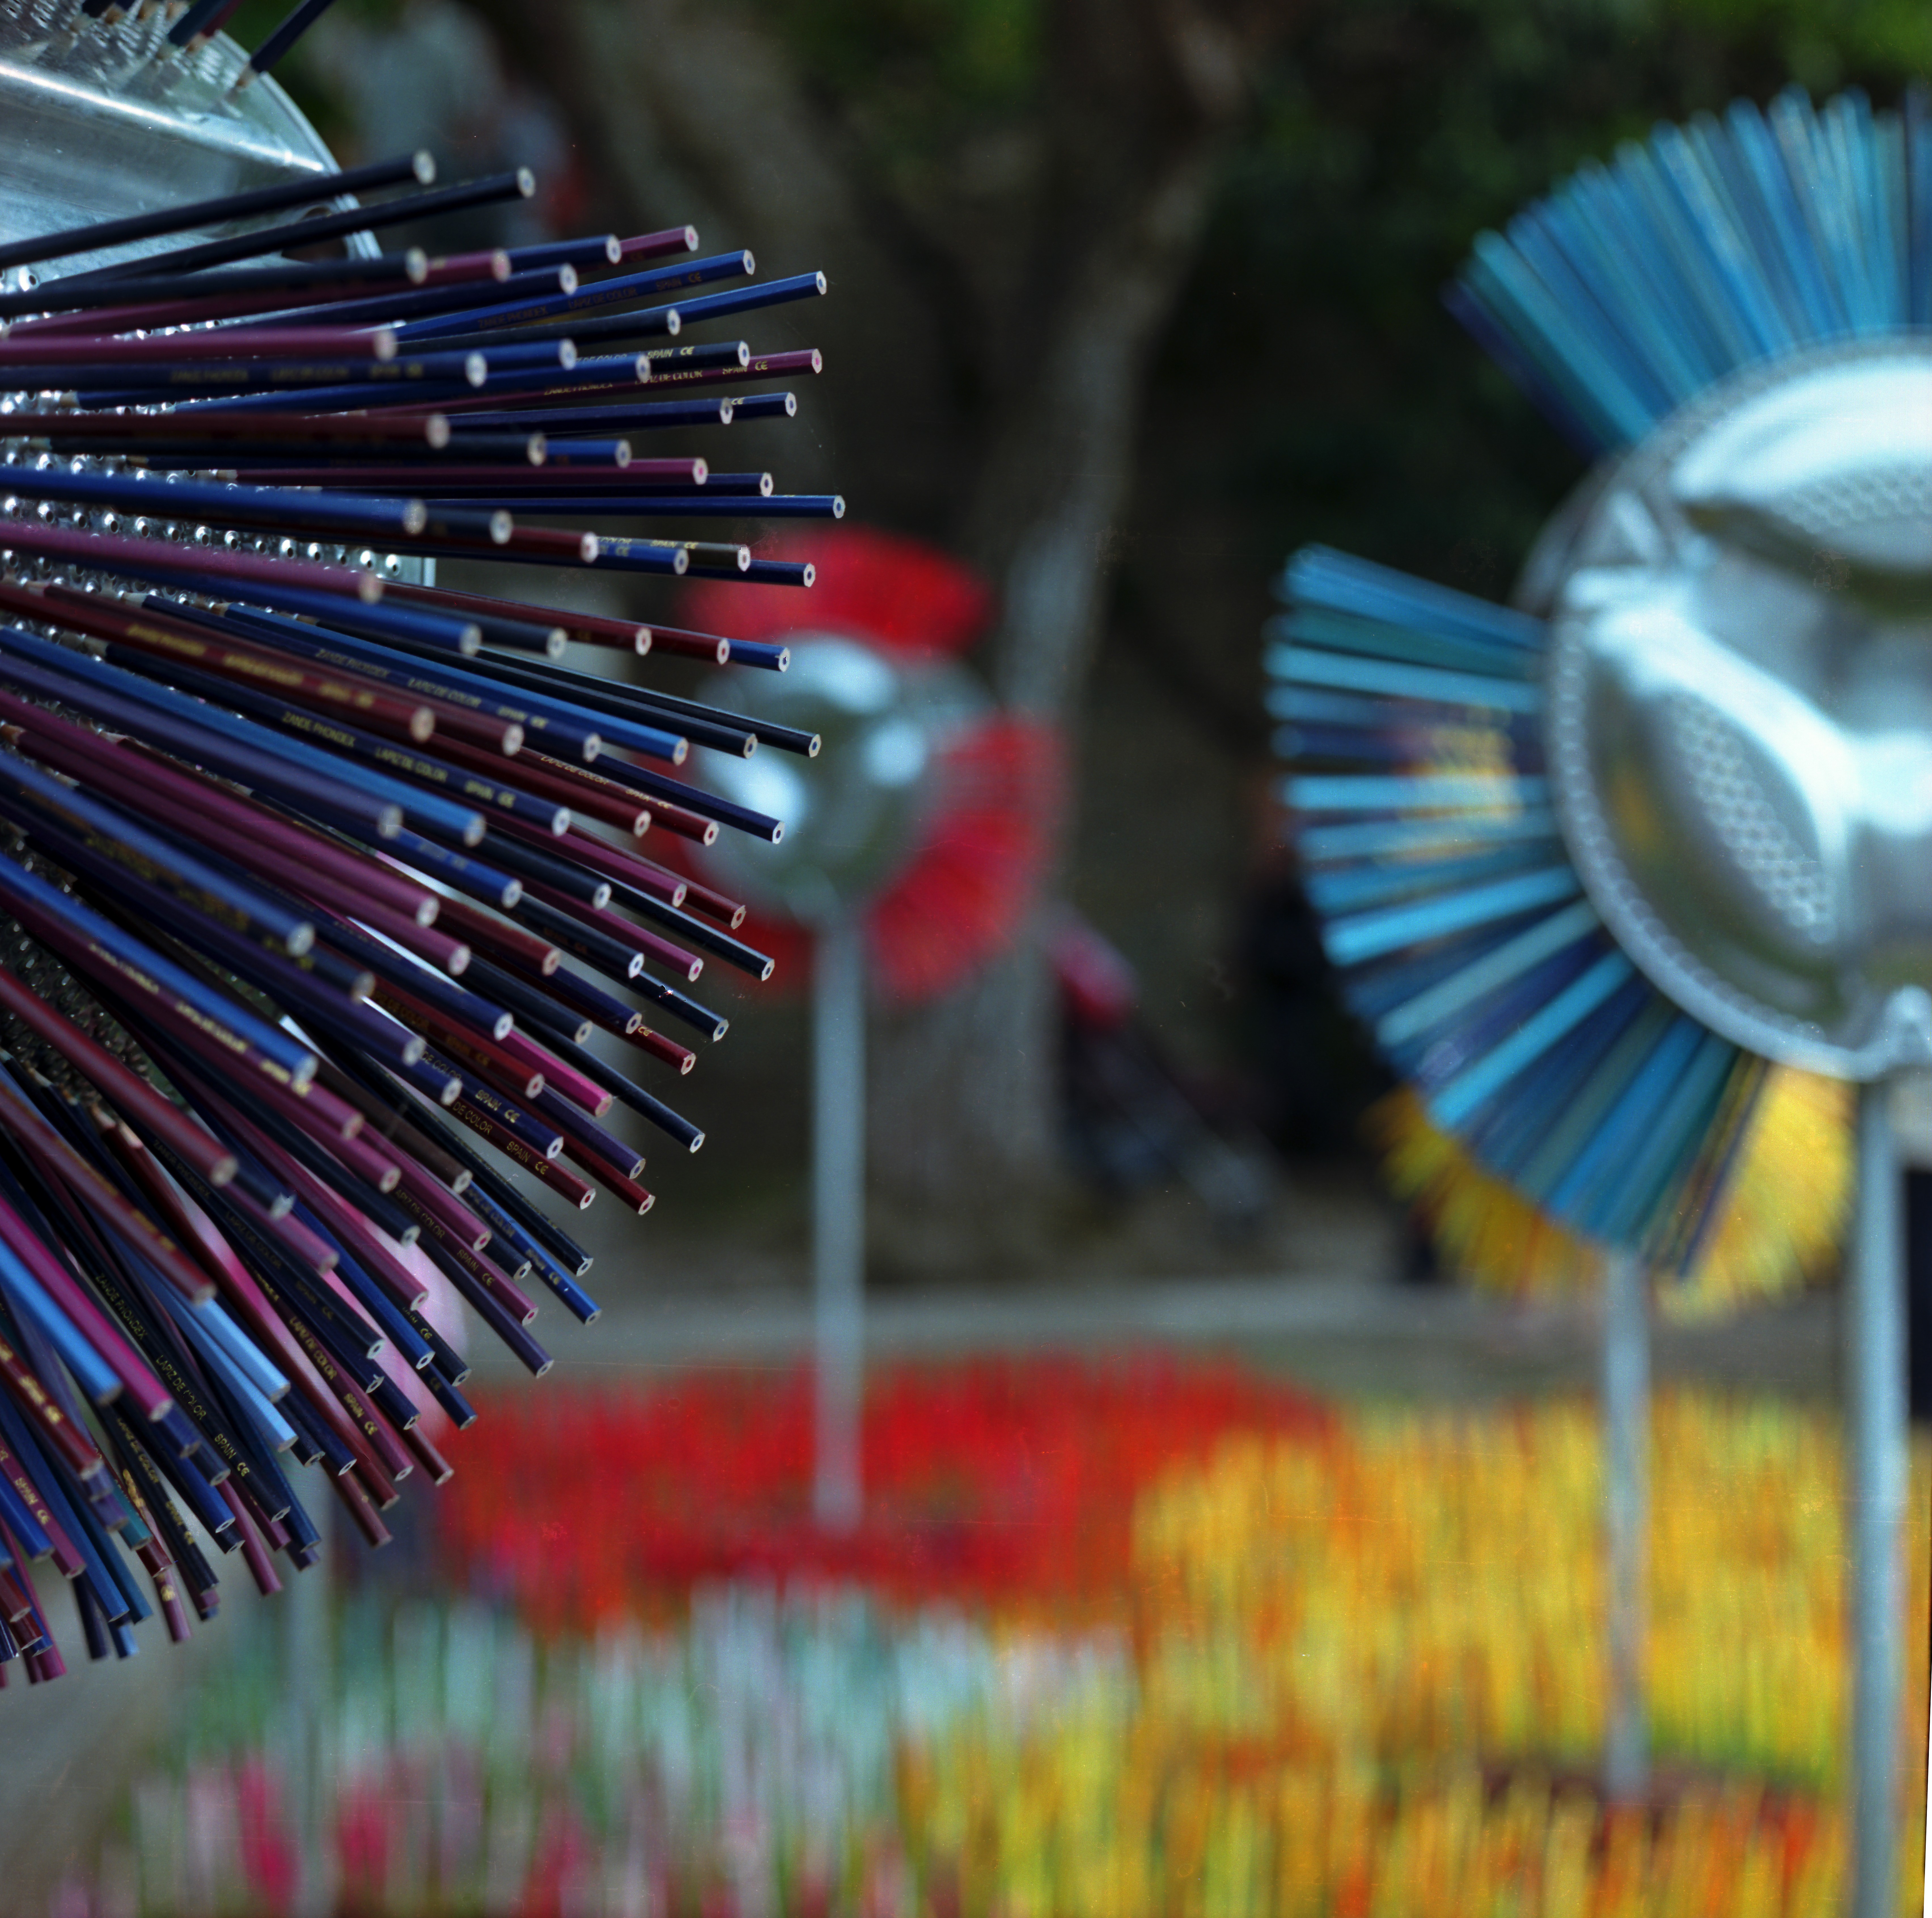
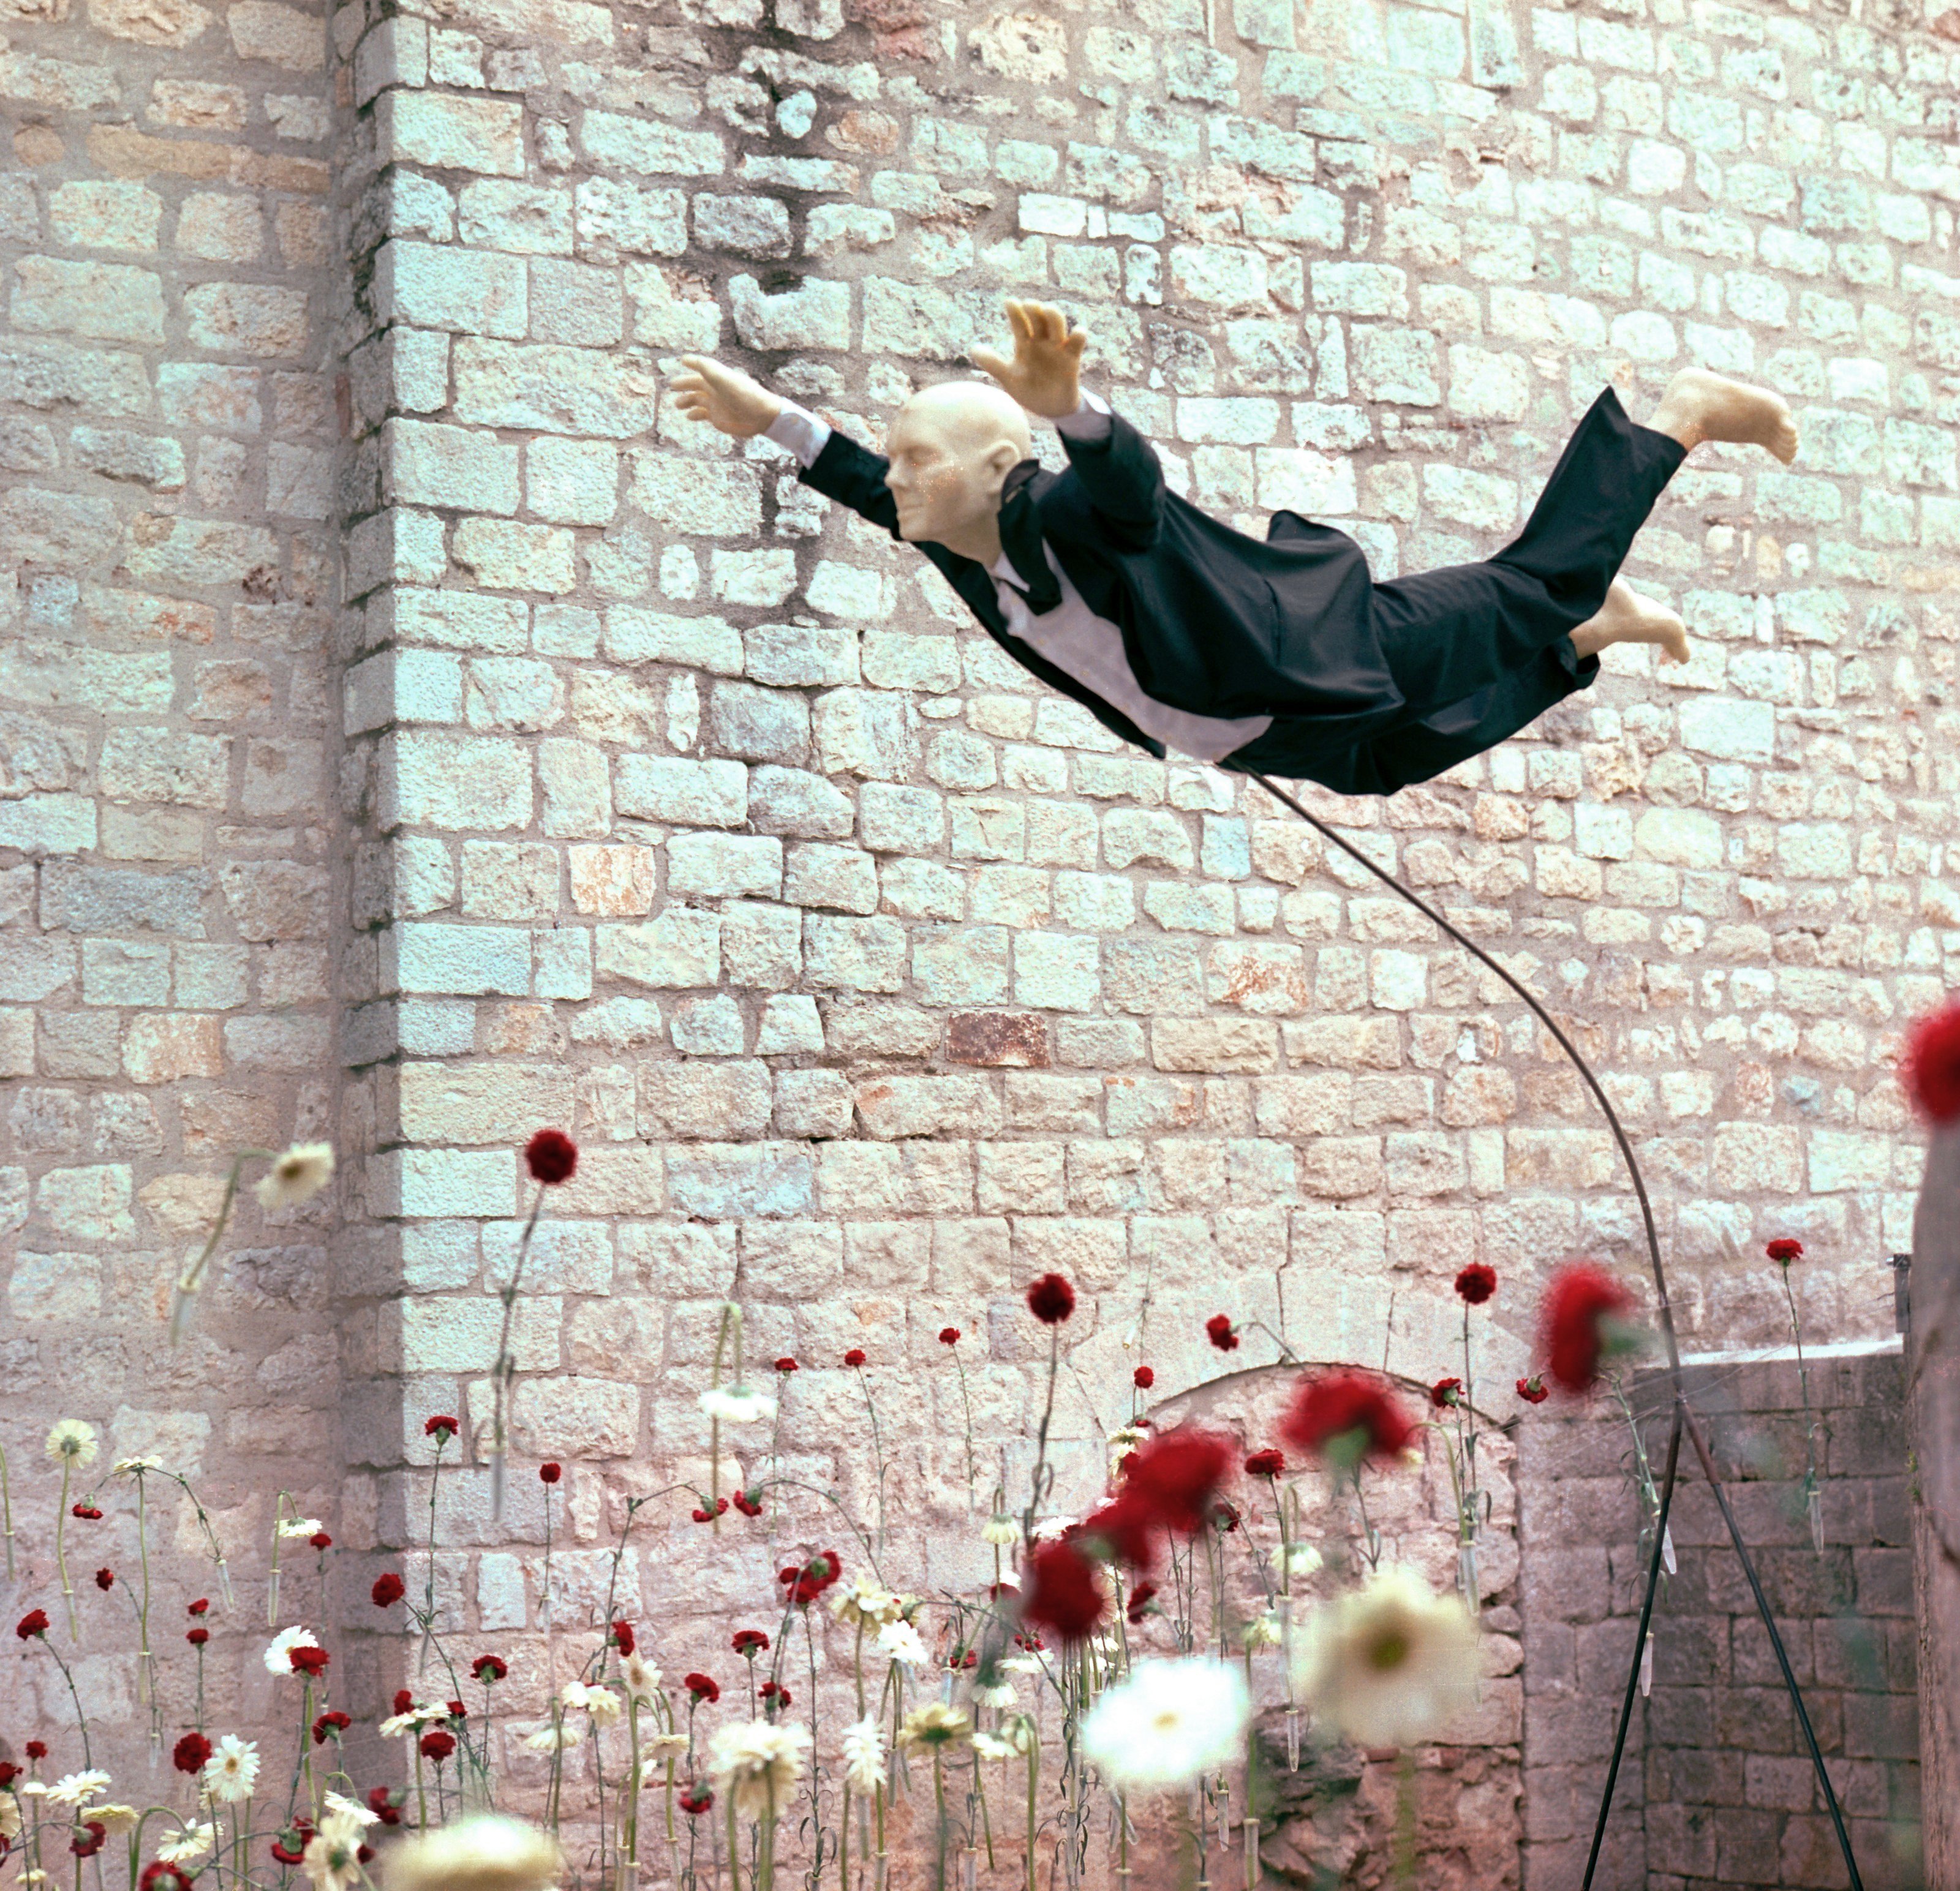
Temps de Flors 2009 (Girona, Catalonia), Pentacon Six TL, CZJ Biometar 120mm f/2.8, Kodak Portra 160NC, Canoscan 9900FTemps de Flors 2009 (Girona, Catalonia), Pentacon Six TL, CZJ Biometar 120mm f/2.8, Kodak Portra 160NC, Canoscan 9900FCustom bike (Gyöngyös, Hungary) 2009, Pentacon Six TL, CZJ Biometar 80mm, Kodak Portra 160NC, Canoscan 9900F
Links
The Pentacon Six System Far the best and most comprehensive informational site about the topic. Highly recommended.
The Soviet Union had a colossal internal market and the demand for a simple, affordable yet reliable SLR was just as huge. Despite the need, there was no such camera in the Soviet Union even after the Word War II apart from the East German products (Contax, Pentacon, Praktina, Praktica, Praktisix, Pentaconsix, Exakta, Exa) but these cameras did not fulfill the requirements for simpleness and they were pricey too.
Therefore KMZ constructors became a bit of Frankenstein and built the camera they needed. They took a Zorki rangefinder camera, thrown away the rangefinder, added a mirror-box and a prism so the first Zenit was born.
The Zenit is a real descendant of the Leica IIc. I know this statement is a bit harsh to hear at first but here is why. The Soviet Union had officially bought the license of the legendary Leica IIc in 1932. All the early FED and Zorki models were based on this license and as I mentioned the first Zenit was the direct modification of the Zorki. Even the lens mount was inherited from Leica being an M39x1 thread mount but because of the mirror the rangefinder lenses although fit but unable to reach the infinite focusing distance.
So the first Zenit (Zenith for export) were introduced in 1952 with Industar 50 (50 mm, f/3.5) lens which was manufactured for Zorkis as well. The proceeding version was the Zenit C which featured synchronization for single-use flash bulbs with the adjustable synch timing advance (from 0 to 25 ms). This camera was extremely reliable due to its simple construction, it was so simple that the mirror was lowered by a single string.
The next in the row was the Zenit 3 (1960-1962) which was mechanically a very similar camera to the original Zenit and to the Zorki, but it introduced the advance lever as a huge improvement over the less convenient advance knob.
You would suggest that the Zenit 3 was the direct predecessor of the 3M, but there was another camera called Crystall which has much more in common with the 3M. The Crístall was the first KMZ SLR with a hinged back, the film could be loaded and removed with ease compared to the previous bottom loaded models. The Crystall was short lived and many say because it was extremely ugly (tractor-like) of a camera due to the ridges on the top of the prism.
Finally, we have reached the camera (this post is about) the mighty Zenit 3M in the story. It was manufactured between 1962 and 1970, designed by N. Marienkov and the M in the name probably stands for modernized. The camera had all the technological advancements of its predecessors such as built-in flash synchronization (1/30s), standard shutter speeds, hinged back and film advance lever. But the mirror was still not a returning type, there was no auto-aperture support on the body and the shutter speed dial did rotate during exposure. In other words, the camera was modernized indeed but was still many years behind the rest of the word.
This camera had got a new kit lens, the Helios 44 (58mm f/2). This is an excellent lens with the exact the same parameters as the pre-war Zeiss Biotar. This lens was much more stable in terms of quality compared to the Tessar like Industars as most Helios’ are very good but the Industars could vary between fantastic and horrible.
The story of course continues and Zenit cameras are being made even today, but for the rest, you have to wait until the next post featuring some of the more advanced evolution steps of the Zenit line!
Style vs robustness
We all know that Zenit cameras are traditionally tank or tractor like and because they are all full mechanical constructions, it is literally impossible to destroy them. Soviet engineers didn’t have to face with the lack of materials but the lack of quality materials. That is why they simply made everything more robust to prepare the mechanics for the worst possible materials. The result is more like a weapon than a camera at first glance, but at least it can be used for self-protection without risking the photo taking ability.
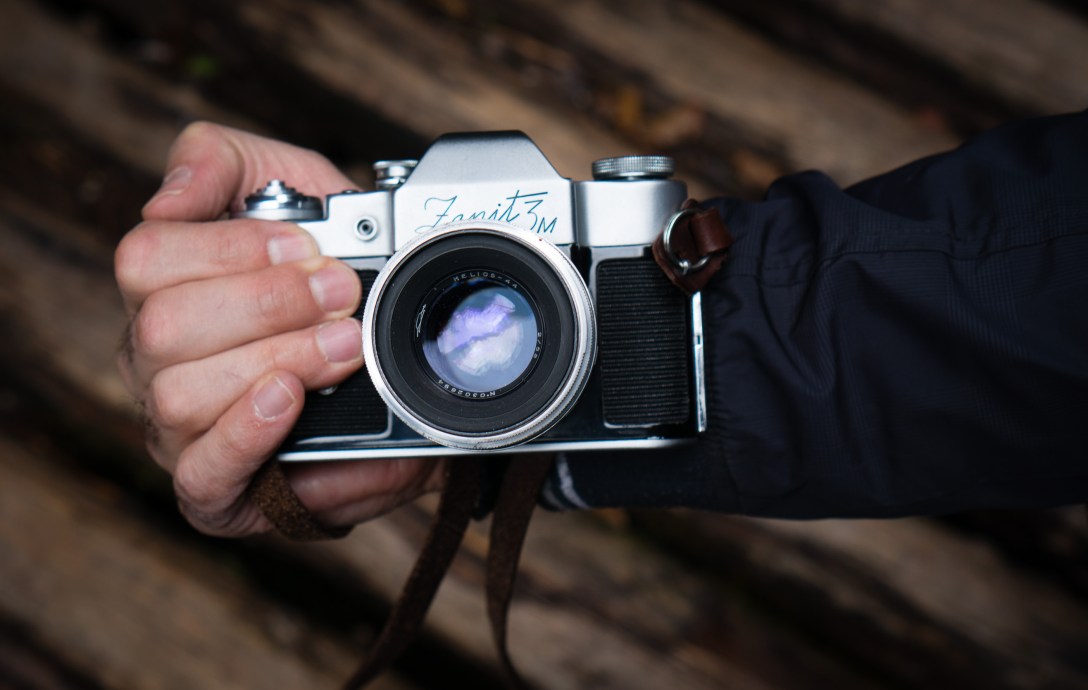
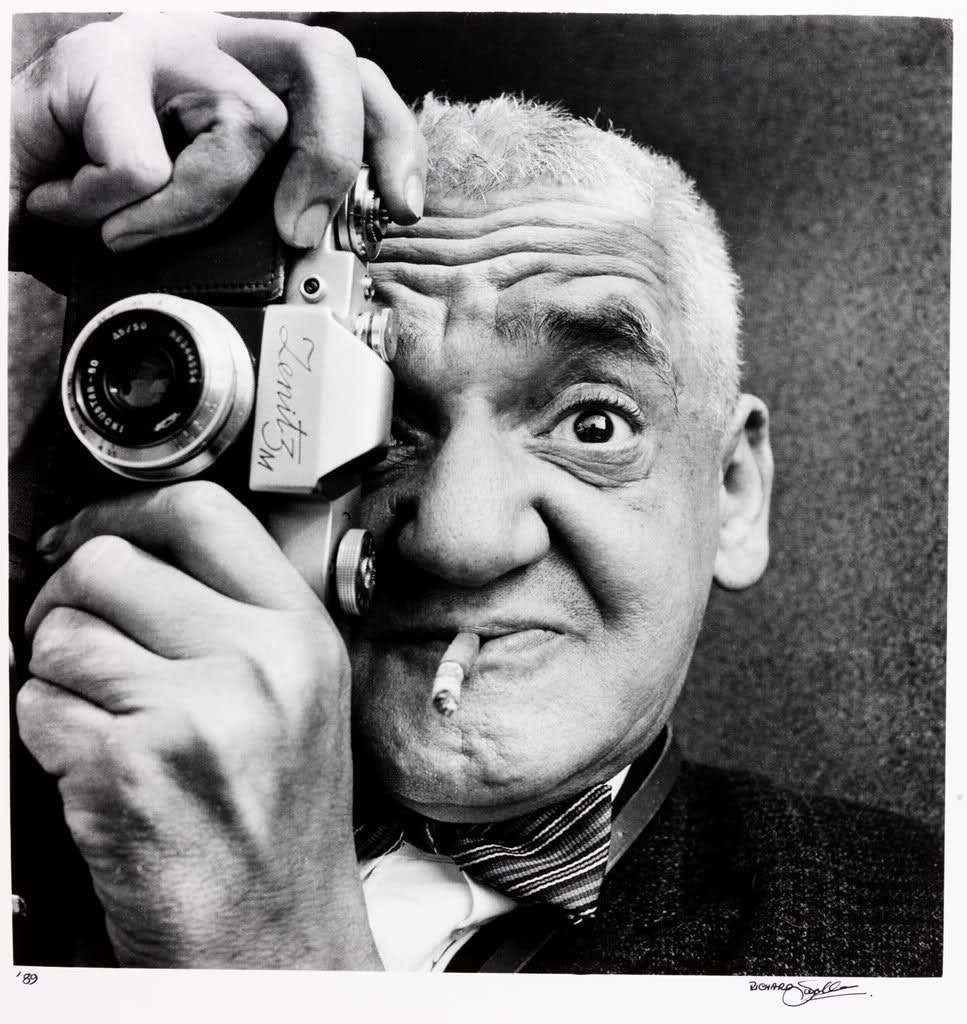
Generally I agree with the opinions that these are not the most beautiful cameras (to be modest) ever made, but actually, in my opinion, the Zenit 3M is a pleasing exception. I really like how the Zenit 3M looks like, this is much much smaller than later models and to me, the front plate with the engravings and the shape of the prism is very appealing. To prove the point, here is a little montage about my Zenit 3M. In addition, I have found a very stylish photograph on this blog about the legendary Weegee holding this camera taken by Richard Sadler. In my opinion, the camera looks very good in Weegee’s hand.
Weegee was the pseudonym of Arthur Fellig(June 12, 1899 – December 26, 1968), a photographer and photojournalist, known for his stark black and white street photography.
Richard Sadler is one of the UK’s leading portrait photographers, shooting the famous ‘Weegee’ picture that was featured in the 2011 NMM exhibition ‘The Lives Of The Great Photographers’.
My Zenit 3M
I have found my Zenit 3M on an antique fair in Miskolc, Hungary. This fair is held on the first Sundays of every month and usually, it is a very rich and colorful occasion attracting many people even from the surrounding countries. The camera belonged to an old man trying to sell very few things and I knew he was the first and only owner from the way he showed it to me. The camera itself looked quite well and I was really touched by the lens at the first place as it was and it is as clean as new. The second thing grabbed me was, of course, the shape of the camera. I hadn’t seen such an old Zenit before and my preconception of a tractor-shape was gone as this camera was very pretty. Finally, the original box and the lens cap was part of the deal so I simply couldn’t resist.
The original price can be seen on the box (2800Huf) which must have worth way more at the time this camera was sold in 1965 (At least the production date is 1965).
Shutter speeds 1/30s, 1/60s, 1/125s, 1/250s, 1/500s + B
Sync speed 1/30s
Mirror not returning type
Viewfinder pentaprism with simple matte screen
Repairs
I did not check all the shutter speeds correctly when I bought the camera and as it turned out the shutter is not in the best shape. The slower speeds look very inaccurate and overall I don’t trust in any speeds enough to risk film and moments. I haven’t even tried this camera yet. So the shutter needs a repairman to clean and set it up, and there will be a day to come for this. The trouble is, the repair would cost more than the camera worth itself.
Otherwise, all features including self-timer work properly, the lens, prism, and mirror are clean and free of fungus so it is really a joy to look through the system especially after the viewfinder of my entry-level Canon DSLR which has a dim and tunnel-like finder compare to the old Zenit.
The way it looks
Zenit 3M box
Zenit 3M ever-ready case
Zenit 3M top (really small little camera)
Final words
Although I have not used this camera I have enough experience from other FSU cameras to see how this would handle. This camera offers everything needed for photography but nothing more. You can have reasonable shutter speeds, a bright viewfinder, self-timer, a truly magnificent lens, flash sync, and convenient film loading and advance mechanisms.
Yes, there are things which you would miss like a self-returning mirror and the support of auto aperture lenses. You have to pre-set the aperture on the lens and the body does not close the iris when you push the button.
If you can live with this limitations and you don’t care of the L39 lens mount, this little elegant camera could be a great fun to use or it would look great in the collection and surely this one will not make you bankrupt.
Test Shots
I have not used this camera because of the unreliable shutter of it, but I did mount the lens to my Canon body and I used another Helios 44 on another Zenit a few years before. Eventually, the lens what matters here and not the camera as it uses film anyway.
In general, I very like the image quality of the Helios 44. I compared it with my Canon 50mm f/1.8 lens I use on my DSLR and although the test was not scientific it seems that the Helios actually beats the Canon lens in some cases wide open in terms of sharpness and contrast. I am going to repeat the experiment in a much more planned and controlled way to approve or confuse it. It seems sure that the two lenses are quite close in performance. Probably the Helios is less coated and I suggest the results will be different when I will test challenging back-light situations. We will see until that here are some test shots.
Helios 44 Digital
The following shots are taken with my Canon 450D with a half-elf made a DIY adapter. I used my M42->EOS adapter and used the lens mount of the Zenit plus some tape to securely put this two together. The Zenit mount (L39 thread in an aluminum ring) is attached to the body with four small screws. The mount almost fits perfectly into the M42->EOS adapter. Luckily with some tape, these could be connected tightly enough without the risk of damaging the M42 thread thanks to the rubber tape.
I don’t recommend to do it for anyone and it was not really stable in fact, it was really hard to focus without ruining this evil construction. So I did better move with the camera back and forth instead of screwing the focus ring. On the other hand, it was good enough for some tests, but I need to get a real adapter for more serious tests or even for portraits. Alternatively, I am thinking to get an M42 mounted version of this lens.
These shoots have been taken wide open f/2 and I did not process them at all apart from basic raw->jpg conversion and resizing for the web. I think the bokeh is very pleasing and I am happy with both the sharpness and contrast of the images.
These were taken with a Helios 44 and a Zenit E camera so the picture quality must be very similar. In fact, these were one of my first shoots on film ever.
“Woow!” This was the first thing came into my mind when I first saw an Exakta in a cabinet in a very small and messy shop of an old camera-repairman a couple of years ago. The second thing? Well, I seriously considered to lick it quickly while the owner looked away. It never happened due to the glass door of the cabinet and I can still feel the sensation of the missed opportunity -What a pity-.
Apart from the joke, I had been seriously touched by the appearance of this family of cameras, especially the older ones. It is an entirely mechanical, full glass, bare metal, chrome and leather piece of jewelry. I am almost certain that this camera triggered the entire steam-punk culture. There is no doubt that this is one of the most beautiful classic cameras of all times.
“True” Exaktas were manufactured by Ihagee in Dresden during almost 4 decades which resulted in an amazingly complete and comprehensive camera system. While I always keen to give a bit of historical overview of a camera system, I had to realize that others have done this on a level I simply cannot match. If you were interested in the different variants and history, please visit this link. I limit myself to the most interesting facts I found out during my research and consider this post as a kind of tribute to Exakta and the company made it Ihagee.
It is interesting to know that the Exakta camera system was very stable during its evolution, almost all parts were interchangeable among models which are remarkable. There was a huge sort of accessories available for these cameras and they were heavily used for technical and scientific photography. I think this system was one of the most versatile at the time. For example, you can see below a commercial from a 1952 German magazine Die Fotografie where the camera is attached to a microscope.
Commercials from the magazine Die Fotografie 1952
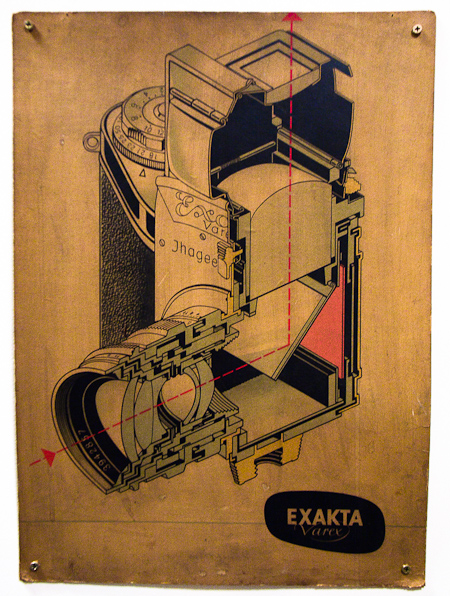
Old poster in a camera shop (Budapest, Hungary)
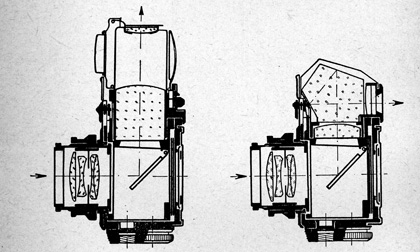
The Exakta Varex was introduced in 1950 and the big innovation was the possibility to use the camera with the standard waist level finder or with a pentaprism. This interchangeable viewfinder system even further increased the versatility of the camera. In addition, there were a big number of available finders of both types (4 basic pentaprism types) and all of them allowed to use a huge variety of focusing screens on top of it. They claimed in their commercials, that they merged the good old experience with modern ideas. You can check out the complete list of finders and screens on this page.
One of the interesting characteristics of this camera is the left-handed shutter release which (I believe) is inherited from the times when the camera used only waist level finder. It is very awkward at first and even at the second time to handle the camera because of this using the prism for those who got socialized on right-handed cameras. I guess it was no problem initially with the waist level finder and they kept this property. In fact, it is possible to get used to it, but it requires quite a commitment.
Commercials
I have managed to dig out a couple of high-quality commercials and posters released by Ihagee, this cool half cut camera poster can be seen in a camera shop in Hungary (Soós Fotó). I have found and included in this post many more nice illustrations from books and magazines. It shows that the Exakta was really among the most prestigious SLRs at the time. It was literally the ultimate way to go for every possible purpose from photojournalism to science and technical applications where larger formats could not be convenient to use.
Commercials from the magazine Die Fotografie 1952
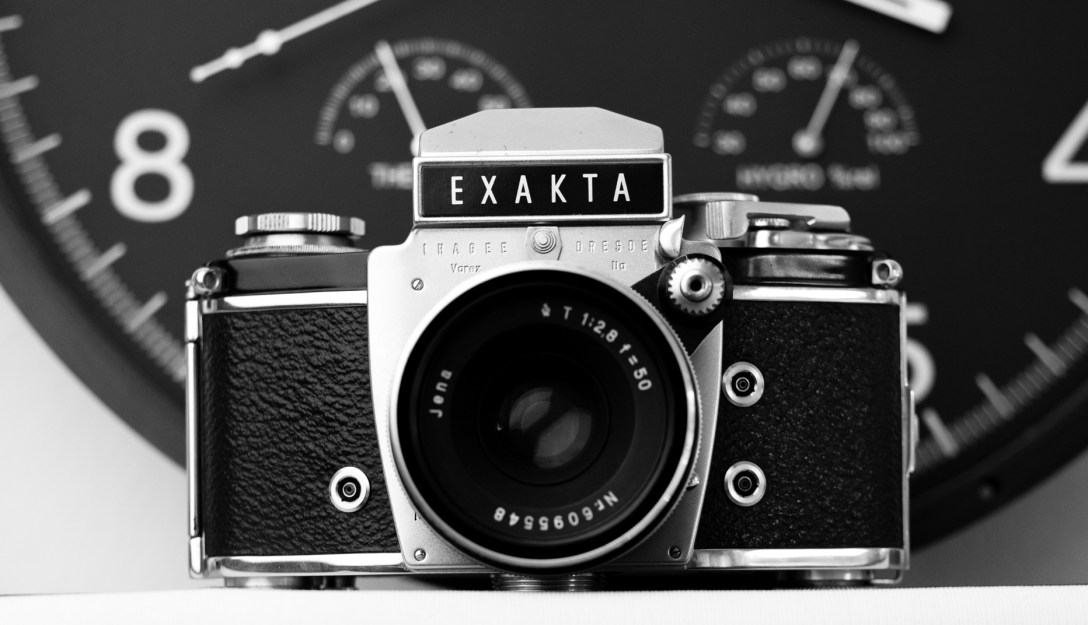
My Exakta
My Exakta is a subtype of the very long lasting and successful Varex IIa. This version was released in 1960 and the distinguishing feature is the logo which is not pressed into the metal anymore and the shape of the prism is slightly different than earlier models.
Varex IIa datasheet
Produced 1957-1963 this version was introduced1960
Film type 135 (35mm)
Lens mount Exakta mount (inner and outer bayonet)
Shutter cloth curtain (traveling horizontally)
Shutter speeds 12s – 1/1000, B
Sync speed 1/50
Viewfinder interchangeable waist level or prism
Exposure meter none
Self-timer
PC sync connections
Internal film cutting blade
This particular camera was sold in Antwerp, Belgium in 1961 and according to the catalog I have, the list price was 13.185 francs with the prism and Tessar standard lens. The second lens (Trioplan 100mm) had the price of 4.205 francs. I am trying to find out what could that mean at that time, but one thing is sure in Hungary this combo would have cost a complete year salary of a regular person in the 60s. In comparison for a Russian Zenit SLR, some had to work like hell for 2-3 months while consuming solar energy only for survival in Hungary those times.
The camera actually belongs to my Friend David who was kind enough to give it to me for use as he did with the Yashica TL-SUPER camera I reviewed. He received it from the original owner from Belgium, so I can actually track back the history of this camera until the beginning. Thank you again, David!
The camera came in the every-ready case, with 2 wonderful lenses. a high-quality B+W filer, a nice rare Carl Zeiss Jena polar filter, a Sunpak flash unit and all sort of documentation including warranty, and catalogs.
The overall condition of the camera is very good, although the Tessar lens was really stiff, it was very hard to focus on. In the opinion of my repair-man, it could have been stored in a cold place for a while. I have got the lens cleaned and lubricated and now it is as good as new. Again, the arts of lubrication was successfully applied, plus apertures and glass elements got some attention and cleaning. Important to note that the focusing ring is covered with some kind of plastic which became rigid over the years, and it is advised to take care of it as it is very fragile and can be broken for any little hit. If it breaks it needs to be replaced by leather with a similar texture which is a hideous task to do.
Shutter
The shutter was advanced when I first got it in hand, so the springs were tensed probably for many years ago and as it turned out the high shutter speeds are not really usable now. 1/500 and 1/1000 while they sound good the movement of the curtains are not even. As a result, some parts of the frame came out less exposed than others. It could be fixed by the master of the lubricants, but it would definitely cost a load of money. I decided to wait and until it gets fixed I started not to use these speeds. It seems everything works fine up to 1/250s and I have managed to carry out my second roll without any problem.
Mirror
The silvering of the mirror is damaged badly around the edges and it has a negative effect on the clearness of the viewfinder. There is no way to fix the mirror because the silver just melted down. The only solution is the complete replacement, but as I use this camera casually only I decided to keep it as it is for a while.
The way it looks
Exakta Varex IIa
Exakta Varex IIa top
Exakta Varex IIa back
Exakta Varex IIa bottom
Exakta Varex IIa back opened
Exakta Varex IIa Lego
Personal experience
As you have already figured out I like this camera the most because of its appearance. I think it really does look gorgeous even though I prefer more the versions with the engraved or embossed logo on the front plate. Despite this not too serious concern, I feel like holding something really special when I choose this for a walk. For me it is an outstanding experience to carry such a nice piece of history and heritage while I can be almost certain that the camera hanging on my neck is so unique I will probably not meet with anything even close to it. It has its charm and style to not to deny apart from what kind of photos came out at the end. Of course, the shoots are great too, nothing to complain about. What I want to say is that it is so elegant I might walk with it even if it was a bad camera (which is not!).
Exakta on my shoulder
Varex IIa in action
Ergonomics
Well, we have reached the point where I must stop extol this camera because the ergonomics is at least awkward.
The left-handed shutter release is really hard to get used to it. The shape of the body is nothing but convenient. It is in fact quite bulky. The reason is probably practical though, this shape helps to keep the film more in place and flat according to some opinion and I eventually accept it.
Rewinding the film
To change the shutter speed, you have to pull out the dial and it is the normal procedure in this era, but not really convenient. To set longer exposures (1/5-12s) you have to operate two dials by setting the main dial to T mode and setting the second for the speed. The film advance lever has an extremely long stroke and the mirror does not return after release. The film transferred from one spool to another in the opposite way as it is usual as the system is left-handed, and to rewind the film you have to pull and turn a couple of things at the same time. Overall many things are a little bit complicated.
All in all this camera is the hardest to use among those I have ever tried. It is at least challenging and not as straightforward as switching your bicycle. But I think it is worth to fight and it is possible to realize that focusing on your left hand is only a habit, not a testament. After you have learned all the tricks it could be as easy to use as any other camera, but for me, it takes some time.
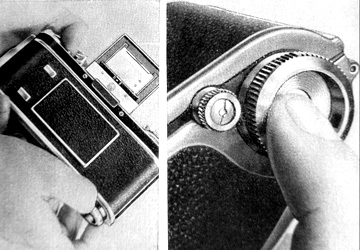
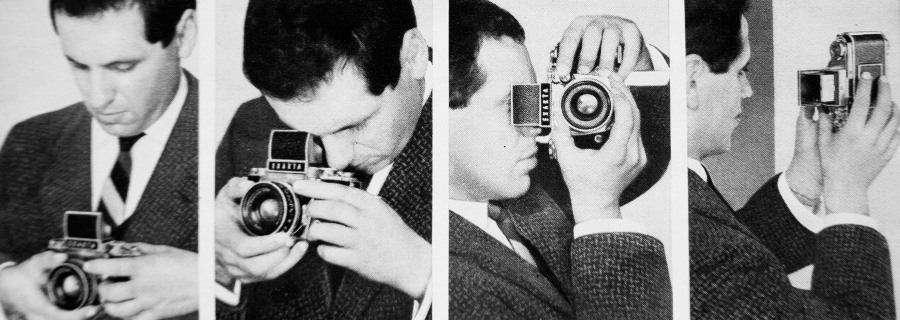
Proper ways to hold the camera while using the waist level finder. The image is from the original handbook of the camera
This is how to hold the camera while using the pentaprism.
Focusing
Split screen focusing (Die Fotografie magazin 1952)
I have only a pentaprism with split screen focusing glass. It is dark for modern standards, although it could be also because my lenses are not exactly that fast (f/2.8) and the mirror is damaged around the edges. I suppose with a faster lens like a f/1.5 Zeiss Biotar and with a new mirror, it would be bright enough.
The split screen works as intended, but it takes a too big part of the screen (in my opinion) and I often use the matte parts around the central circle to focus instead.
I would love to try the waist level finder also because I prefer that on my Pentacon Six over the prism because of the extra lightness and the presence of a magnifying glass for pin accurate focusing. I don’t shoot much action with these anyway, I have time to focus precisely.
Ground glass vs pentaprism (Dr. Sevcsik Jenő, Fényképezés 1960 book)
Funny feature
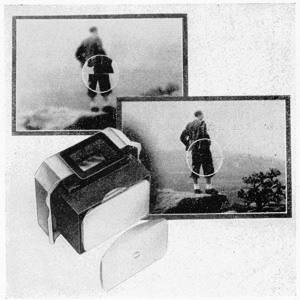
There is a feature of this camera which had been hardly used by most and made me think quite a bit until I have found out what it is for. Interestingly enough you can actually cut the film inside the camera with a razor sharp hook-shaped blade. This way you can change film in the middle of the roll without the need for rewinding and calculating the position of the last exposed frame.
The blade is marked with the number 38. The image is from the original handbook of the camera.
Operation of the film cutting rod.
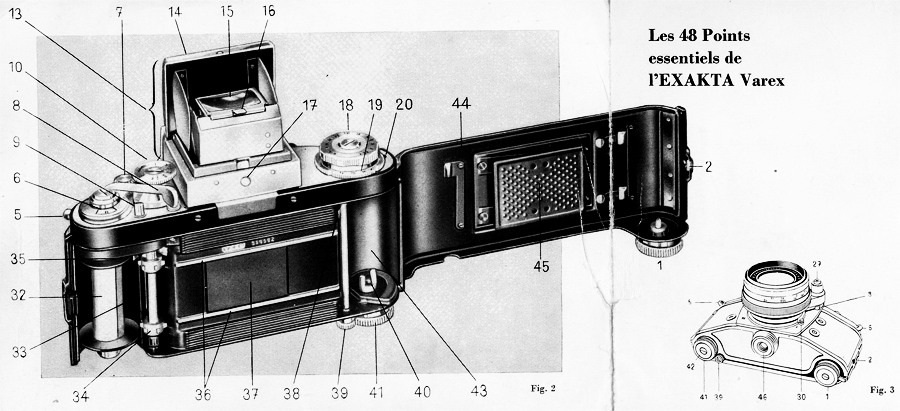
This blade can be seen on above on my photo where the back is open and for reference point please look the point 38 on the draft above. The operation is simple you have to screw out a lock at the bottom of the camera than you have to pull the rod and the blade cuts the film. I have never seen this before and while I am sure I will never use it, still it is a neat little feature. The engineers of Ihagee thought of everything.
Lenses and test shoots
Ihagee didn’t manufacture lenses by itself, but many brands made glass for the Exakta mount.
A very cool page to visit according to these lenses, in general, can be found here, and in detail with illustrations here.
I have got the camera with two lenses: a standard 50mm Tessar and a 100mm Trioplan. The Tessar had to get cleaned and lubricated, but the other lens is in a really nice shape.
Carl Zeiss Jena 50mm f/2.8
There is no Tessar written on the lens nor Carl Zeiss only Jena and a big “T” letter. The reason is that the East German Carl Zeiss Jena was not allowed to use it’s brand name nor the name of the lenses outside of the eastern block because the West German company owned the brand names. Nevertheless, this is a Carl Zeiss Jena Tessar lens and it performs as it should.
The Tessar is a classical construction or base type which consists of 4 elements 2 of them cemented together. These are considered very sharp and having a “hard” character (whatever it means). Because of the good performance, good enough speed and cheap production costs this lens type was very popular and have several siblings such as Elmar, Industar, Primotar, Skopar, Xenar, Ymmar, Ysaron, Belar etc. Apart from the direct relatives, there are many more modifications led to new lens families.
I am going to write a deeper article about this lens as soon as I can get an EOS to Exakta adapter.
This is a triplet structure anastigmat containing obviously 3 elements. Although the structure is very simple it allows a relatively fast aperture and also it has the advantage of having no risk to get glued elements separated as there are none of them.
Some of the brothers are Anticomar, Cassar, Novar, Meritar, Radionar, Trinar, Triotar, Voigtar, Eurygon.
The triplet construction does not produce sharp images on large apertures due to the issues with the rays coming from sideways. This problem can be fixed on a level by stopping down. As you can see on the test photos the lens is indeed very soft wide open and it adds some kind of glow to the objects. It could even be beneficial for portraits by delivering a dream-like effect which hides most of the skin imperfectness of the model.
This lens is famous for its bokeh, which contains unusual and for most pleasing circles when shooting wide open. Unfortunately, I have no example taken by me so far, but you can see one here.
Again, I will do a deeper review of this lens as soon as I get an adapter to Canon and have some time to do more research.
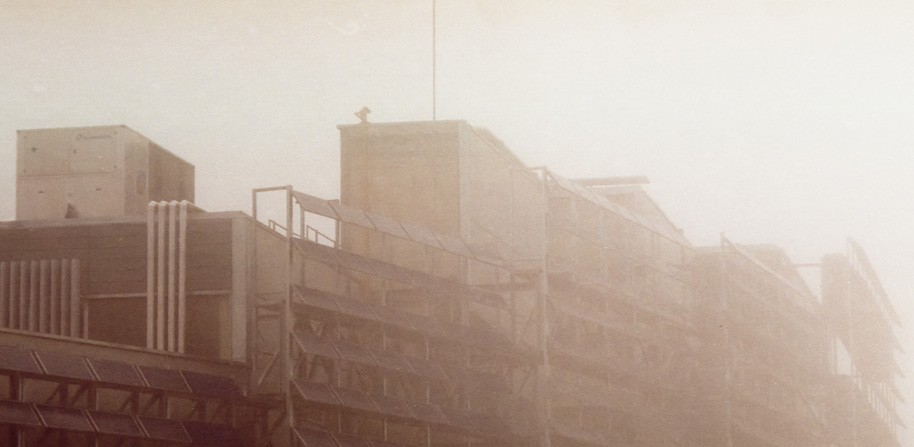
I am a huge fan of post-apocalyptic movies, games, and atmosphere overall. In fact, I really would like to participate or work on such a movie one day. Of course being a mortal I have very little chance to do it, but I had to realize that the receipt of post-apocalyptic scenery is actually very simple.
My main ingredients are some early morning mist, a high tech solar cell covered concrete building (very easy to find), an old Exakta loaded with Kodak Gold and 2 vintage glasses (Zeiss Jena Tessar 50mm f/2.8 and Meyer Optic Trioplan 100mm f/2.8).
For some reason, these shoots remind me of the movie Delicatessen which I can faithfully recommend to watch. OK, there aren’t any high tech in that movie, but the fog creates a similar sensation to me at the opening scenes.
This building, by the way, is a member of the Technological Park of the University in Girona in Spain and I am lucky enough to work in this strange complex. I took these photos a morning during my regular walk to work.
Interesting note that this building is named after Narcís Monturiol i Estarriol who invented the first fully functional submarine. Also interesting the fact that (as far as I know) the solar cells were actually never in use even though the construction has finished around 2009. I hope they will be operational one day. I guess there must be a bit expensive for decoration purposes only. I love the way they look like anyway.